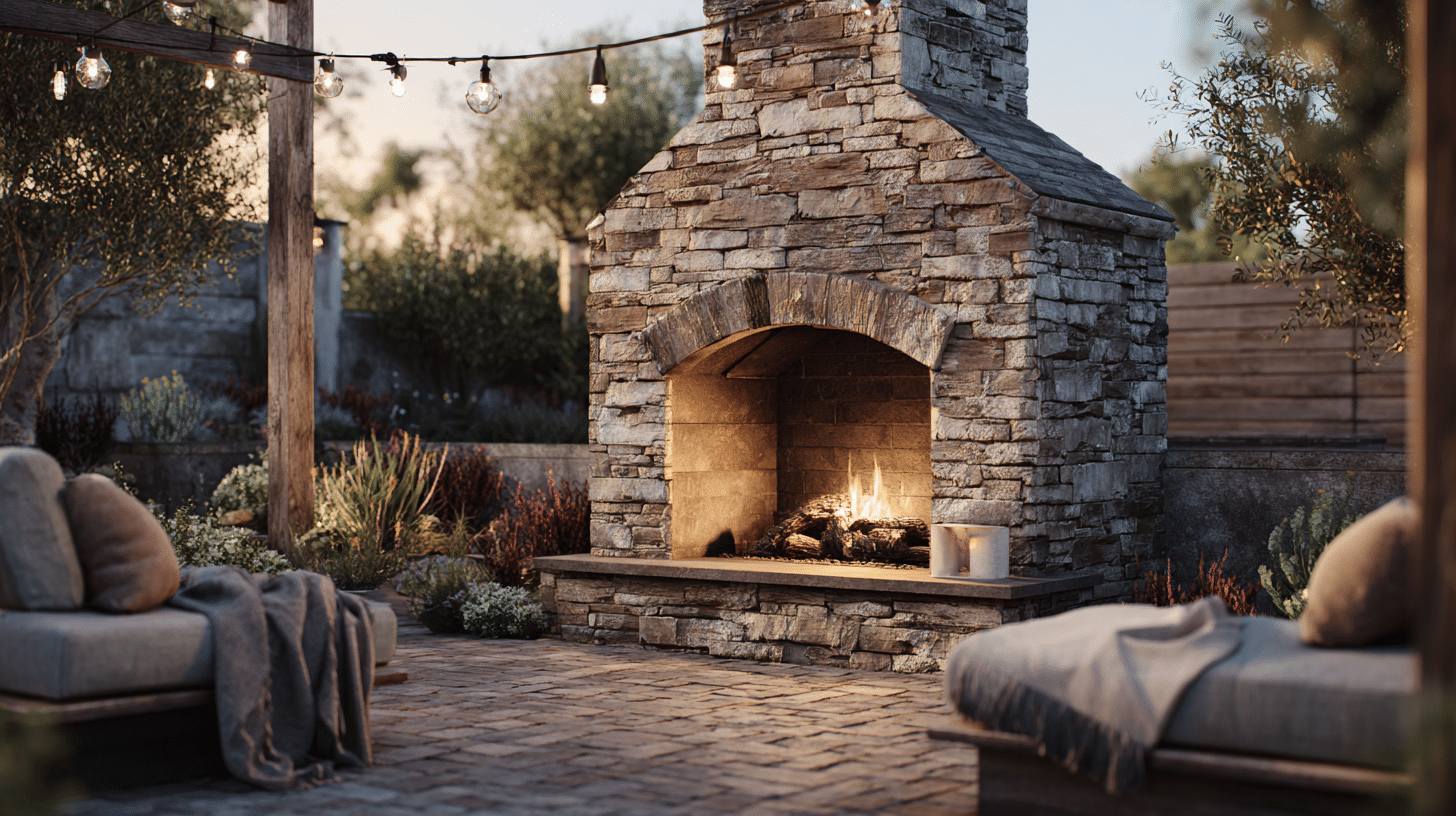
Learning how to build an outdoor fireplace changes your backyard into a gathering spot where memories spark to life. You’ll create more than just a fire feature; you’ll craft the heart of countless evenings under the stars.
This project combines stone, mortar, and sweat into something that’ll outlast trends and seasons. You don’t need to be a master mason to pull this off.
With the right materials, a solid foundation, and patient hands, you can stack stones that’ll cradle flames for generations. The process demands respect for fire safety and building codes, but the payoff? Pure magic.
Ready to turn raw materials into your own blazing masterpiece? Some secrets are best discovered with dirt under your nails and smoke in the air.
What to Consider Before Building an Outdoor Fireplace
Before you grab a shovel, slow down. Planning saves you from costly mistakes and helps your fireplace stand strong for years.
- Location matters more than you think: Keep it at least 10-15 feet from your house, trees, and anything flammable. Consider wind patterns so smoke doesn’t chase your guests, and make sure you’ve got level ground to work with.
- Check local building codes: Some areas require permits or have strict regulations about outdoor fires, and inspectors don’t mess around.
- Choose your design wisely: Simple designs work best for beginners, but sketch out your vision anyway so you can estimate materials.
- Budget realistically: Materials can run $500-$3000, depending on your ambitions and stone choices.
- Gather your materials early: Firebricks, concrete blocks, mortar, and stone don’t appear magically, and shopping mid-project wastes time.
Materials and Tools Needed
Before starting the build, gathering the right tools and materials helps the project move faster and prevents delays once building begins.
| Item | Purpose |
|---|---|
| Fireplace Kit Blocks (Rectangular + Wedge Units) | Main fireplace structure |
| Leveling Sand | Fine leveling under base course blocks |
| Construction Adhesive (Exterior Block Adhesive) | Bonds each course (2 beads per layer) |
| Firebrick + Firebrick Adhesive/Sealant | Line the firebox interior |
| Lintel Blocks + Angle Iron | Supports opening and the smoke chamber |
| Capstones + Chimney Cap | Finishes and protects the chimney top |
| Tape Measure + String Line | Layout and alignment |
| 4 ft Level | Checking the level and plumb |
| Rubber Mallet/Hammer | Tapping blocks into position |
| Shims (Coins/Washers) | Leveling the angle iron if needed |
| Grinder (Optional) | Fixing high blocks |
| Gloves, Eye Protection, Dust Mask | Safety gear |
Step-by-Step Instructions for DIY Outdoor Fireplace
Now for the actual build. Take your time with each step and check your work as you go. Building slowly and carefully means fewer mistakes and a sturdier fireplace that will last for years.
Step 1: Start With a Level Base and Square Layout
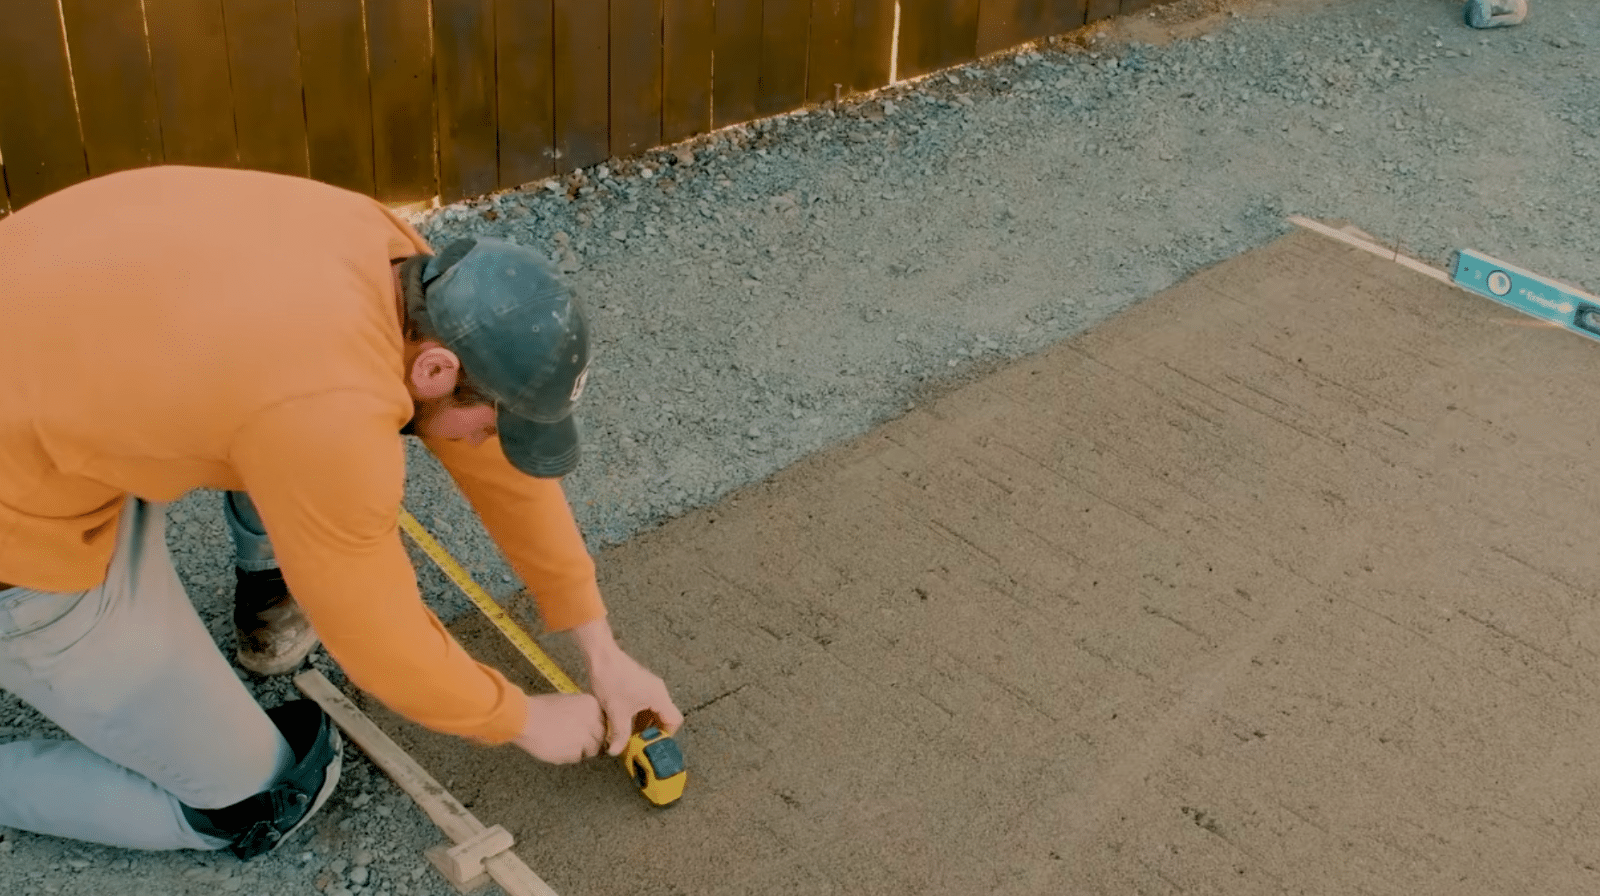
Begin with a flat, solid foundation. Square your layout using the arc method: measure the same distance from your reference line at two points, scribe arcs, then pull a string line through where the arcs meet.
Keep this string line in place as your straight guide throughout the base course. Getting the foundation square and level now saves major headaches later.
Use stakes to hold your string lines taut and check measurements from corner to corner. Both diagonal measurements should match perfectly if your layout is truly square.
Step 2: Dry-Set the Base Course, Then Level Every Block
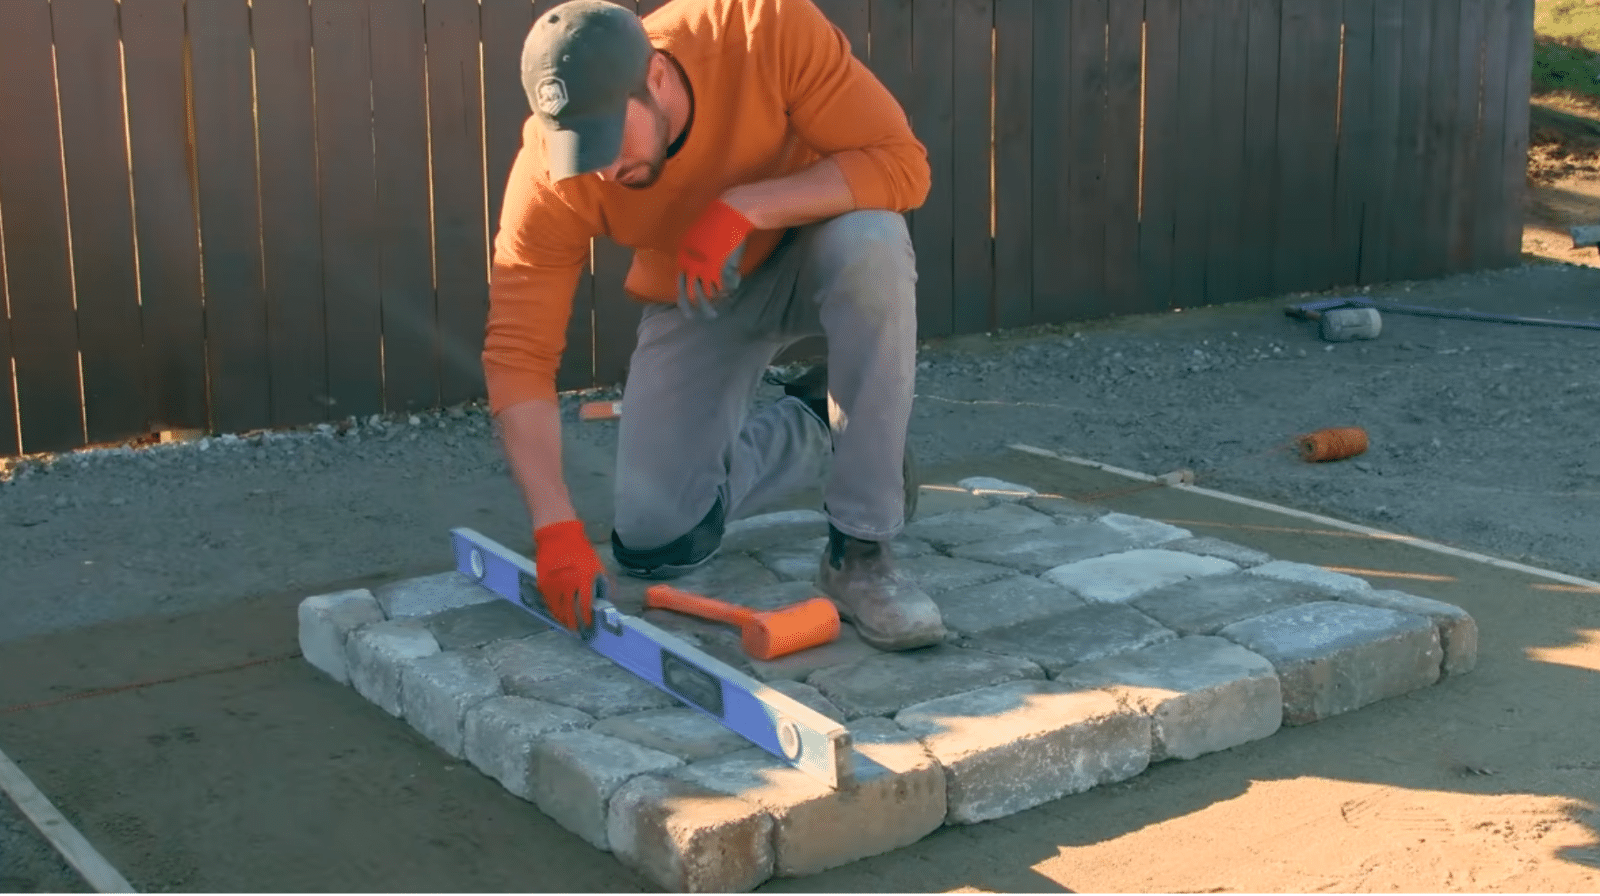
Lay the entire first course without adhesive. Level each block in all directions: front-to-back, side-to-side, and crosswise. Lift the blocks individually and add small amounts of sand beneath each until the entire base course is perfectly level and square.
This tedious step matters more than any other. An A-level basis means every course above it is easier. Use a long level to check across multiple blocks at once. Take breaks and recheck everything. Once satisfied, mark block positions before removing them to apply adhesive.
Step 3: Stack the Fireplace Body and Hearth
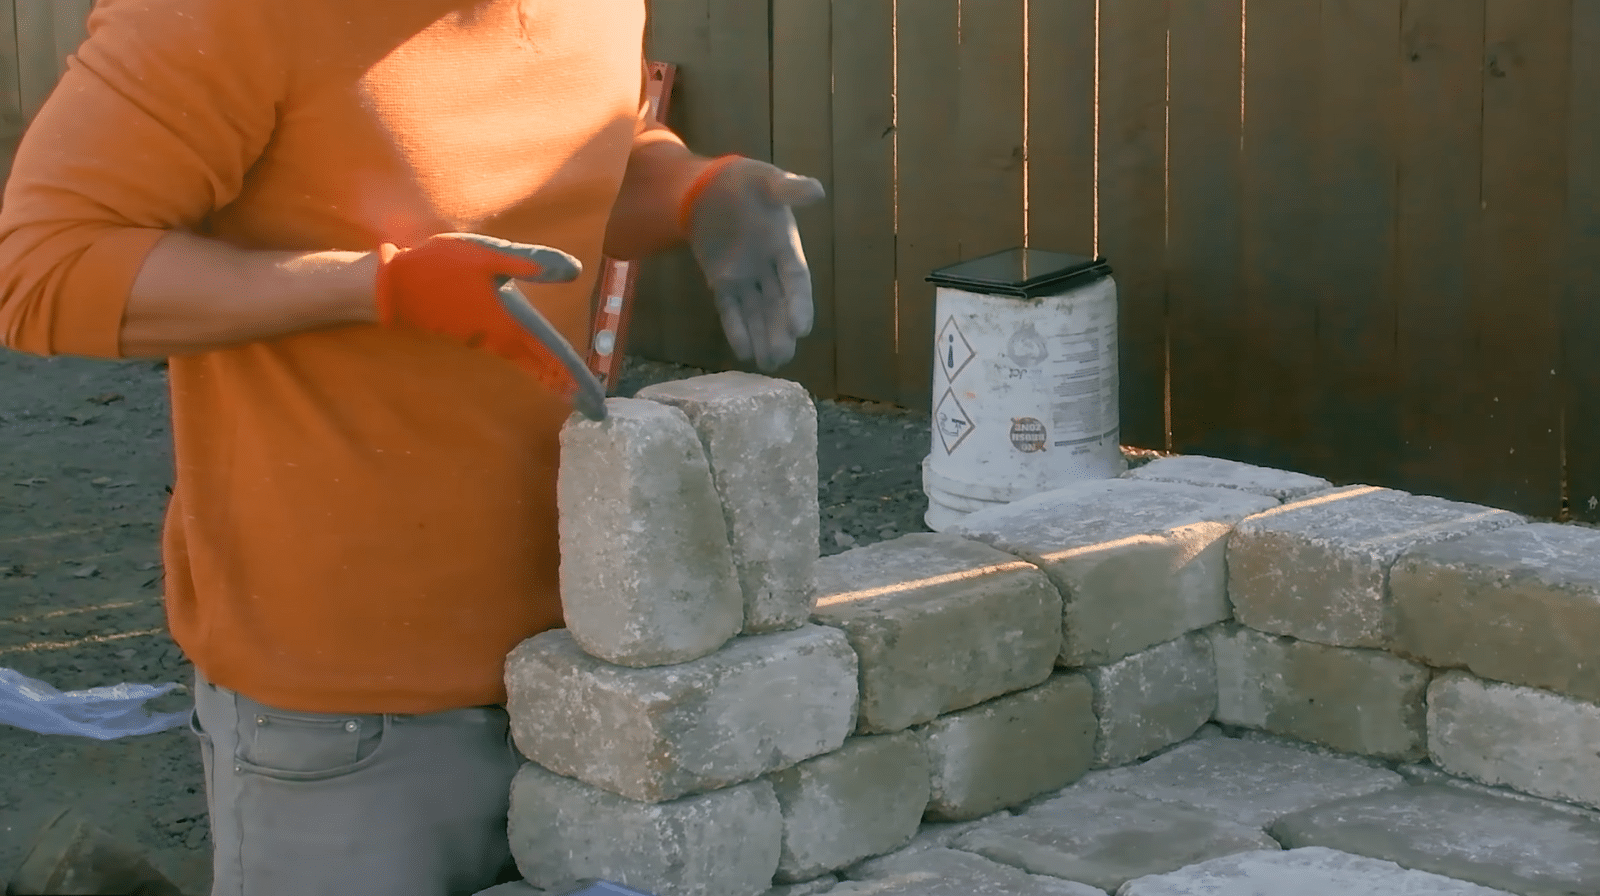
Stack courses upward, checking plumb constantly with your level. Apply two beads of construction adhesive on each course before adding the next layer. At the hearth area where people might sit or stand, add extra adhesive on all contact points for extra strength.
Check plumb every few courses by holding your level vertically against the wall. Tap blocks gently with a rubber mallet to adjust position before the adhesive sets. Keep wet rags handy to wipe away adhesive that squeezes out. Work at a steady pace, but don’t rush.
Step 4: Install the Firebrick in the Firebox
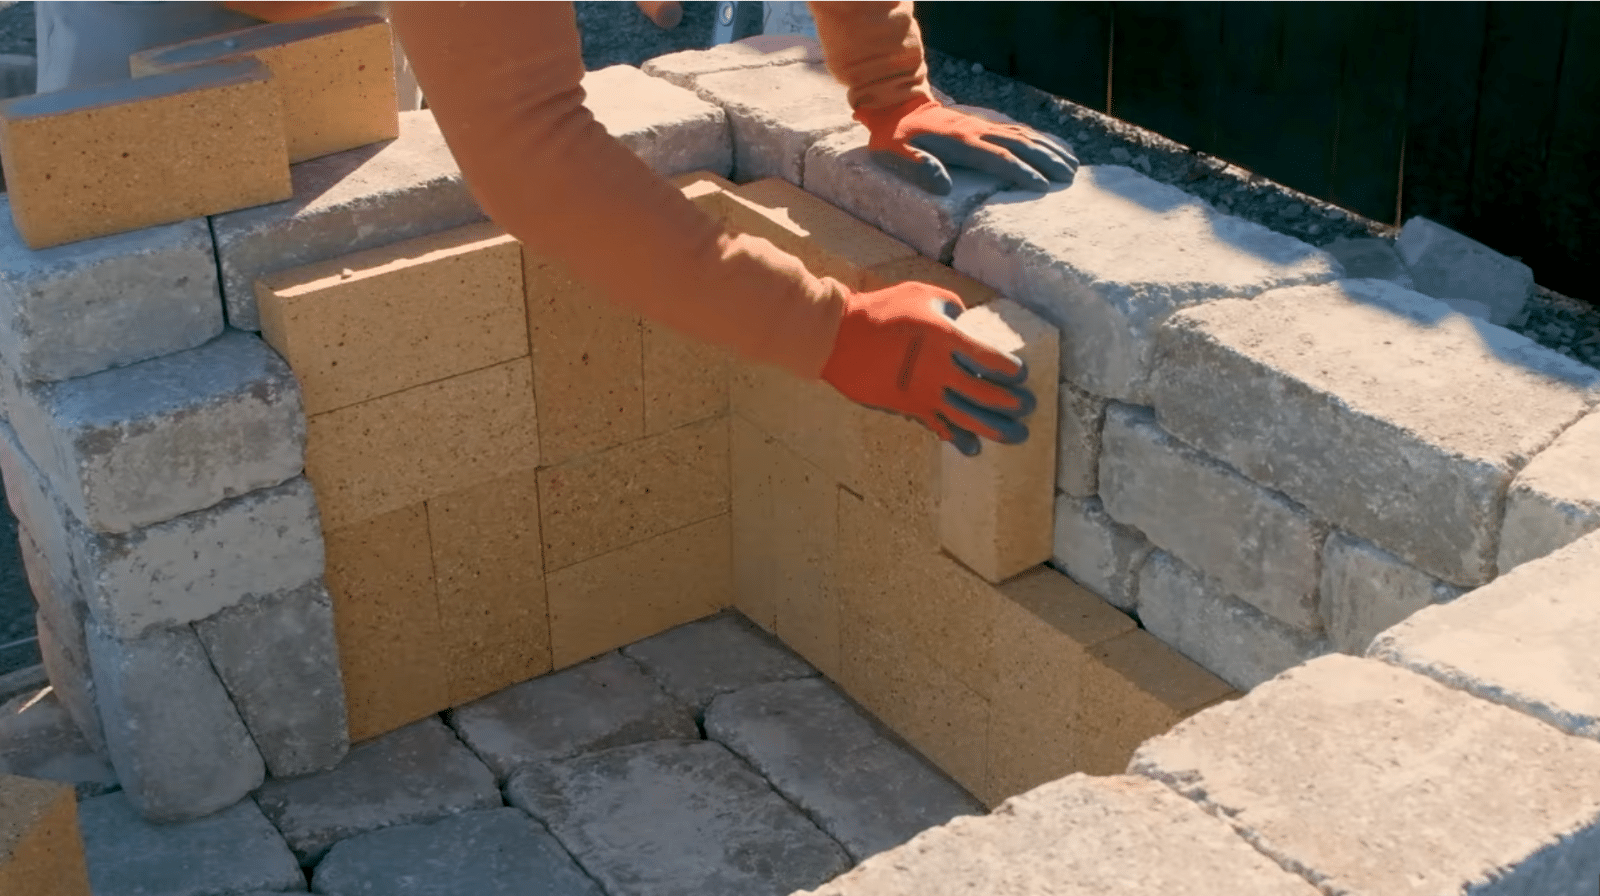
Start placing firebrick from the sides and work inward toward the center. Don’t worry about small gaps initially since overlapping pieces in later rows will tighten up the corners. Use high-heat adhesive sparingly: bond brick to brick and attach firebrick to the firebox wall.
Too much adhesive creates a mess without adding strength. Cut bricks with a grinder if needed to fill spaces. The firebrick layer protects your concrete blocks from direct heat. Make sure every brick sits flat and tight against neighbors for the best heat protection.
Step 5: Install the Lintel and Build the Smoke Chamber
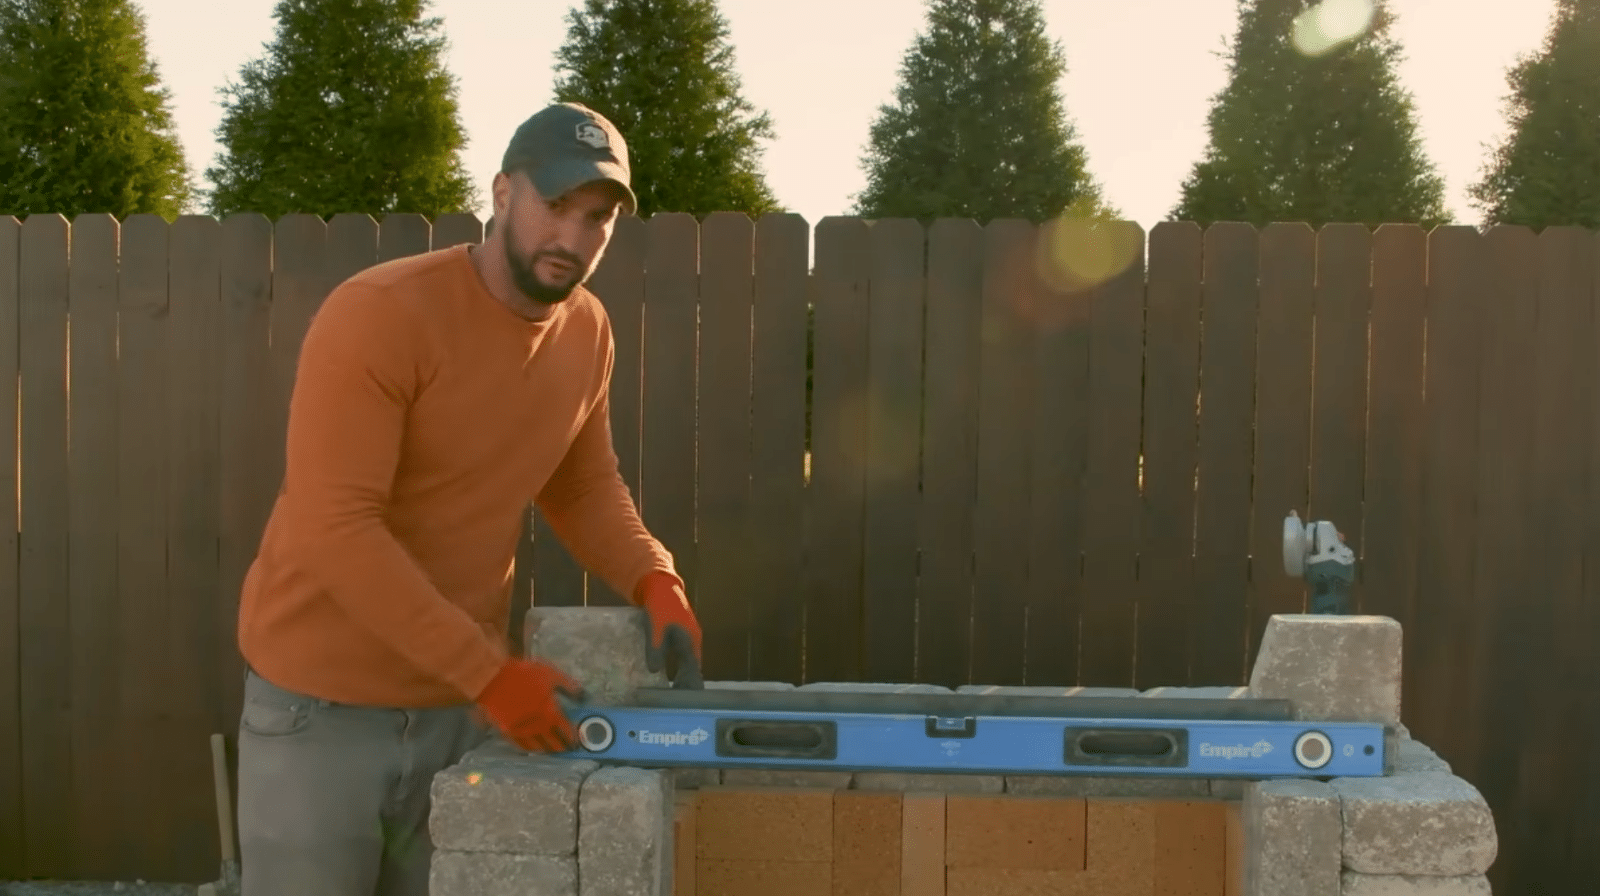
Glue lintel blocks to both firebox sides. Center the angle iron on top, shimming with coins or washers if it doesn’t sit flush. Check the opening with a 4-foot level. Stack the first course above the lintel, temporarily supporting middle blocks until the weight from above locks them in place.
When stepping sides inward for the smoke chamber, build the back row first and center each run. Use temporary counterweight blocks if needed while the adhesive sets. The smoke chamber funnels smoke upward efficiently, so take time getting the taper right.
Step 6: Build the Chimney, Then Add Caps
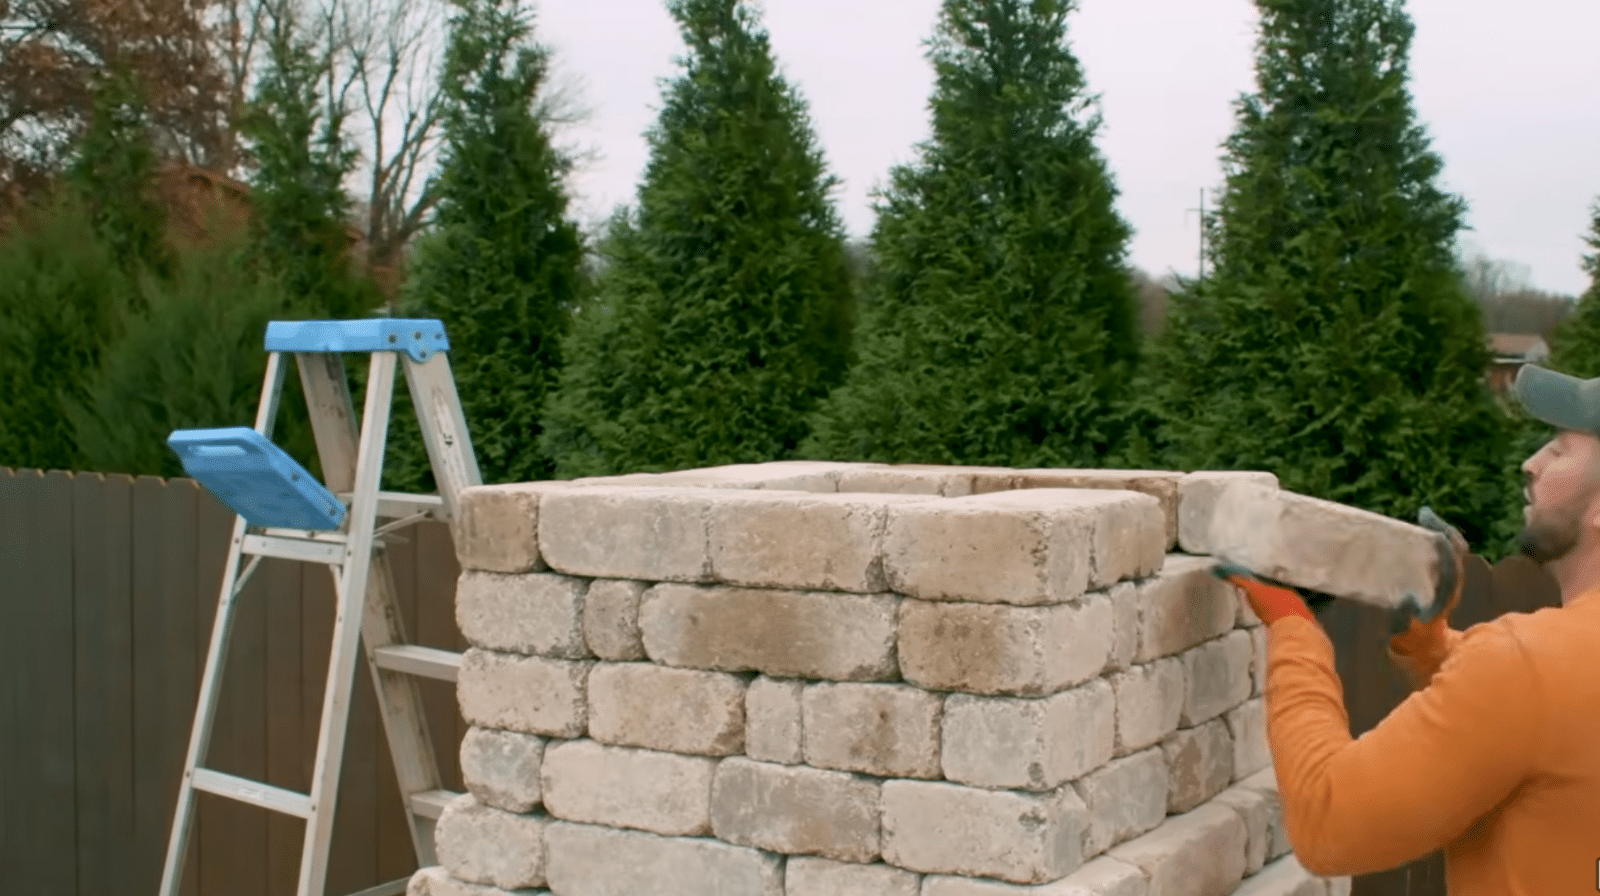
Keep the chimney perfectly plumb as it rises. Use your level crosswise on each side to ensure it’s not twisting. Install capstones with adhesive, but don’t glue too close to edges so you can slide them into perfect alignment.
Turn any chipped corners inward where they’re less noticeable. Set and secure the chimney cap following the kit instructions. The cap keeps rain out and improves the draft.
Stand back periodically to eyeball the chimney from different angles. A straight chimney looks more professional and performs better than a leaning one.
For more detailed instructions, refer to the YouTube video by @CornerstoneRocksKits below:
Safety Considerations
Check local rules for placement and clearances before you start. Most areas require at least 10 feet from structures and proper setbacks from property lines.
Wear gloves and eye protection when handling masonry since blocks have rough edges that can cut skin. Use a dust mask when cutting or grinding to protect your lungs from concrete dust.
Follow adhesive cure times before adding heavy layers or caps. Never rush the curing process or stack too much weight too quickly.
Do not use the fireplace until everything is fully set and stable, typically 72 hours after completion. Keep a fire extinguisher nearby once you start using it.
Never leave fires unattended and make sure embers are completely out before going inside. Keep children and pets at a safe distance while fires burn. Trim back overhanging tree branches within 10 feet of the chimney to prevent embers from contacting it.
Common Mistakes to Avoid
Learn from others who’ve built before you. These common errors can turn a weekend project into a frustrating struggle or cause problems down the road.
- Rushing the Base Course: A slightly unlevel or out-of-square base creates problems that multiply as you build higher. Every flaw compounds, making the upper courses harder to level and keep straight.
- Not Keeping a String Line Reference: Without a taut string line, your first course can drift off-square. Every subsequent course follows that crooked base, resulting in twisted walls that look unprofessional and may not be structurally sound.
- Skipping Plumb Checks: Walls and chimneys can gradually lean without you noticing early on. By the time the lean is obvious, you’ve already built several courses that need to be torn down and rebuilt properly.
- Weak Adhesive Habits: Applying too little adhesive or skipping it in the hearth area can lead to loose blocks and eventual movement. The hearth, in particular, needs strong bonding, since people will sit and stand there regularly.
- Lintel Not Flush: A crooked lintel or an unlevel angle iron makes the fireplace opening uneven and throws off the alignment of all courses stacked above it. This affects both the appearance and the structural integrity of the smoke chamber.
- Ignoring Debris Between Blocks: Small bits of dried adhesive, sand, or gravel create gaps between courses and prevent blocks from sitting flush. Clean surfaces before each new course to maintain the proper level and bond.
Wrapping Up
Now you know the essentials of how to build an outdoor fireplace. It’s not as complicated as it looks once you break it down into manageable steps.
Sure, you’ll hit a few snags along the way, but that’s part of the process. This project delivers something store-bought fire pits never will: a structure built by your own hands that becomes a cornerstone of your outdoor space.
Your friends and family will gather around flames you contained with stone and mortar, and that feeling beats any weekend project you’ve tackled before.
The foundation, the walls, the firebox, each layer brings you closer to those first crackling logs. So grab your materials, double-check those measurements, and start building.
Ready to get started? Pick your location this weekend and start sketching your design. Your backyard has been waiting for this upgrade.