Learning how to age wood turns ordinary lumber into something special. It’s a craft that bridges the gap between brand-new boards and pieces that look like they’ve weathered decades of sun, rain, and time.
Some folks want that rustic farmhouse vibe, while others are restoring vintage furniture and need matching wood. Whatever the reason, aging wood doesn’t require fancy equipment or years of patience.
With the right techniques, anyone can create beautifully distressed pieces in just a few hours. The best part? Nature’s already done the heavy lifting by showing us exactly what aged wood should look like.
Now comes the fun part, tricking wood into looking older than it really is. The methods are surprisingly simple, but the results can fool even the most discerning eye.
The Science Behind Wood Aging
Wood doesn’t age overnight, and there’s real science behind those weathered gray tones everyone loves. When wood sits outside, UV rays break down the lignin that holds fibers together.
This process creates that silvery patina over time. Moisture plays a role too, causing wood to expand and contract, which leads to those characteristic cracks and splits.
Tannins in the wood react with oxygen and iron, creating darker streaks and color changes. Nature takes years to achieve this look because these chemical reactions happen slowly.
But craftspeople can speed things up by mimicking what the sun, rain, and air do naturally. It’s all about understanding the chemistry and working with it.
Best Types of Wood for Aging Projects
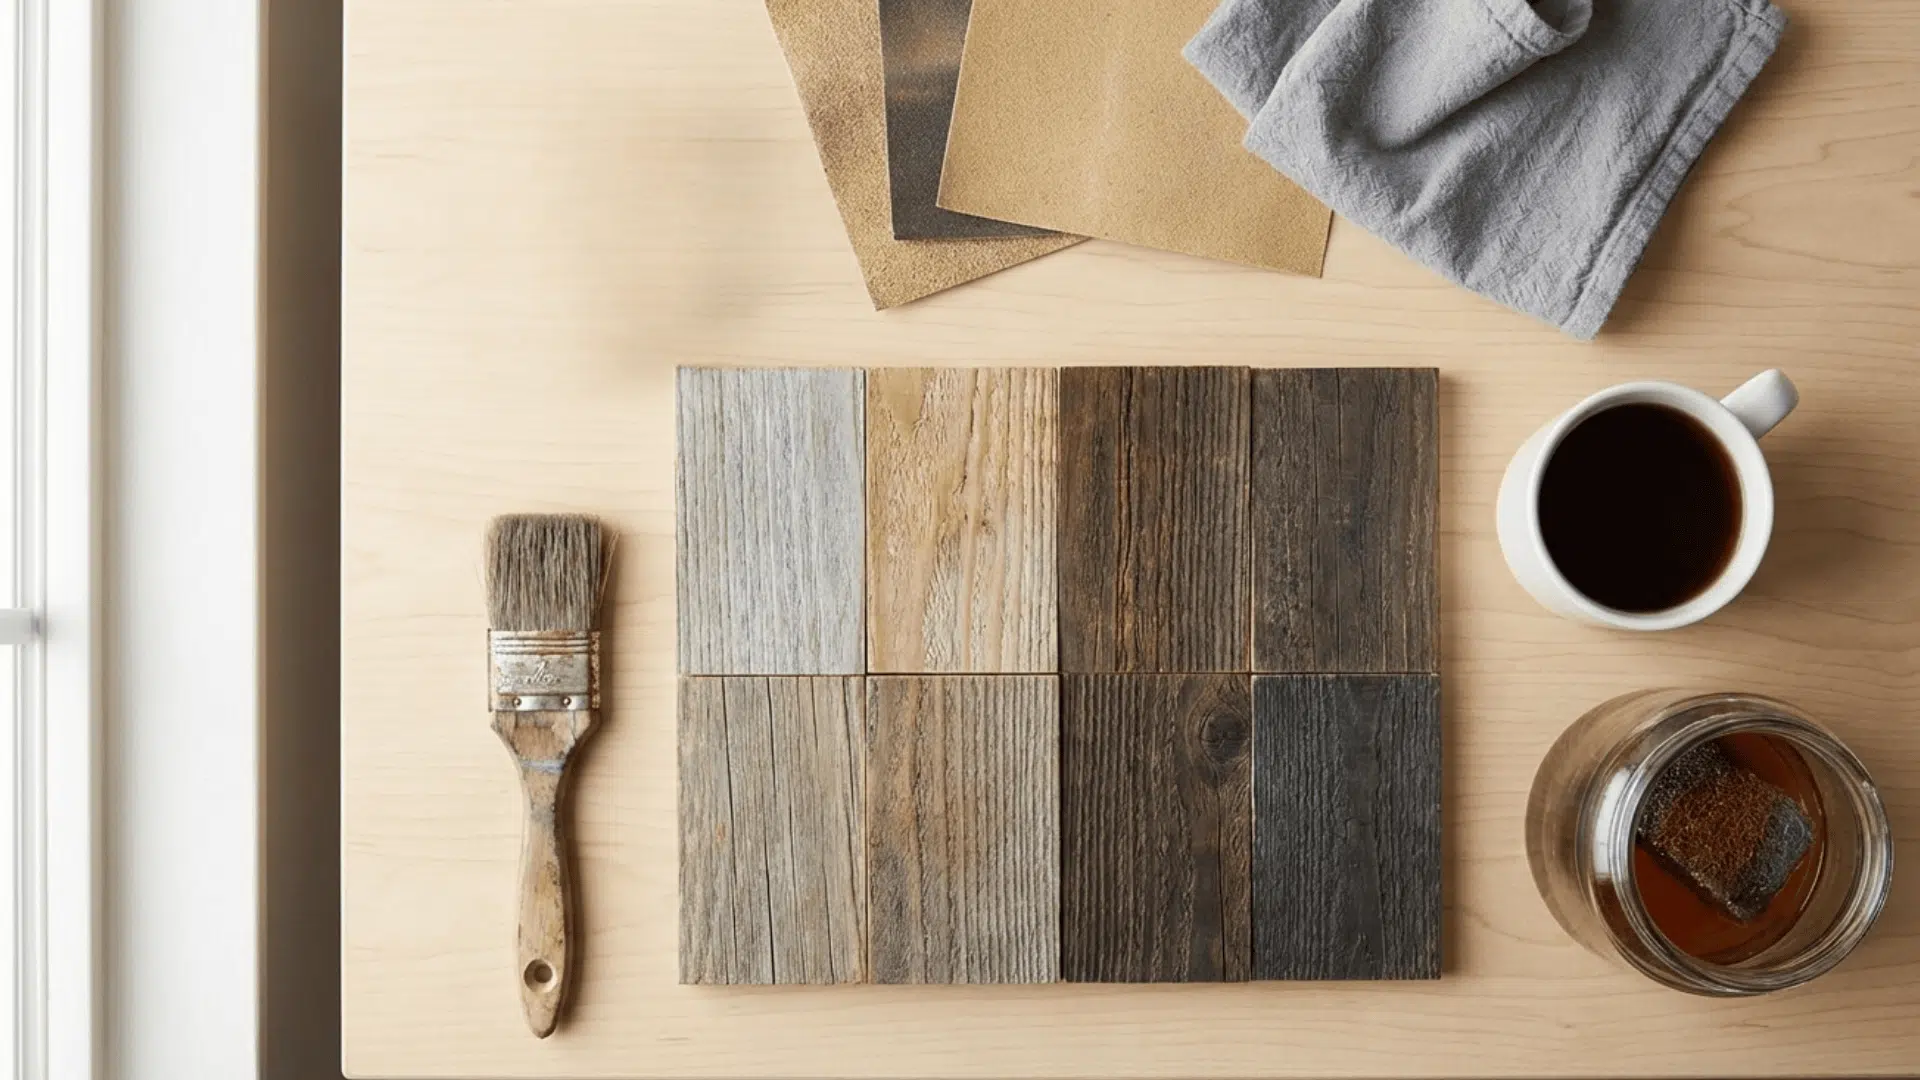
The final color and texture also depend on the wood species used for the project. Some woods react better to aging techniques than others, so it helps to understand the types of wood used for furniture before selecting the right material.
| Wood Type | Aging Characteristics | Best For |
|---|---|---|
| Pine | Shows grain quickly, takes stains well | Rustic furniture, wall panels |
| Cedar | Natural oils resist rot, turn gray beautifully | Outdoor projects, fences |
| Oak | Deep grain patterns, darkens with age | Farmhouse tables, beams |
| Barn Wood (reclaimed) | Already aged, authentic patina | Accent walls, shelving |
DIY Wood Aging Methods
There are countless ways to age wood, from chemical reactions to physical distressing. Each method creates a unique look, and some work better for specific projects than others.
1. Quick Vinegar Aged Wood Look
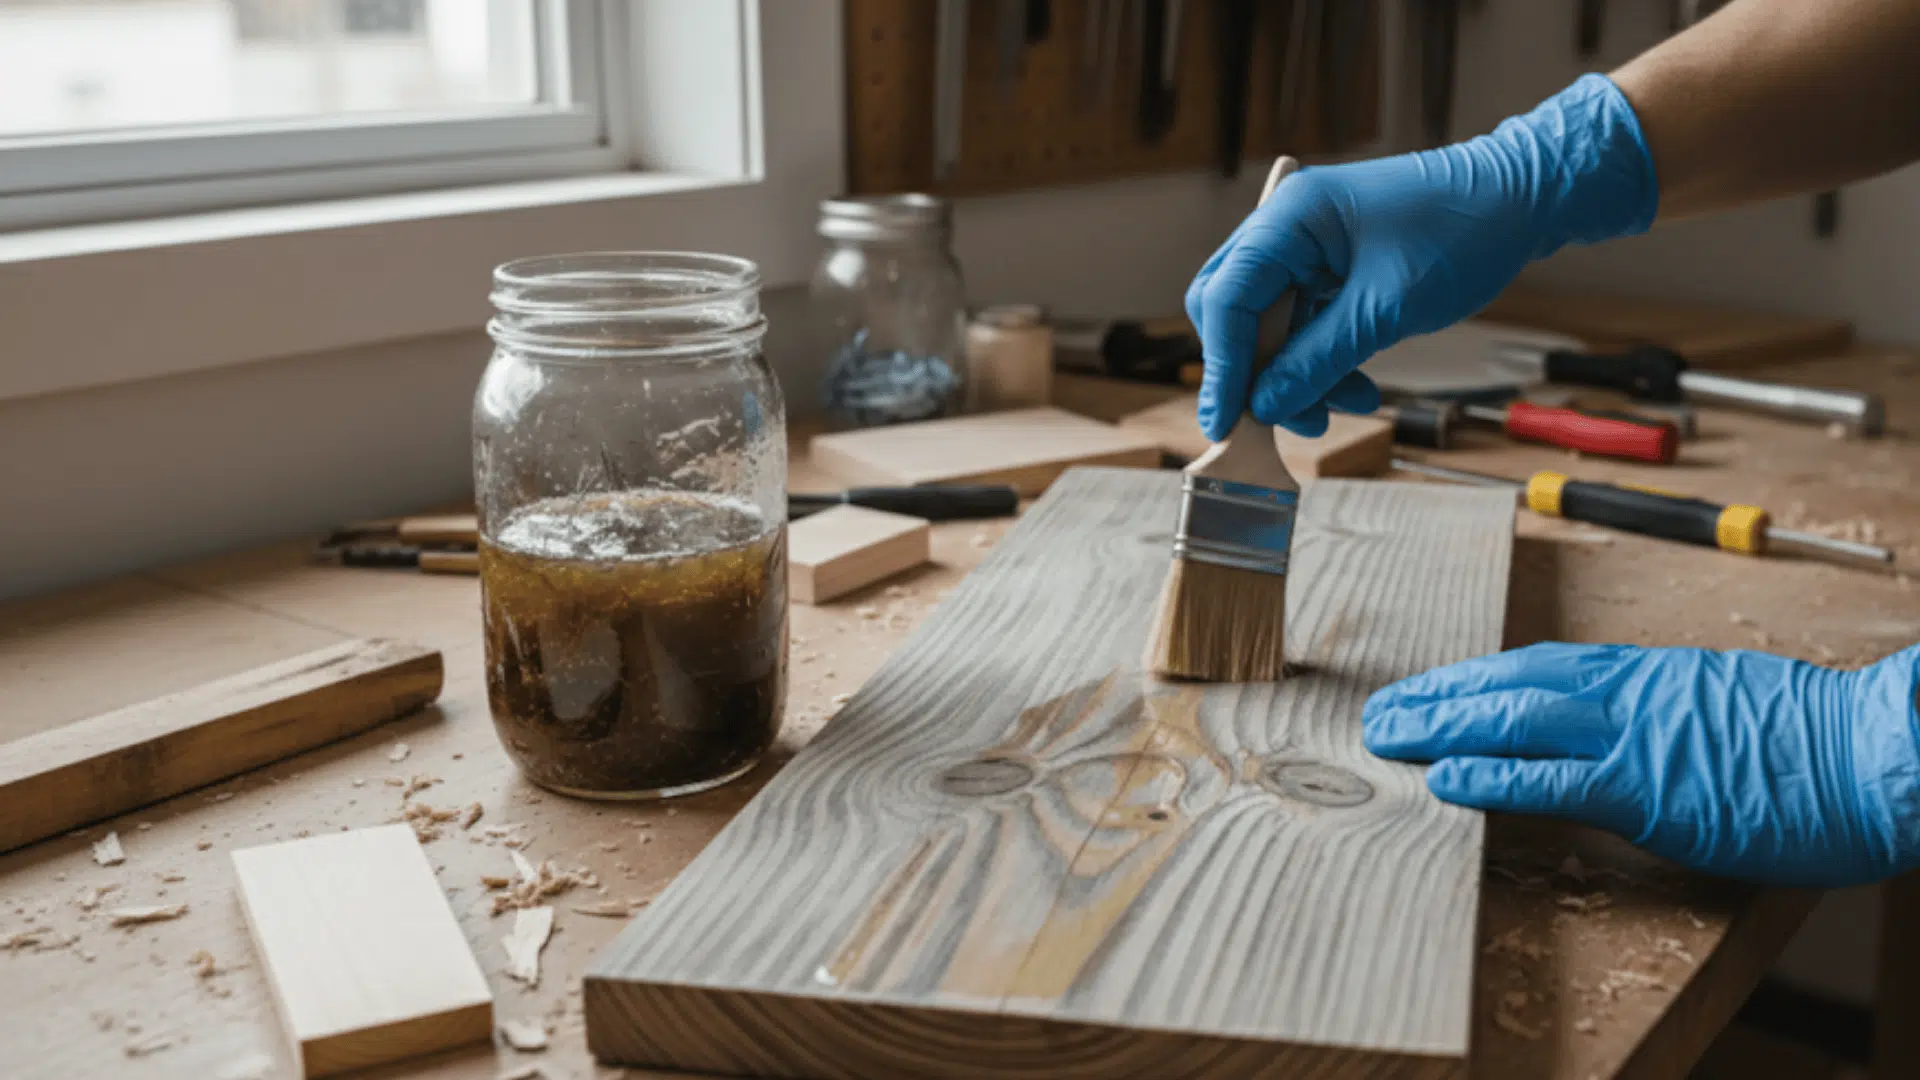
Steel wool dissolved in vinegar creates a chemical reaction with wood tannins, producing instant gray tones. It’s one of the easiest aging methods around, and the results show up within minutes.
- Best for: Pine, oak, and other tannin-rich woods
- Time needed: 30 minutes to 2 hours
- Skill level: Beginner
- Tools and materials needed: White vinegar, steel wool (0000 grade), glass jar, brush
- Steps to follow: Soak steel wool in vinegar for 24 hours. Brush the liquid onto bare wood. Watch it darken as it dries.
- Pro tip: The longer steel wool sits in vinegar, the stronger the reaction and darker the color.
2. Dark Barnwood Tea and Vinegar Finish
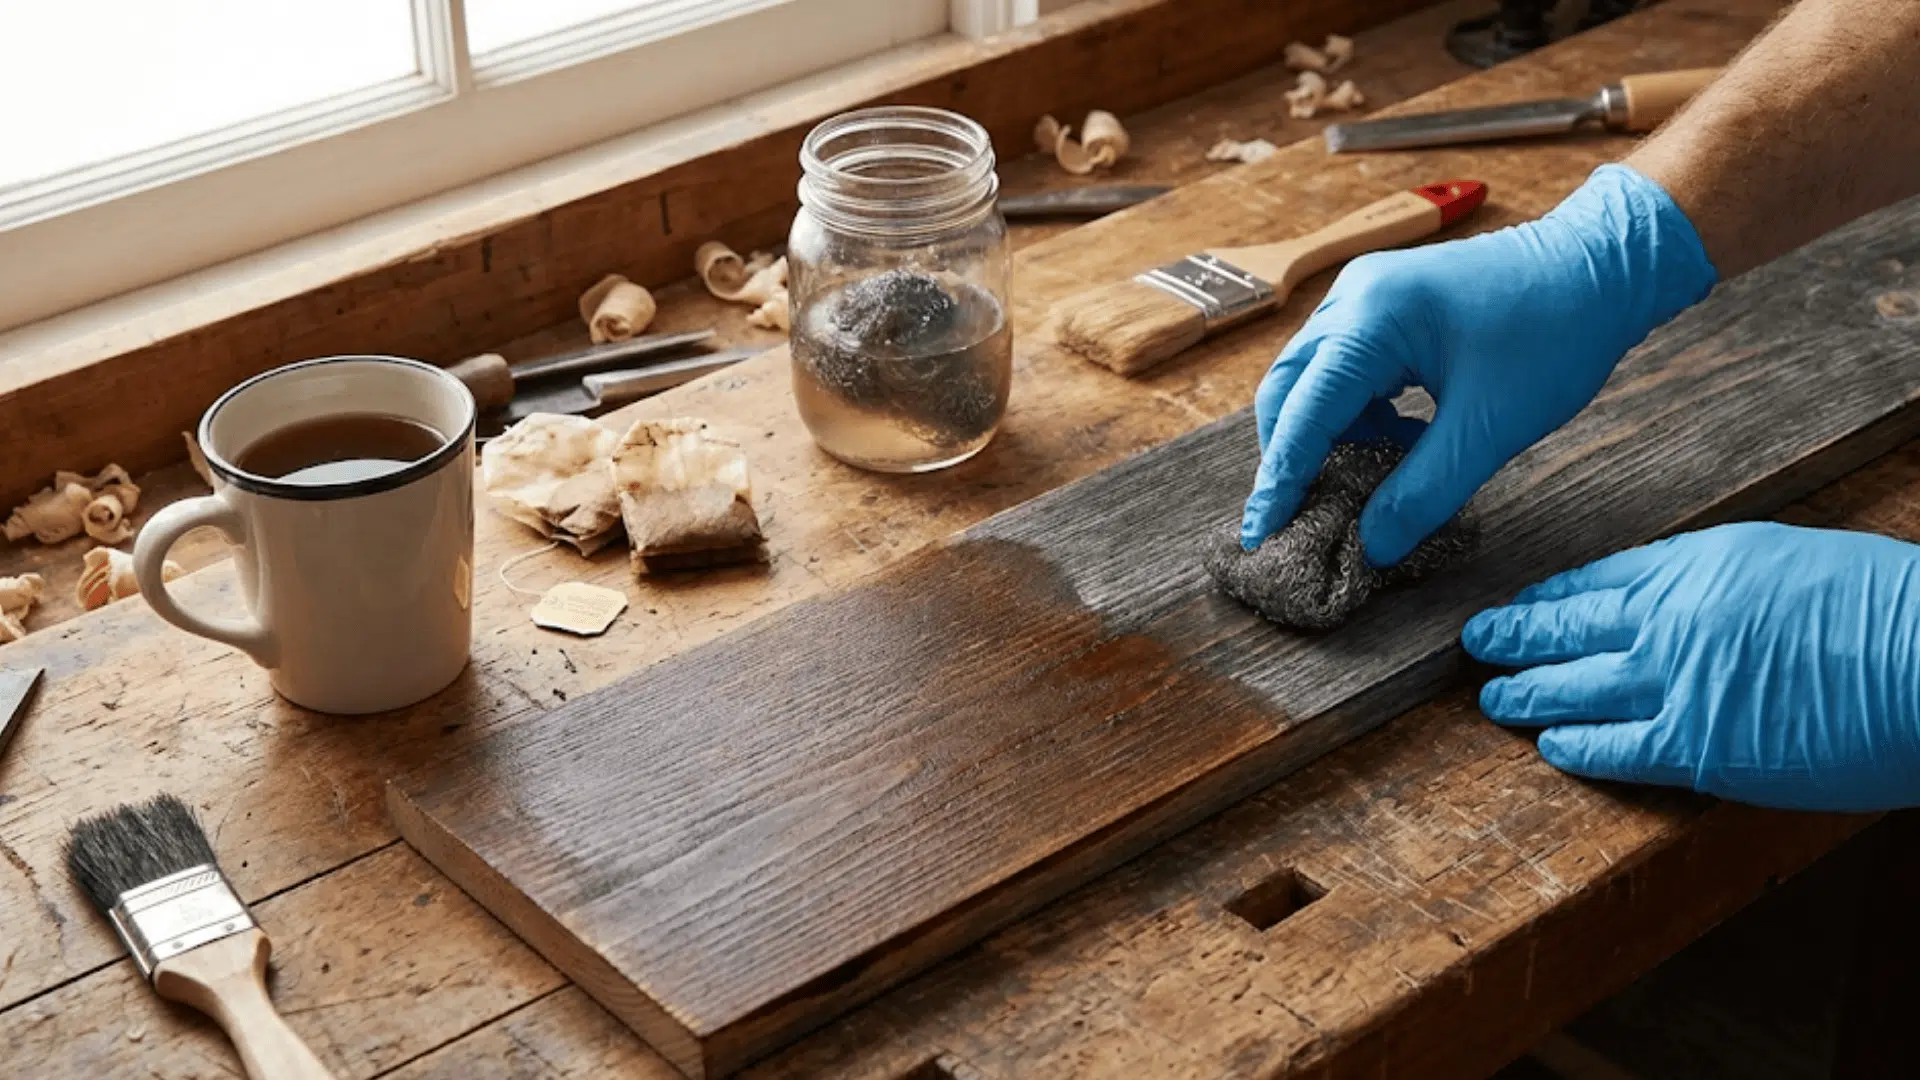
Combining black tea with the vinegar solution creates deeper, richer tones that mimic old barn siding. The tannins in tea boost the chemical reaction, giving wood that authentic weathered appearance.
- Best for: Creating dark gray barnwood replicas
- Time needed: 1-3 hours
- Skill level: Beginner
- Tools and materials needed: Black tea bags, boiling water, steel wool, vinegar solution, two brushes
- Steps to follow: Brew strong tea and brush it onto the wood. Let dry completely. Apply the vinegar solution over the tea layer.
- Pro tip: Use multiple tea coats before vinegar for an almost-black barnwood finish.
3. Rustic Wood Distressing Method
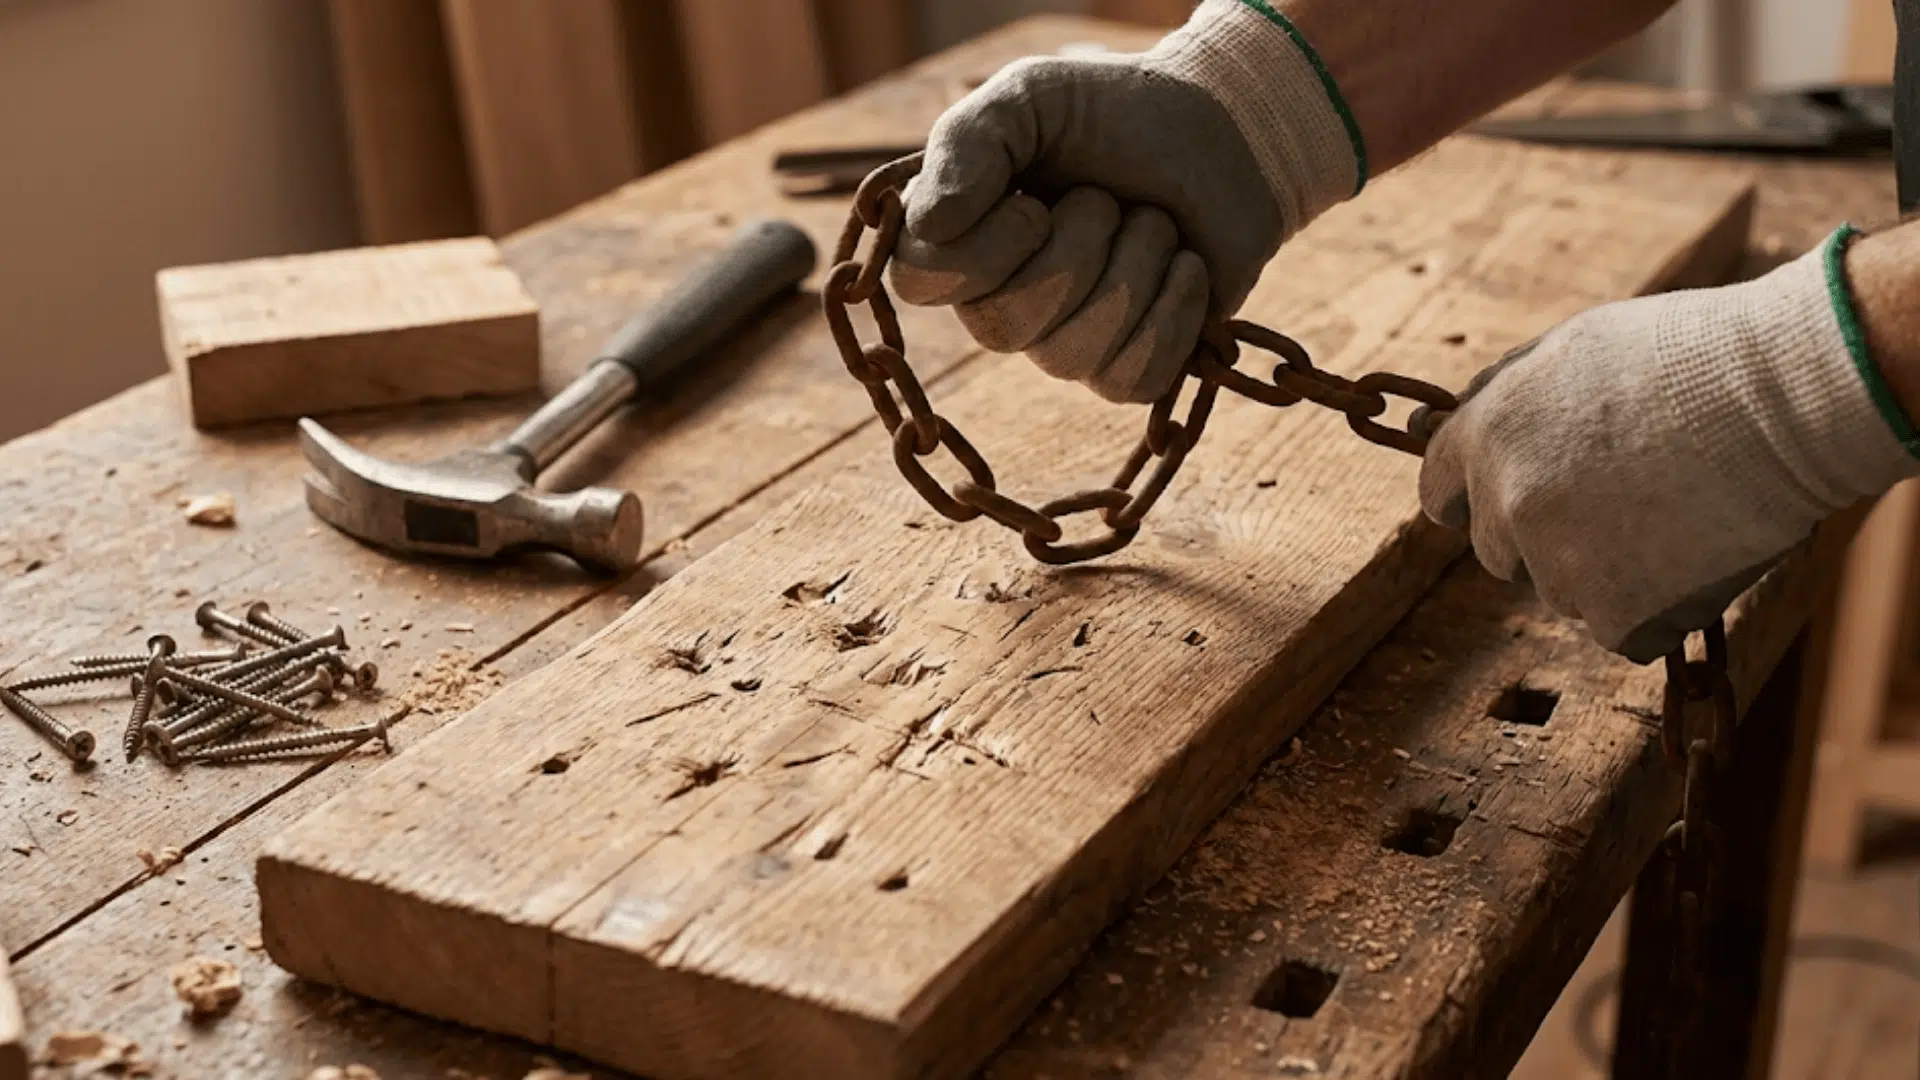
Physical distressing involves strategically damaging wood to create dents, dings, and character marks. This method works great when combined with other aging techniques because it adds dimension.
- Best for: Farmhouse furniture, rustic decor pieces
- Time needed: 20-40 minutes
- Skill level: Beginner
- Tools and materials needed: Hammer, screws, chains, nails, sandpaper
- Steps to follow: Hit wood with chains for random marks. Add dents with a hammer and screws. Focus on edges and corners where natural wear happens.
- Pro tip: Study genuinely old pieces to see where wear naturally occurs, then replicate those patterns.
4. Sanded Farmhouse Worn Edge Look
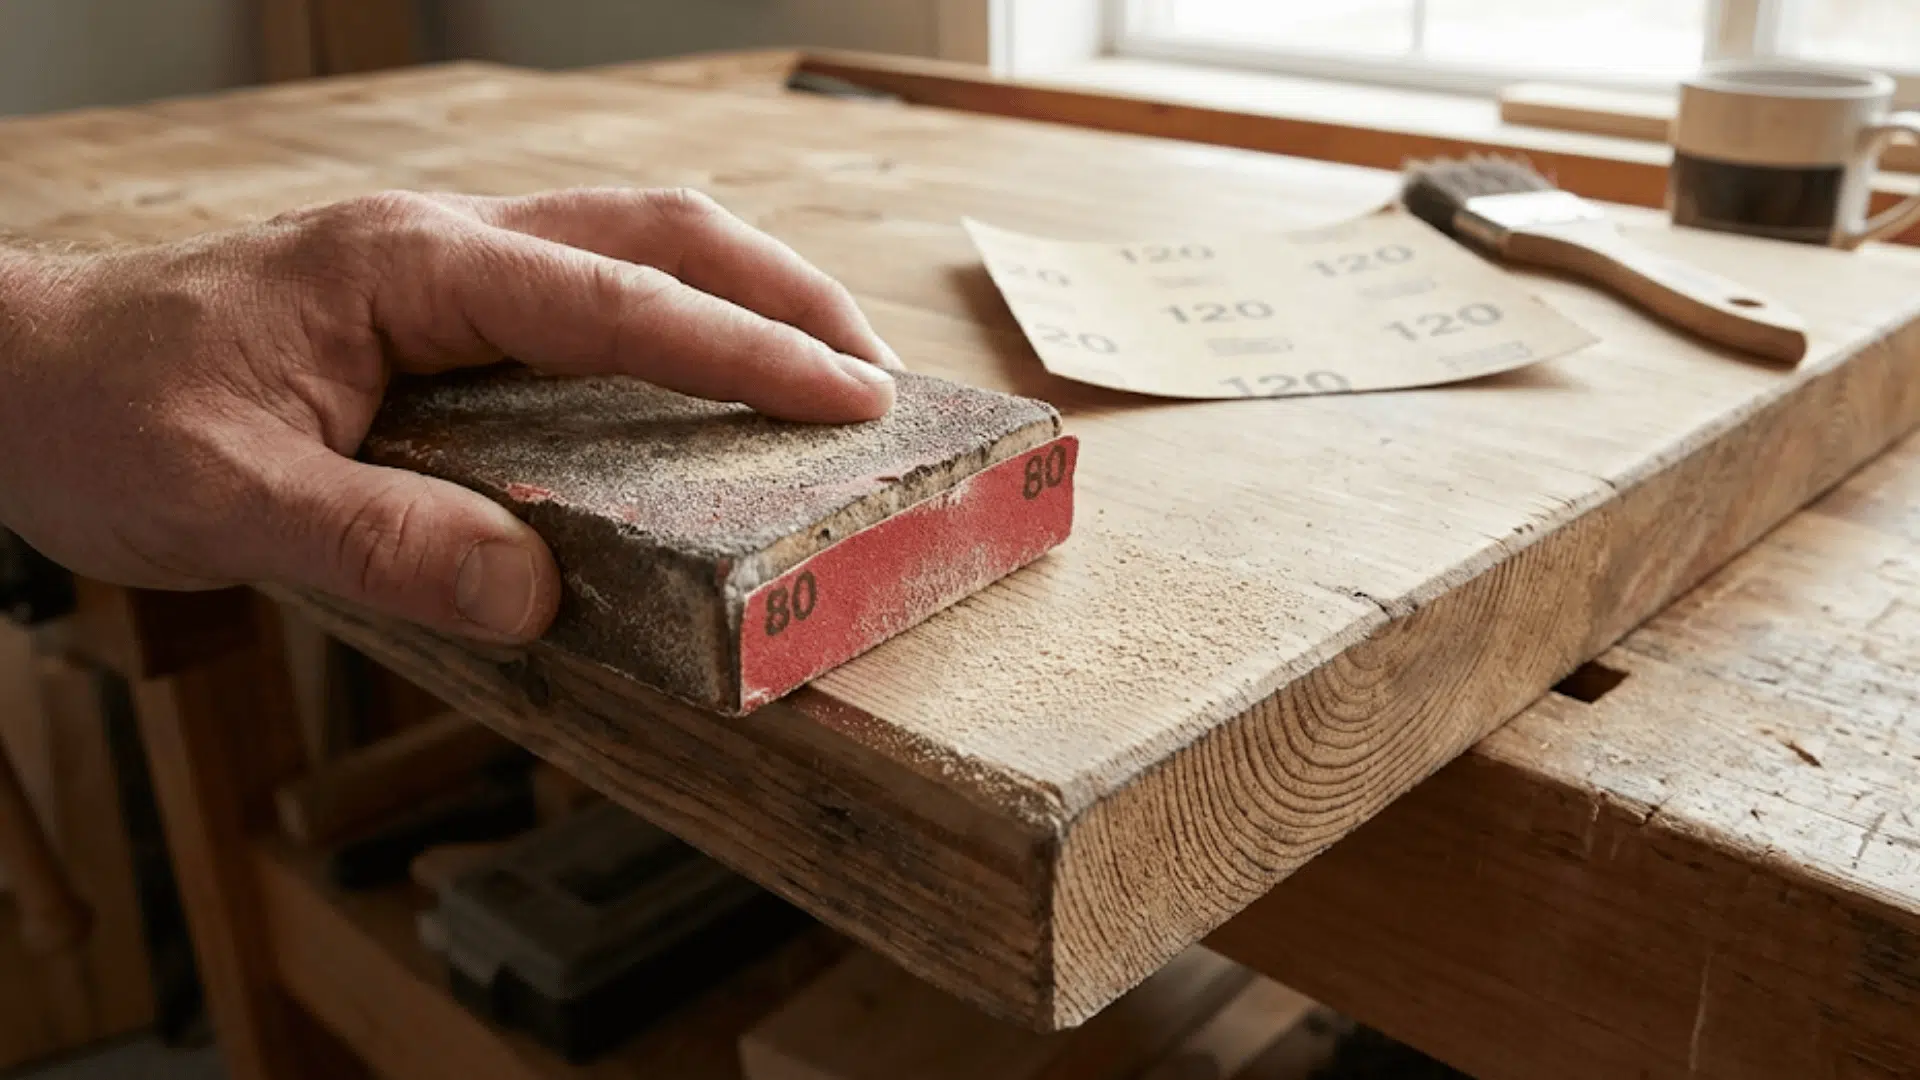
Sanding creates smooth, worn edges that look like decades of use have rounded them off. This subtle technique works wonders for furniture pieces and gives them that touched-by-time feel.
- Best for: Tables, chairs, cabinet doors
- Time needed: 30 minutes to 1 hour
- Skill level: Beginner
- Tools and materials needed: 80-grit and 120-grit sandpaper, sanding block.
- Steps to follow: Sand all edges and corners with 80-grit paper. Smooth with 120-grit. Focus on areas that hands naturally come into contact with over the years.
- Pro tip: Sand through paint or stain layers on edges to reveal bare wood underneath for authentic wear.
5. Antique Stain and Wipe Finish
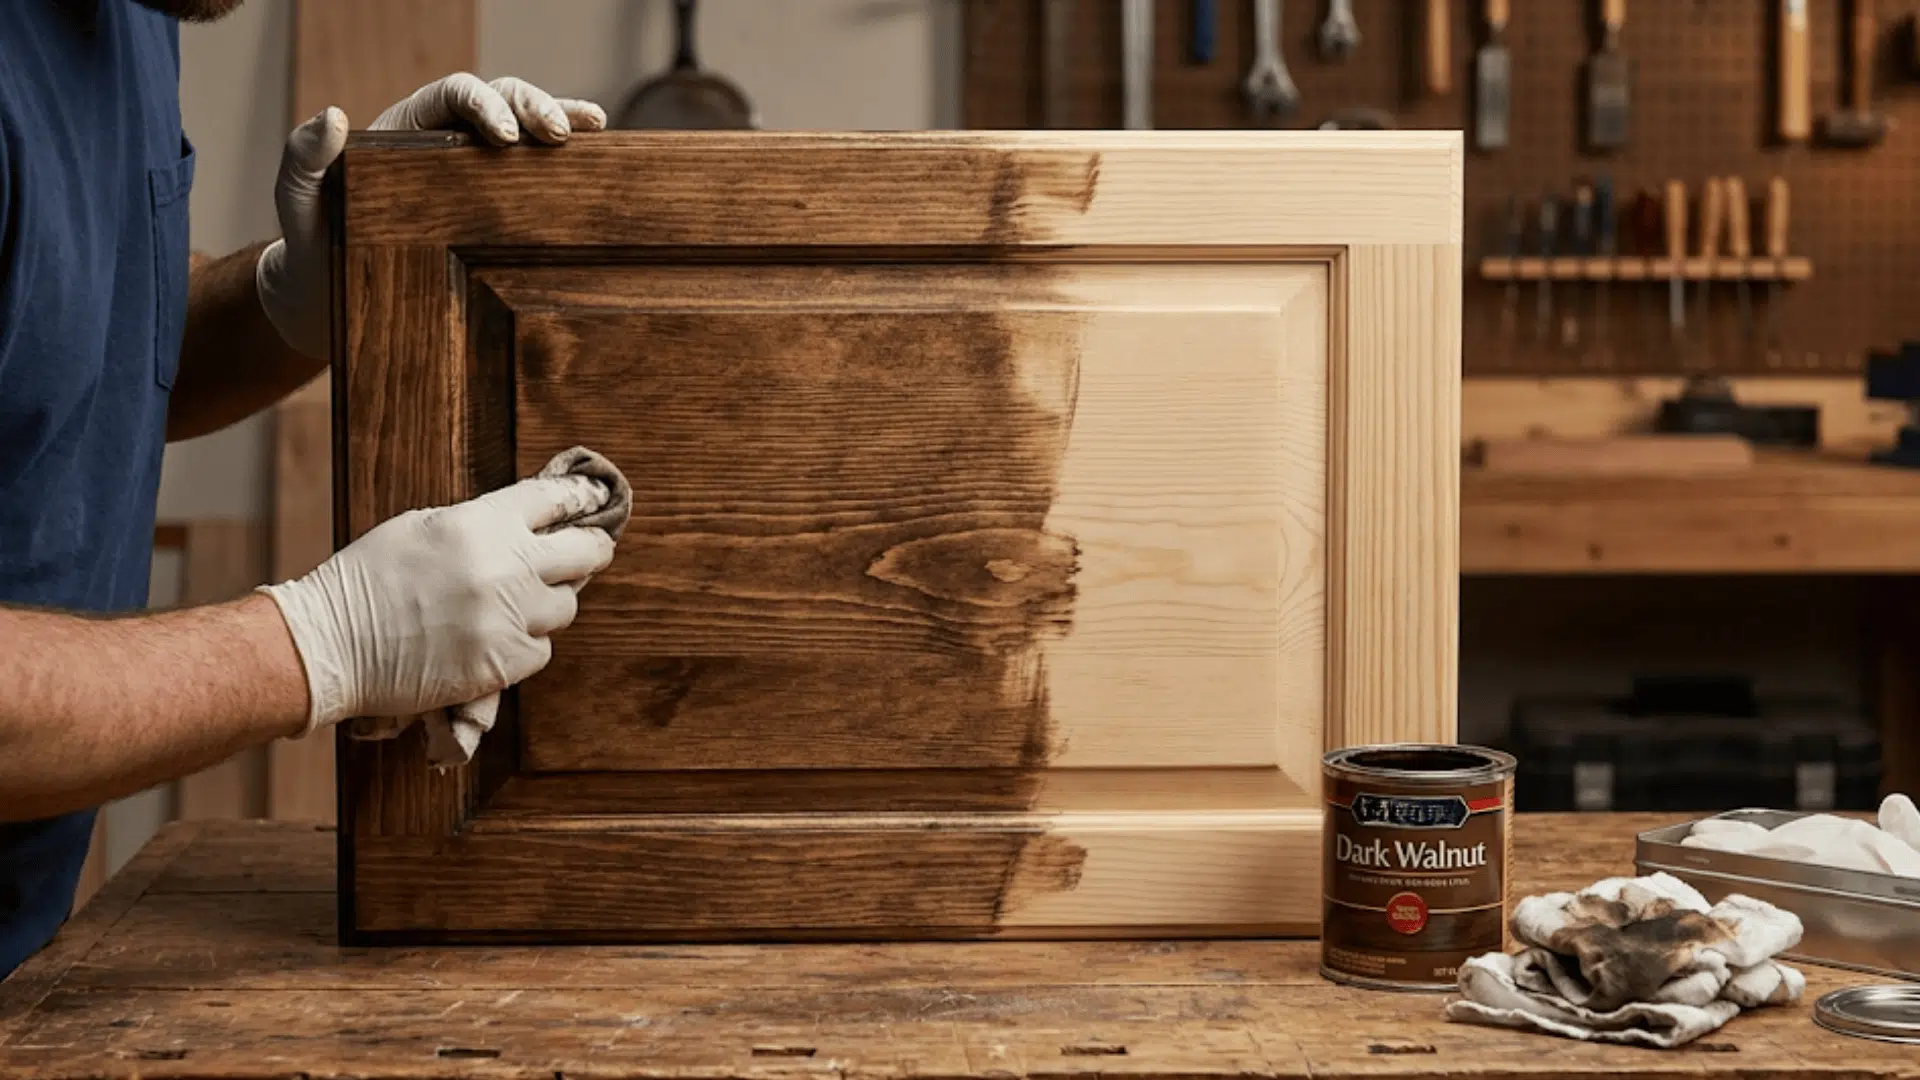
This traditional method uses a dark stain applied and partially wiped away to settle in cracks and grain. It’s how furniture makers have aged pieces for generations, and it still works beautifully.
- Best for: Fine furniture, heirloom-style pieces
- Time needed: 2-4 hours (plus drying)
- Skill level: Intermediate
- Tools and materials needed: Dark walnut or ebony stain, rags, brush, gloves
- Steps to follow: Apply stain liberally. Let it sit for 5-10 minutes. Wipe excess, leaving stain in grain grooves. Apply a second coat if needed.
- Pro tip: Wipe harder on flat surfaces and lighter in detailed areas to create natural-looking depth variations.
6. Chippy Vintage Paint Look
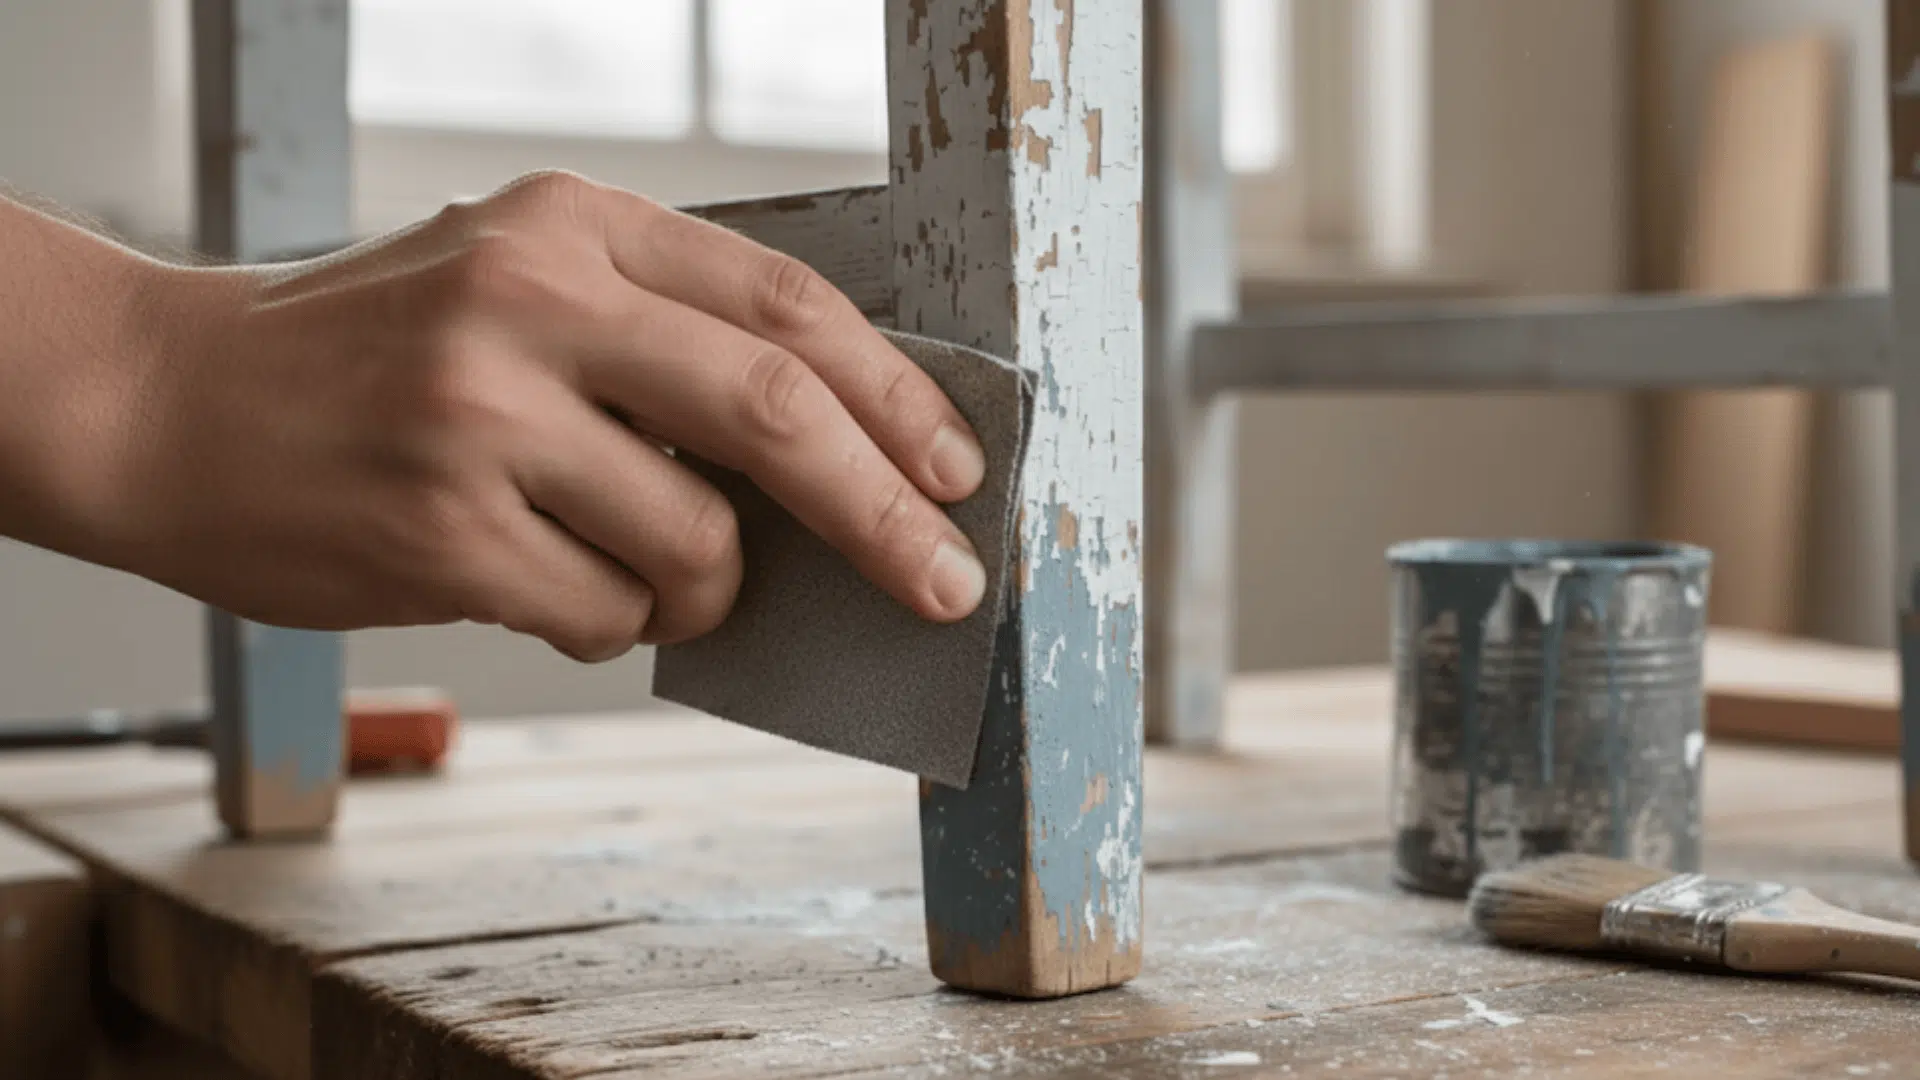
Layering paint colors and sanding through them creates that chippy, peeling look found on vintage pieces. It’s perfect for cottage-style or shabby chic projects where distressed paint is the goal.
- Best for: Dressers, chairs, decorative pieces
- Time needed: 3-5 hours (multiple coats)
- Skill level: Intermediate
- Tools and materials needed: Two paint colors, sandpaper, brush, petroleum jelly (optional)
- Steps to follow: Paint base color. Let dry. Add a second color. Sand through the top layer randomly to reveal the base color beneath.
- Pro tip: Rub petroleum jelly on areas before the top coat so paint won’t stick there and chips naturally.
7. Dry Brush Weathered Paint Effect
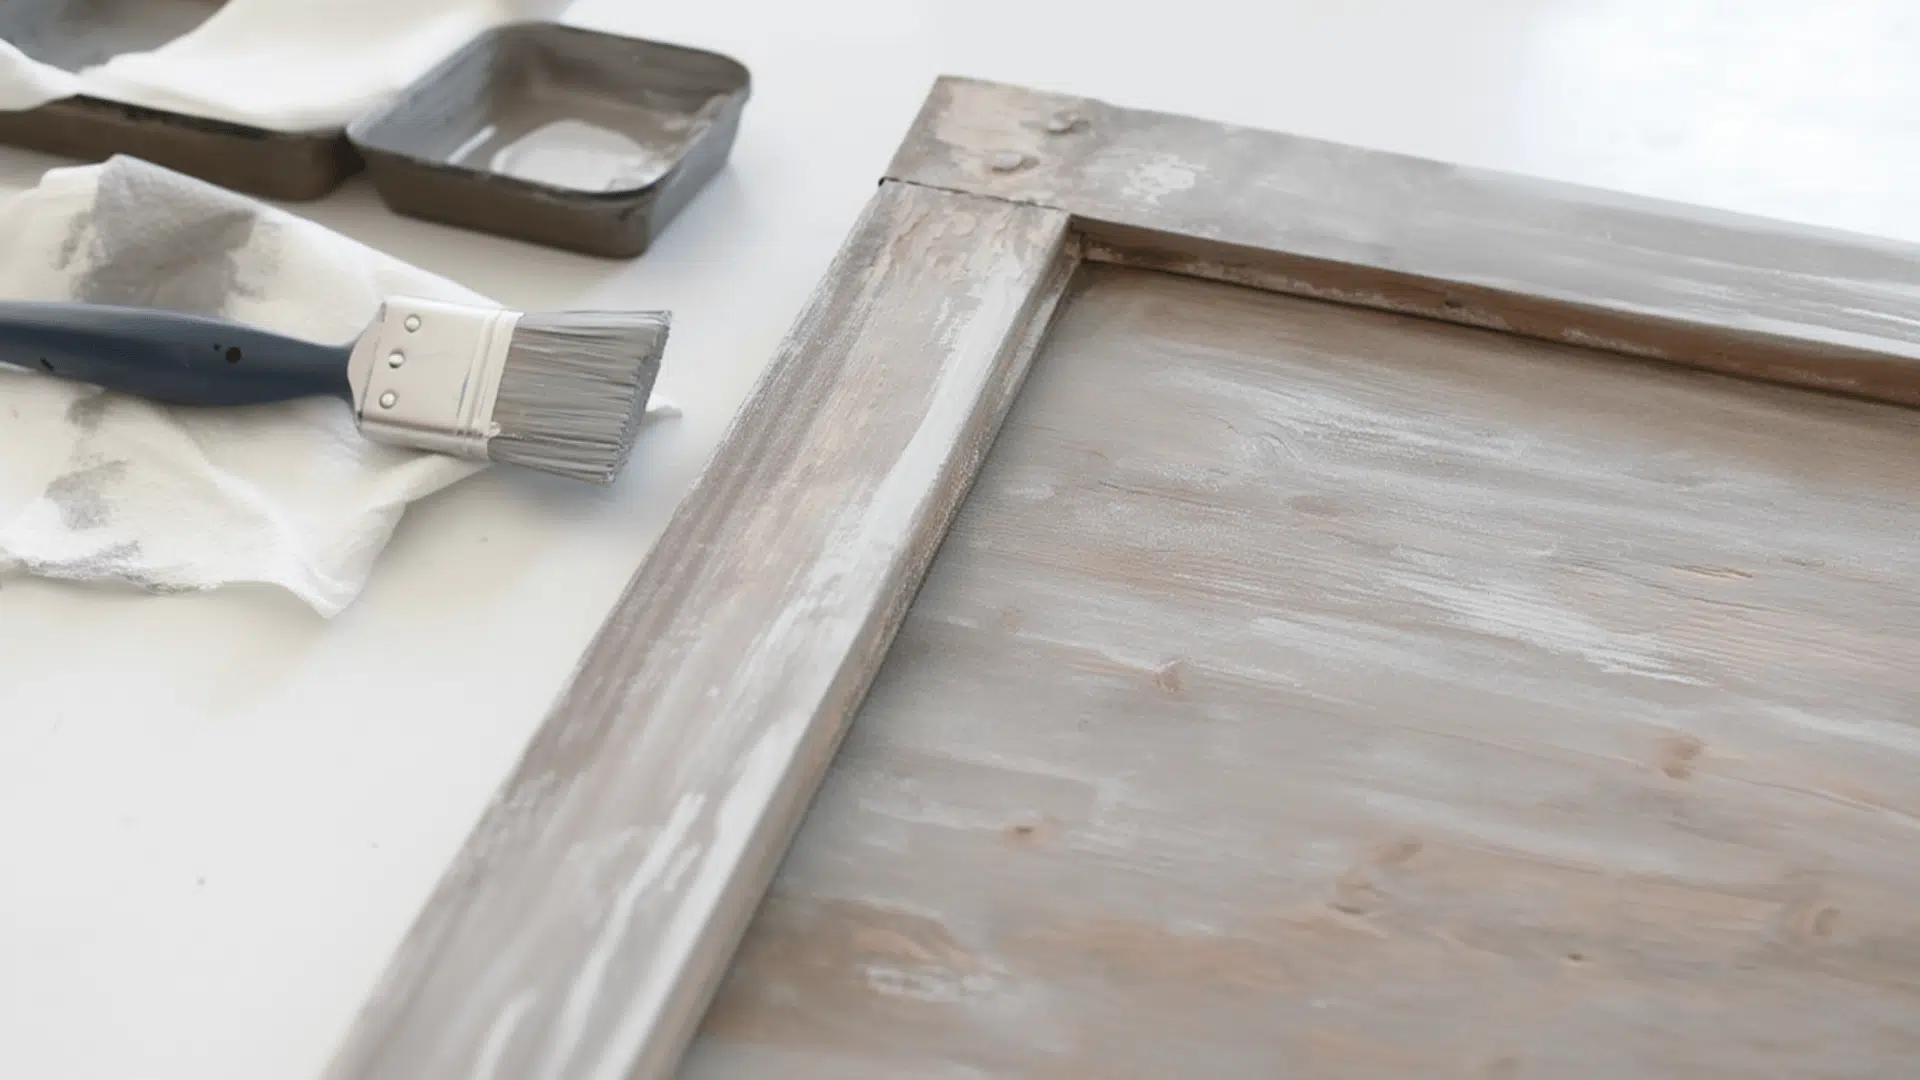
Dry brushing involves wiping most paint off the brush before applying it, creating a weathered, barely-there finish. The technique lets wood grain show through while adding subtle color.
- Best for: Accent pieces, picture frames, small projects
- Time needed: 30-60 minutes
- Skill level: Beginner
- Tools and materials needed: Paint (white or gray works best), brush, paper towels
- Steps to follow: Dip the brush in paint. Wipe almost all paint onto a paper towel. Brush lightly over wood in the grain direction.
- Pro tip: Build up layers gradually because adding more is easy, but removing dry-brushed paint isn’t.
8. Warm Coffee Aged Wood Tint
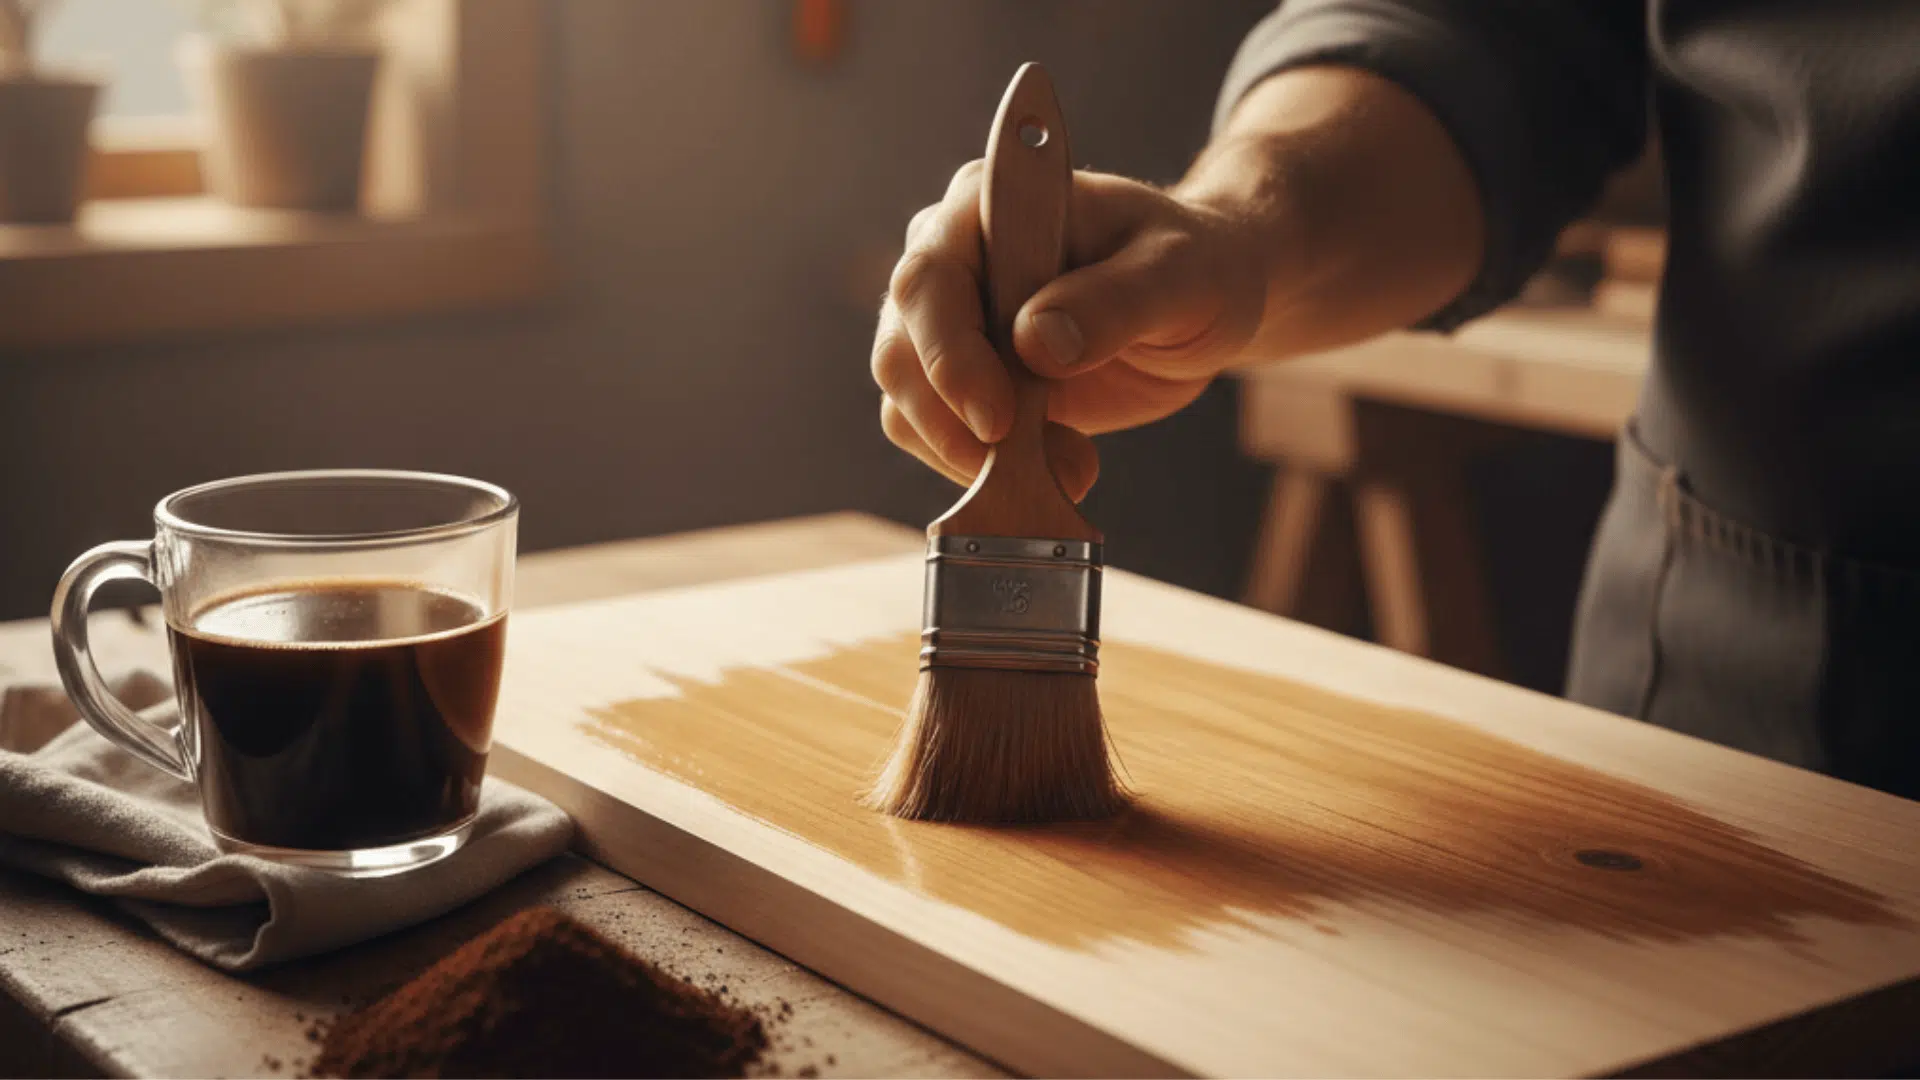
Coffee creates warm brown tones that give wood a sun-faded appearance. It’s gentler than vinegar methods and works well for projects needing subtle aging without dramatic color changes.
- Best for: Light woods, subtle aging effects
- Time needed: 1-2 hours
- Skill level: Beginner
- Tools and materials needed: Strong-brewed coffee, a brush, and a cloth
- Steps to follow: Brew extra-strong coffee and let it cool. Brush onto bare wood. Apply multiple coats for a deeper color. Let dry between coats.
- Pro tip: Add instant coffee granules to liquid for even stronger tinting power and faster results.
9. Gray Wash Weathered Wood Finish
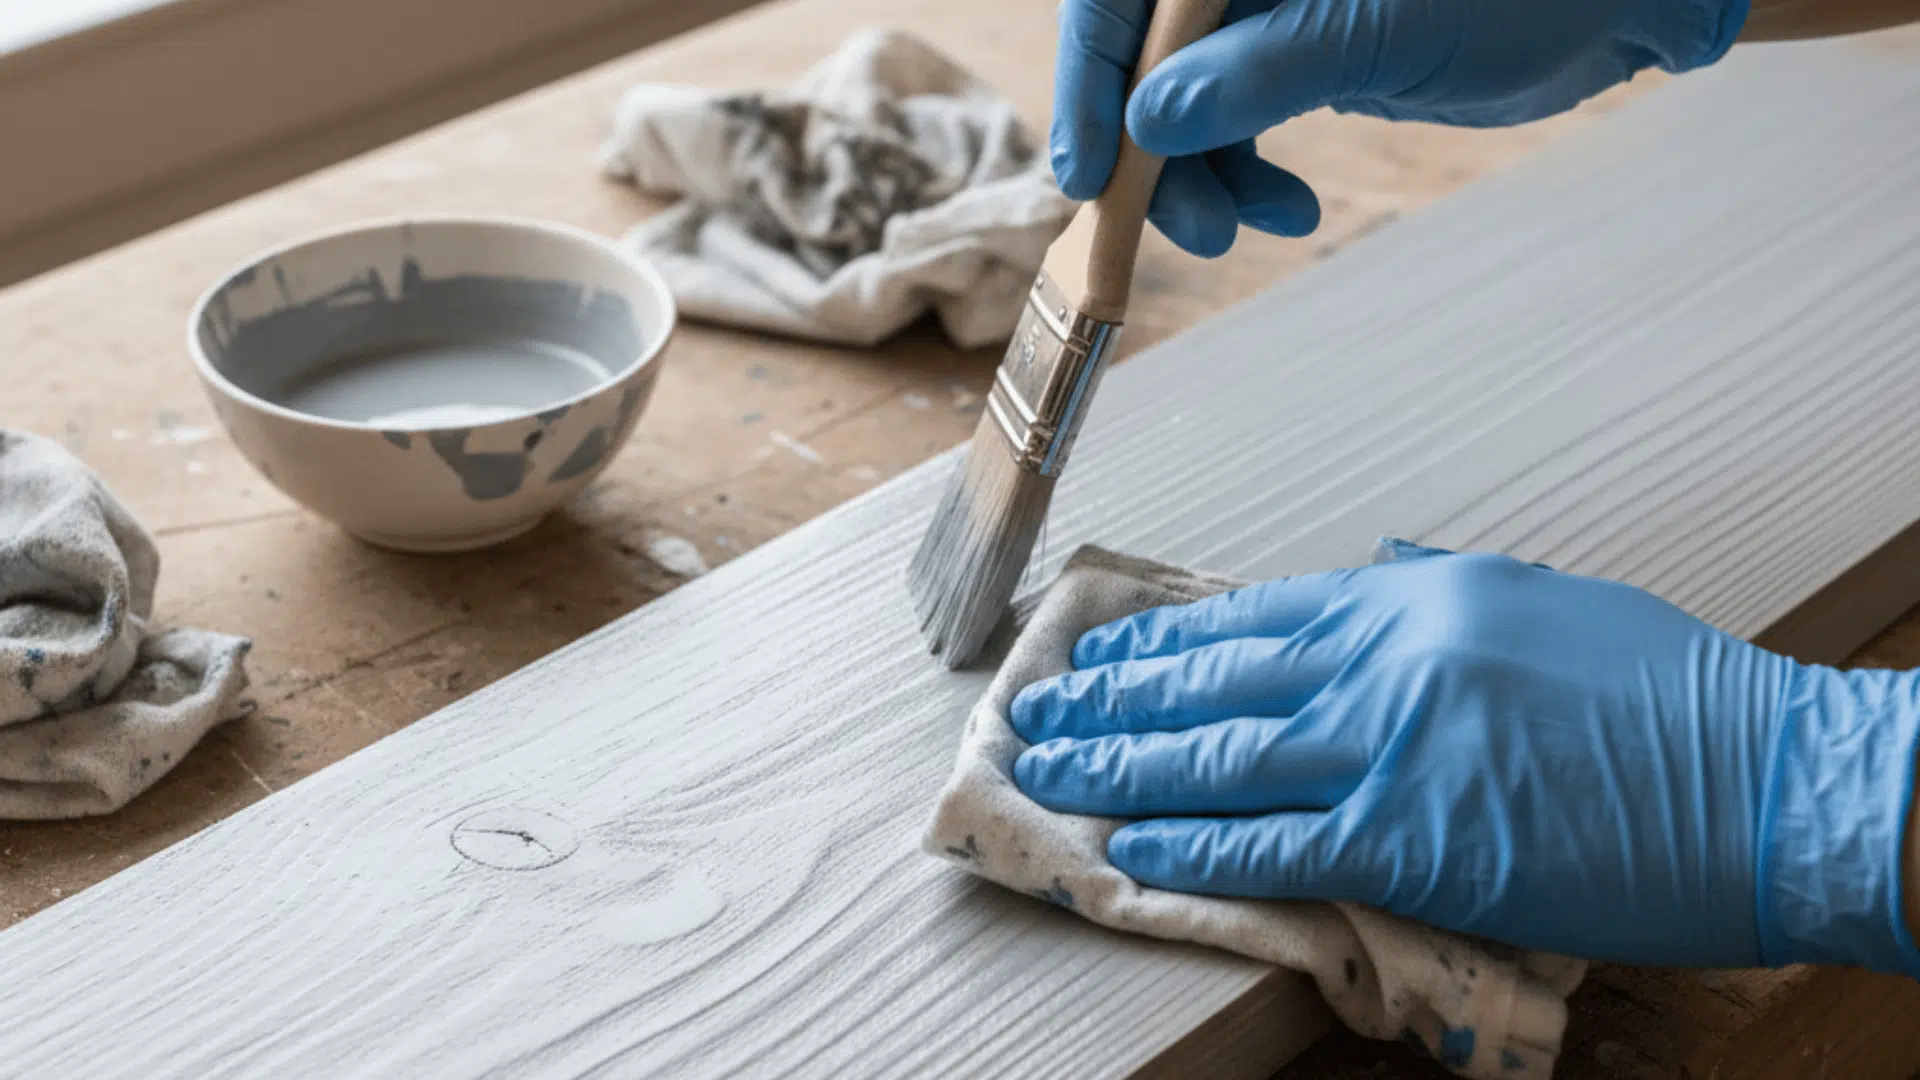
Diluted gray paint creates a washed, sun-bleached look similar to driftwood or coastal weathering. The thin consistency lets wood grain shine through while adding that perfect aged patina.
- Best for: Beach-style decor, outdoor furniture replicas
- Time needed: 1-2 hours
- Skill level: Beginner
- Tools and materials needed: Gray paint, water, brush, rags
- Steps to follow: Mix 1 part paint with 3 parts water. Brush onto wood. Wipe excess immediately with rags, working in the grain direction.
- Pro tip: Layer different shades of gray wash for more depth and a sun-faded appearance that looks truly authentic.
These methods can stand alone or work together for custom results. Many woodworkers combine two or three techniques on the same piece, layering effects until they achieve exactly the look they’re after.
Finishing Your Aged Wood Project
Once the aging process is complete, protecting that hard work becomes essential. The right finish preserves the weathered look while adding durability.
- Polyurethane for high-traffic pieces: Water-based poly protects without yellowing, making it perfect for tabletops and floors that need serious protection. Apply thin coats and sand lightly between layers for a smooth finish.
- Wax for a soft, natural feel: Furniture wax gives aged wood a subtle sheen while letting people feel the texture. It’s ideal for decorative pieces that won’t get heavy use but need some protection.
- Oil finishes for deep penetration: Tung oil or linseed oil soaks into wood and enhances grain patterns beautifully. They’re great for pieces that need a natural, hand-rubbed appearance.
- Matte sealer spray for quick protection: Spray sealers work fast and won’t change the color much. Perfect for projects where maintaining the exact aged look matters most.
- Leave it raw for ultimate authenticity: Sometimes, no finish is the best finish, especially for wall art or pieces that won’t be touched often.
What Real DIYers Say About Aging Wood
When DIYers talk about aging wood, the vibe is usually “texture first, color second.” A lot of builders swear by wire brushing, especially with a brush head on a drill or angle grinder, because it pulls out the softer pulp and makes the grain pop.
For bigger structures, people often add dents and wear with hammers or a heavy chain to keep it looking natural. Some mention spot-torching for realistic dark patches, then finishing with a simple gray wash. Others go for peeling paint using paste in the paint, or even pressure washing to rough things up fast.
Common Mistakes to Avoid When Aging Wood
Even experienced woodworkers make mistakes when aging wood for the first time. Some errors are easy to fix, while others can ruin a project completely. Knowing what to avoid saves time, materials, and frustration.
- Always test techniques on scrap wood first. Every wood species reacts differently to aging methods. Pine might turn dark gray while oak stays lighter.
- Don’t distress the entire surface uniformly. Real aged wood shows wear only in specific high-traffic spots. Edges, corners, and handles get the most wear. The center of the tabletops stays relatively smooth.
- Apply vinegar solutions lightly. Too much creates blotchy, uneven results instead of natural gray tones. Multiple thin coats work better than one heavy application. Patience pays off here.
- Sand wood before aging it. Aging techniques won’t hide rough surfaces or mill marks. They actually make imperfections more visible. Start with smooth, clean wood for the best results.
- Let each layer dry completely. Rushing causes colors to mix and creates muddy finishes. Wait at least an hour between coats. Overnight drying is even better for certain techniques.
The Bottom Line
Mastering how to age wood opens up a world of creative possibilities. From vinegar tricks to distressing techniques, these methods prove that authentic-looking aged wood doesn’t require decades of waiting.
The techniques covered here work for beginners and experienced crafters alike. Results can match expensive reclaimed wood without the hefty price tag.
Now it’s time to grab some scrap wood and start experimenting. Pick one method that sounds interesting and give it a try. The first project might not be perfect, but that’s how skills develop.
Ready to transform plain lumber into something with character and story? Start with a small test piece today and watch ordinary wood become extraordinary. Share results, ask questions, and keep creating!