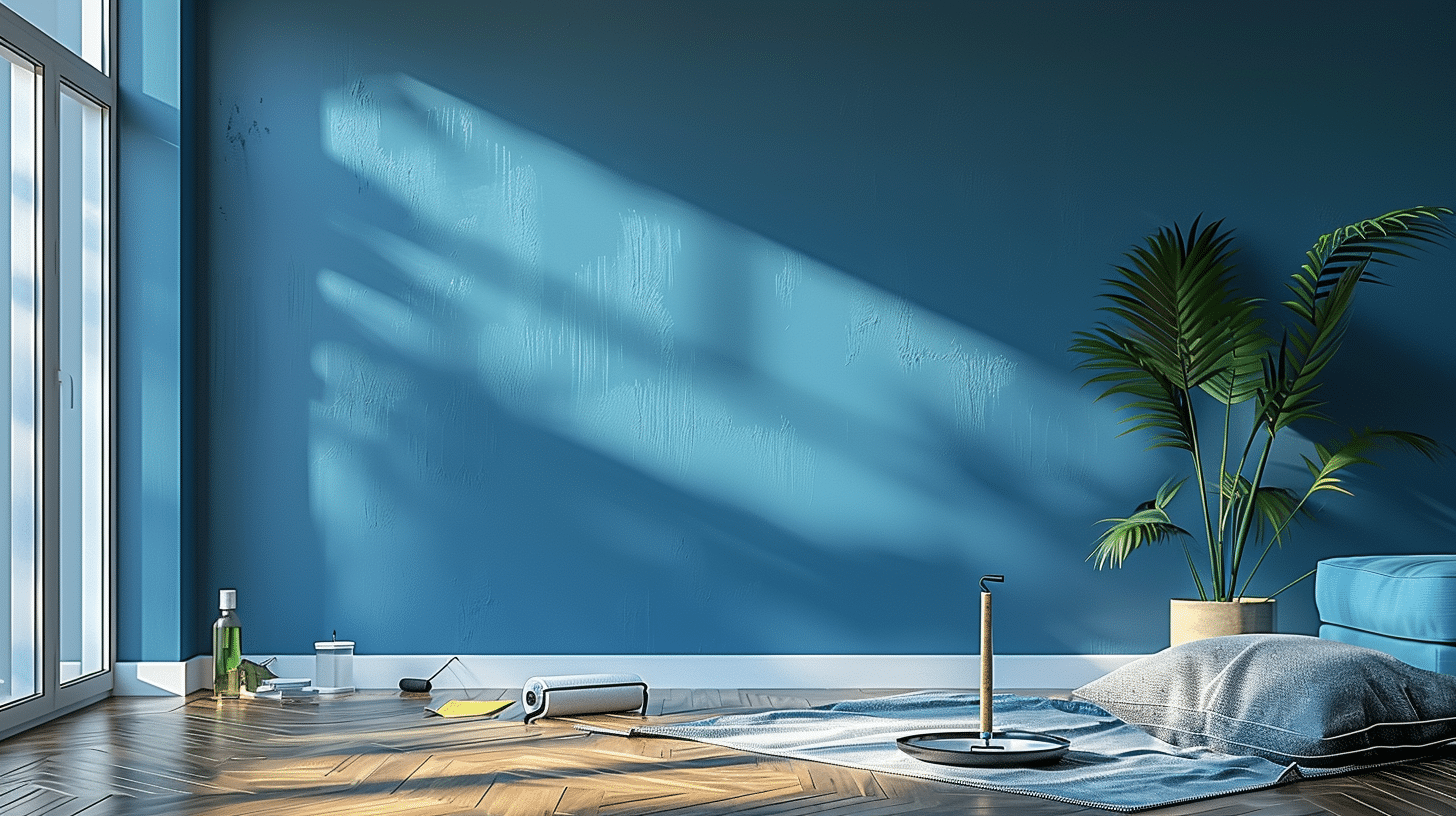
Look around your home. Blank walls can feel cold and unfinished, yet adding personality does not have to cost a lot. DIY wall decor ideas help you create a space that feels personal using simple materials and a little creativity.
No professional help is needed, and you can skip expensive art pieces. These projects can look impressive while staying budget-friendly.
You will find ideas for every skill level, from quick paper crafts to simple wood designs. Many of them work in any room and can be adjusted to match your style.
Your walls can go from empty to eye-catching with a few easy changes.
Why Choose DIY Wall Decor Over Store-Bought Options
Store-bought decor looks nice, sure, but it comes with a price tag that can make anyone think twice. DIY wall decor offers something different. It’s budget-friendly, personal, and way more satisfying to create.
- Saves Money Without Sacrificing Style: Most projects cost a fraction of what stores charge, and the results look just as good.
- Adds a Personal Touch: No one else will have the exact same piece hanging in their home.
- Uses Materials Already on Hand: Old frames, fabric scraps, and leftover paint can all become something beautiful.
- Builds Creative Confidence: Each project gets easier, and skills improve naturally over time.
- Allows Flexibility to Change Things Up: Don’t like it anymore? Just make something new without the guilt of wasting money.
Easy DIY Wall Decor Ideas for Beginners
Starting your first wall decor project feels exciting and a little scary at the same time.
These beginner-friendly ideas need minimal supplies and take under two hours to complete from start to finish. You don’t need artistic talent or expensive tools to make these work.
1. Geometric Paper Wall Art
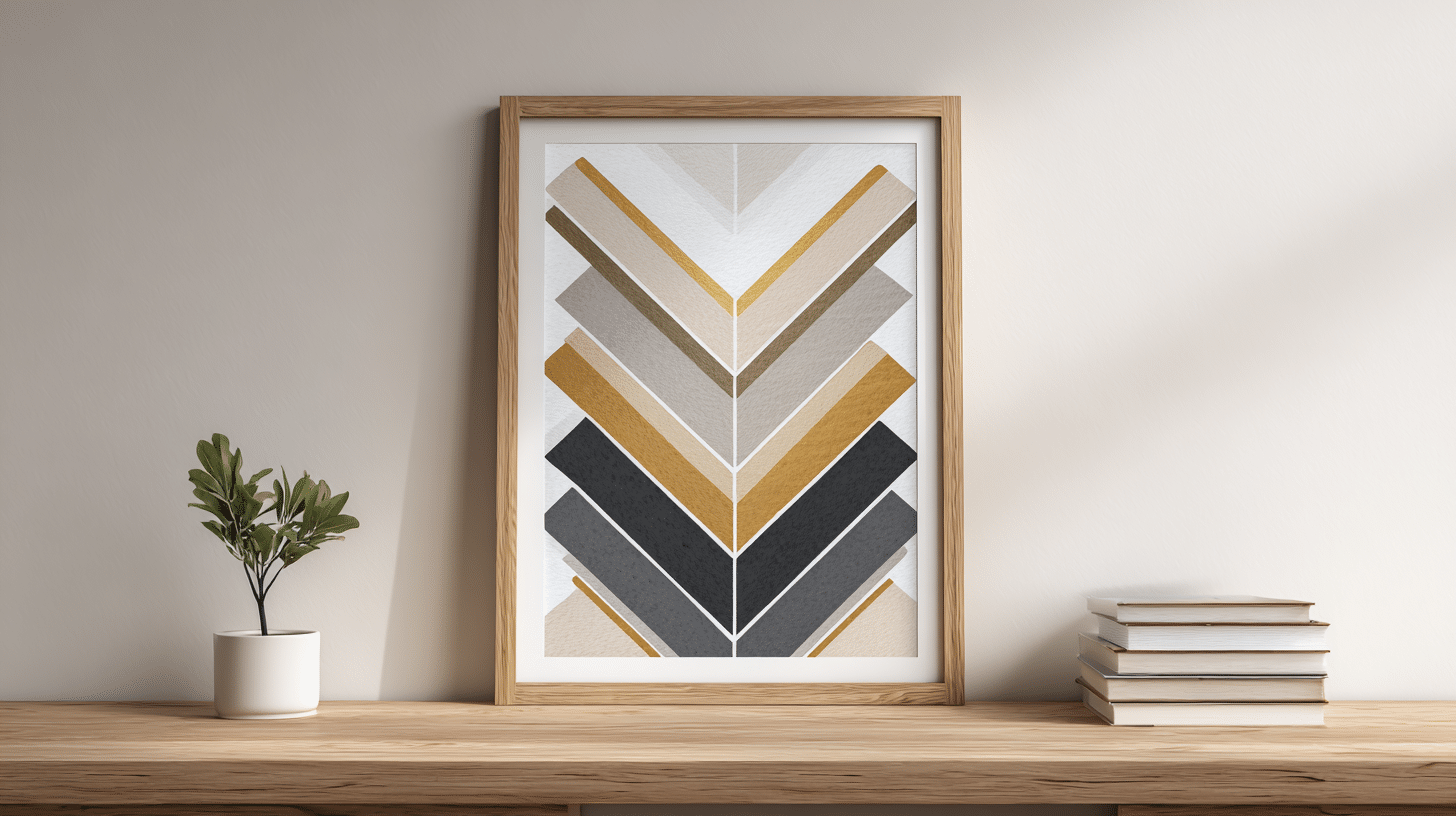
Cut colored paper into triangles, hexagons, or diamonds. Arrange them in patterns on your wall using removable adhesive dots. It creates modern, eye-catching designs without permanent damage.
- Best Room: Living room or home office
- Total Time: 45 to 60 minutes
- Approximate Budget: $8 to $15
- Materials Needed: Colored cardstock (5-8 sheets), Removable adhesive dots, Scissors or paper cutter, Ruler, and pencil
2. Paper Flower Arrangements
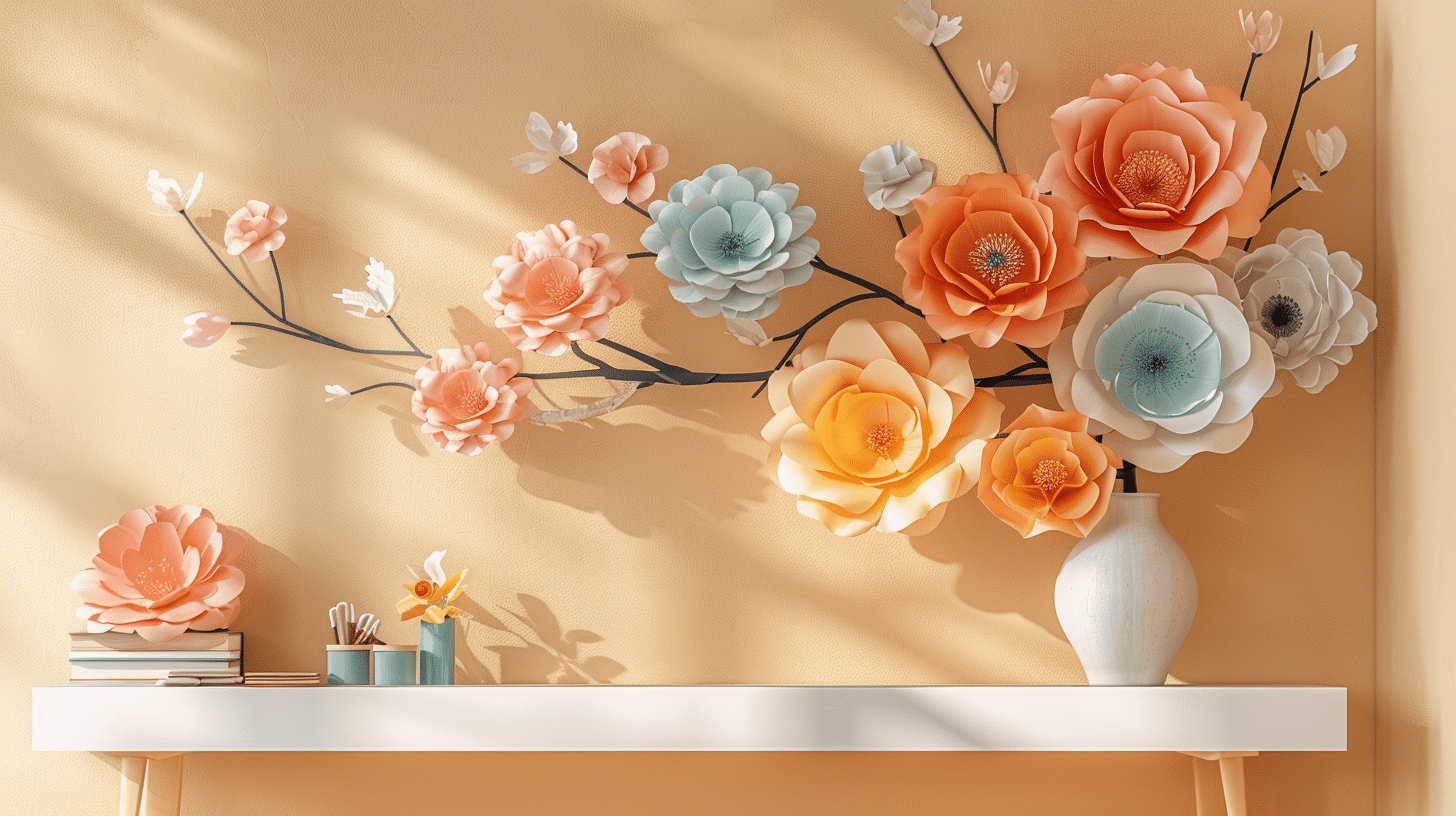
Craft paper flowers using tissue paper, cardstock, or book pages. Layer circles of paper, scrunch the centers, and attach them to branches in a vase. Mount the vase on your wall for a 3D effect.
- Best Room: Bedroom or nursery
- Total Time: 90 minutes to 2 hours
- Approximate Budget: $10 to $18
- Materials Needed: Tissue paper in multiple colors, Floral wire, or pipe cleaners, Tree branches or dowels, Small vase or container, Hot glue gun, Command hooks for mounting
3. Origami Wall Installations
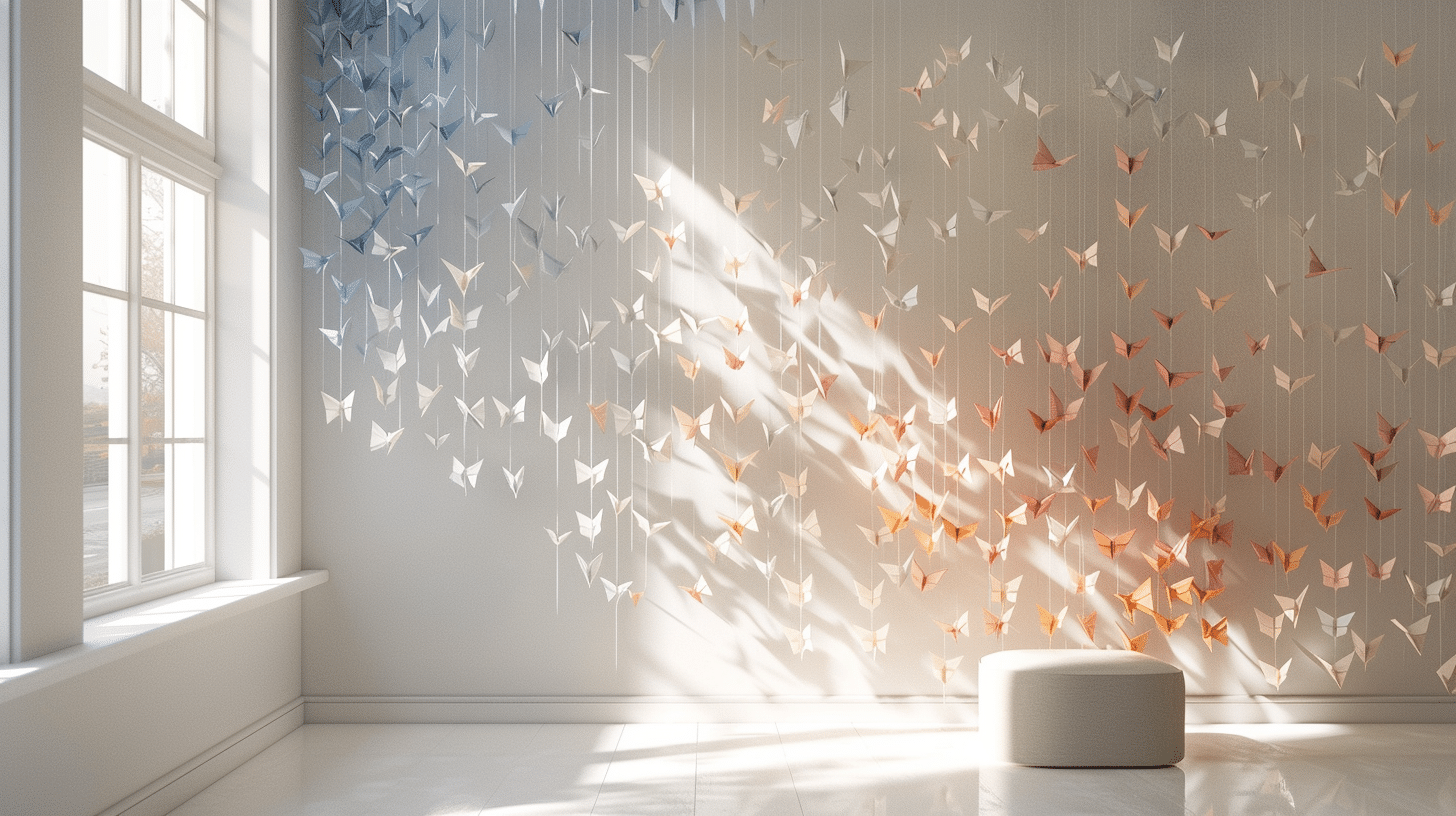
Fold paper into cranes, butterflies, or stars. String them together with fishing line and hang them at different heights. The pieces catch light and cast subtle shadows that change throughout the day.
- Best Room: Kids’ room or craft room
- Total Time: 2 to 3 hours
- Approximate Budget: $5 to $12
- Materials Needed: Origami paper or regular paper, Clear fishing line, Small command hooks, Scissors, Needle for threading the line
4. Scrapbook Paper Collages
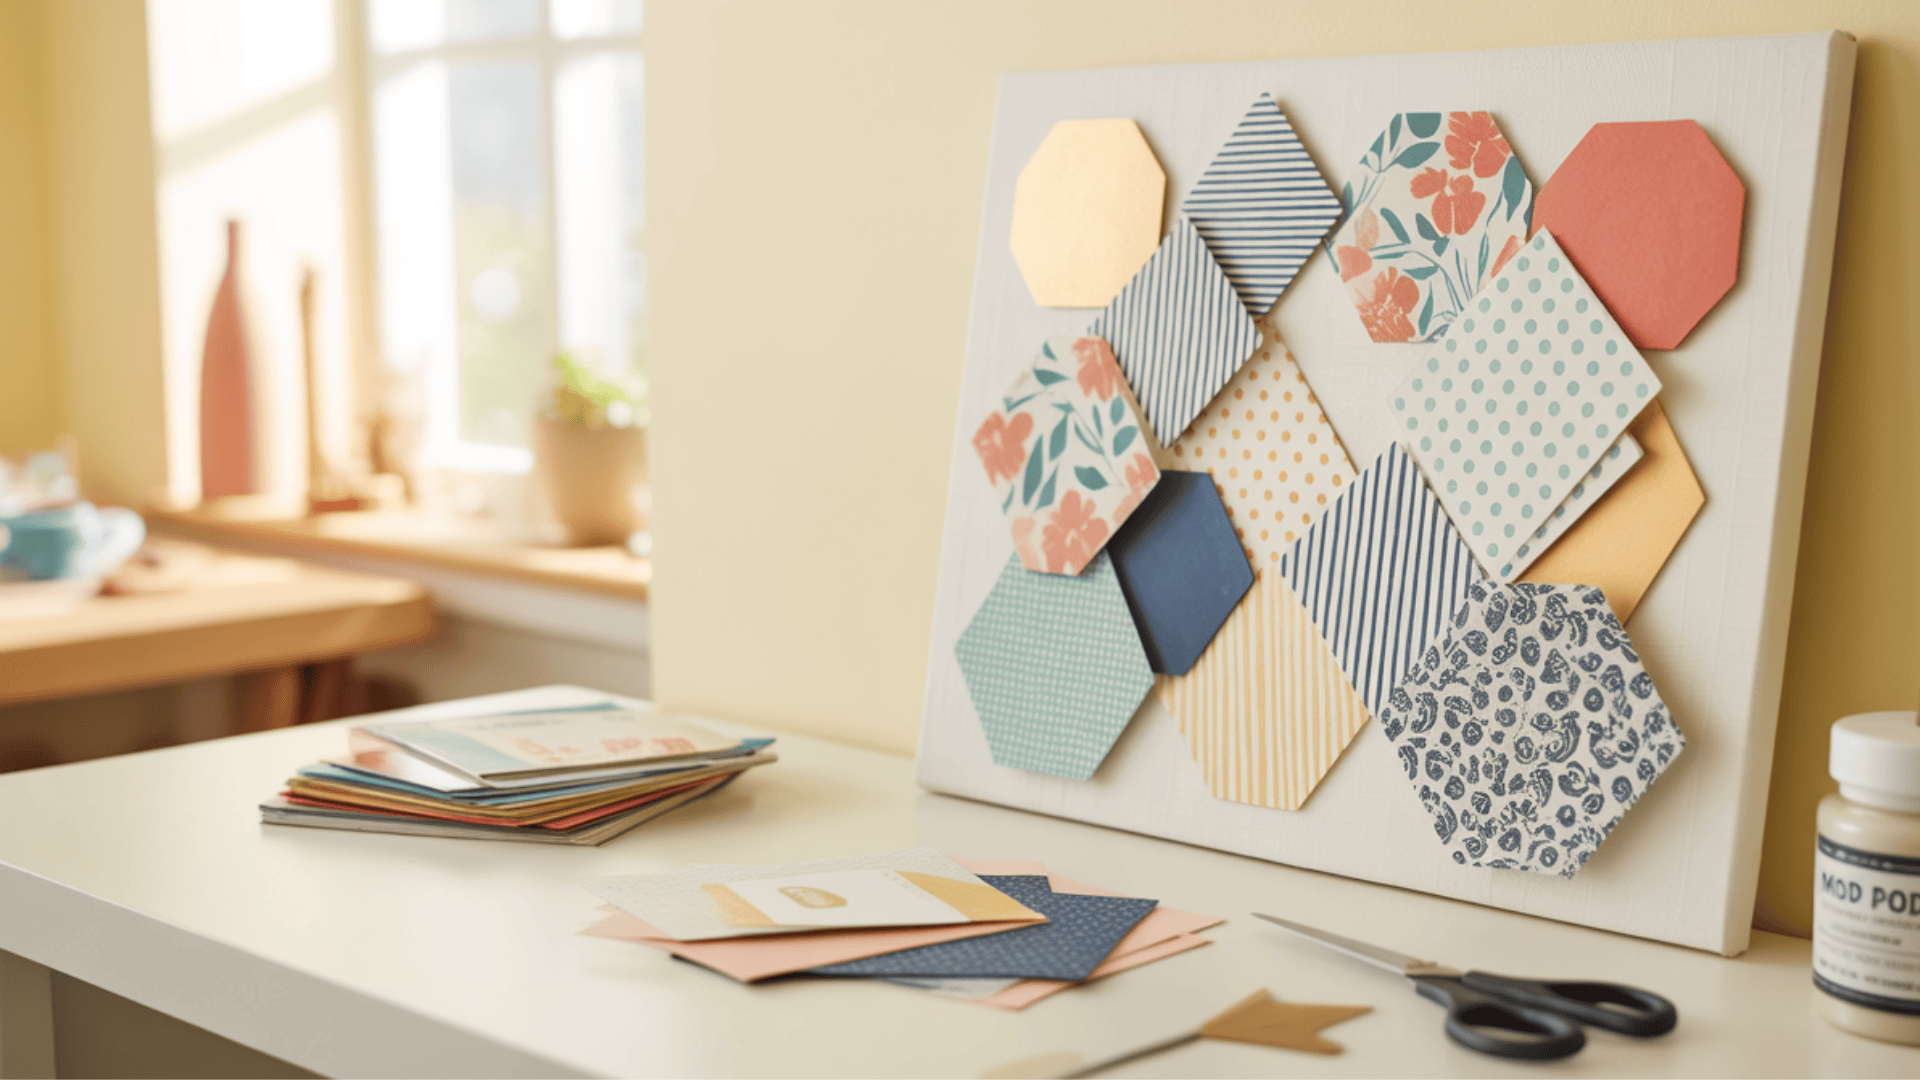
Buy patterned scrapbook paper in coordinating colors. Cut it into your desired shapes and glue them onto canvas or directly on your wall. Mix patterns like stripes, florals, and geometric prints for a layered look.
- Best Room: teen bedroom or craft room
- Total Time: 60 to 90 minutes
- Approximate Budget: $12 to $20
- Materials Needed: Patterned scrapbook paper (8-10 sheets), Canvas board (11×14 inches), Mod Podge or craft glue, Foam brush, Scissors or craft knife
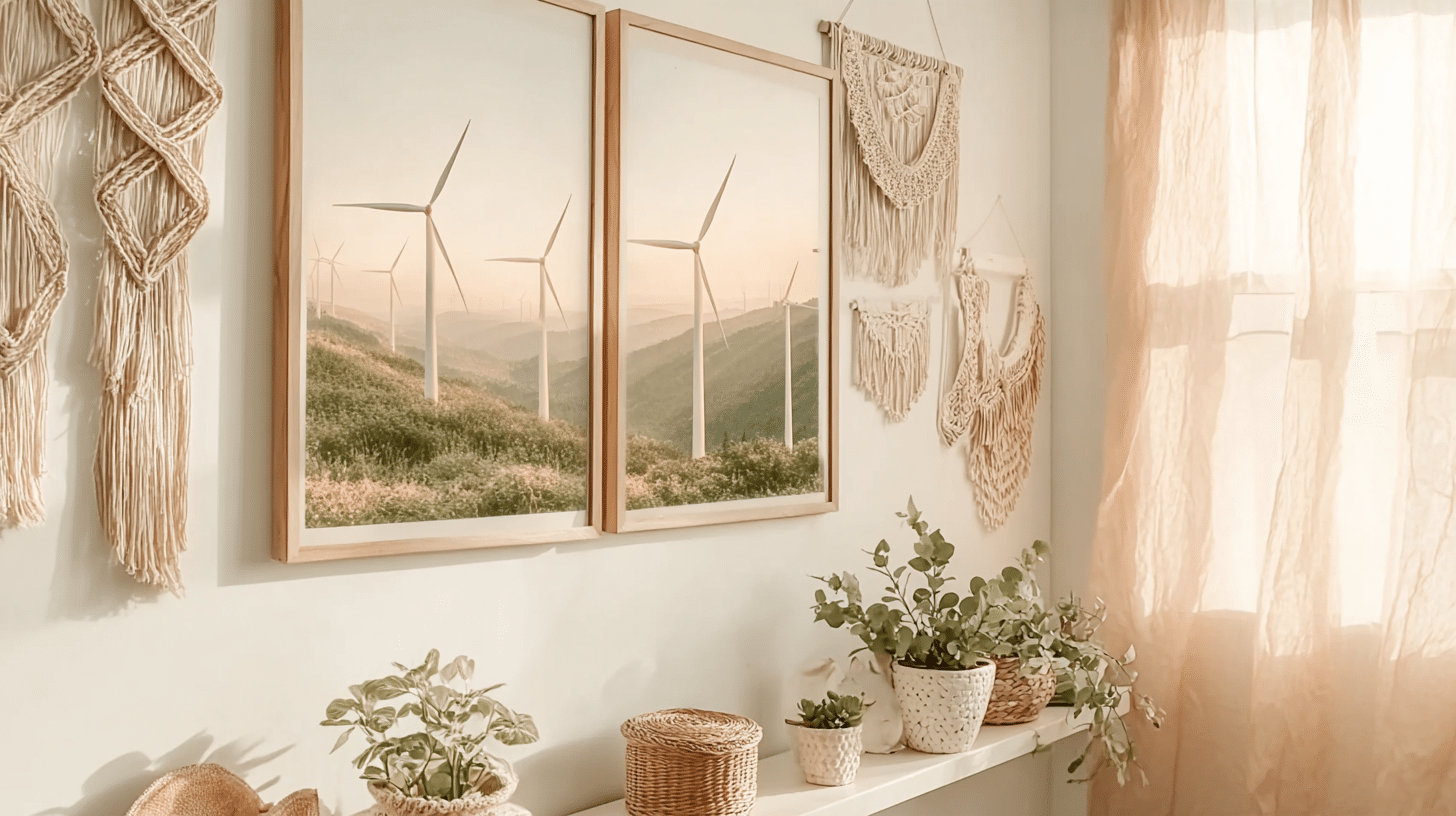
5. Macramé Wall Hangings
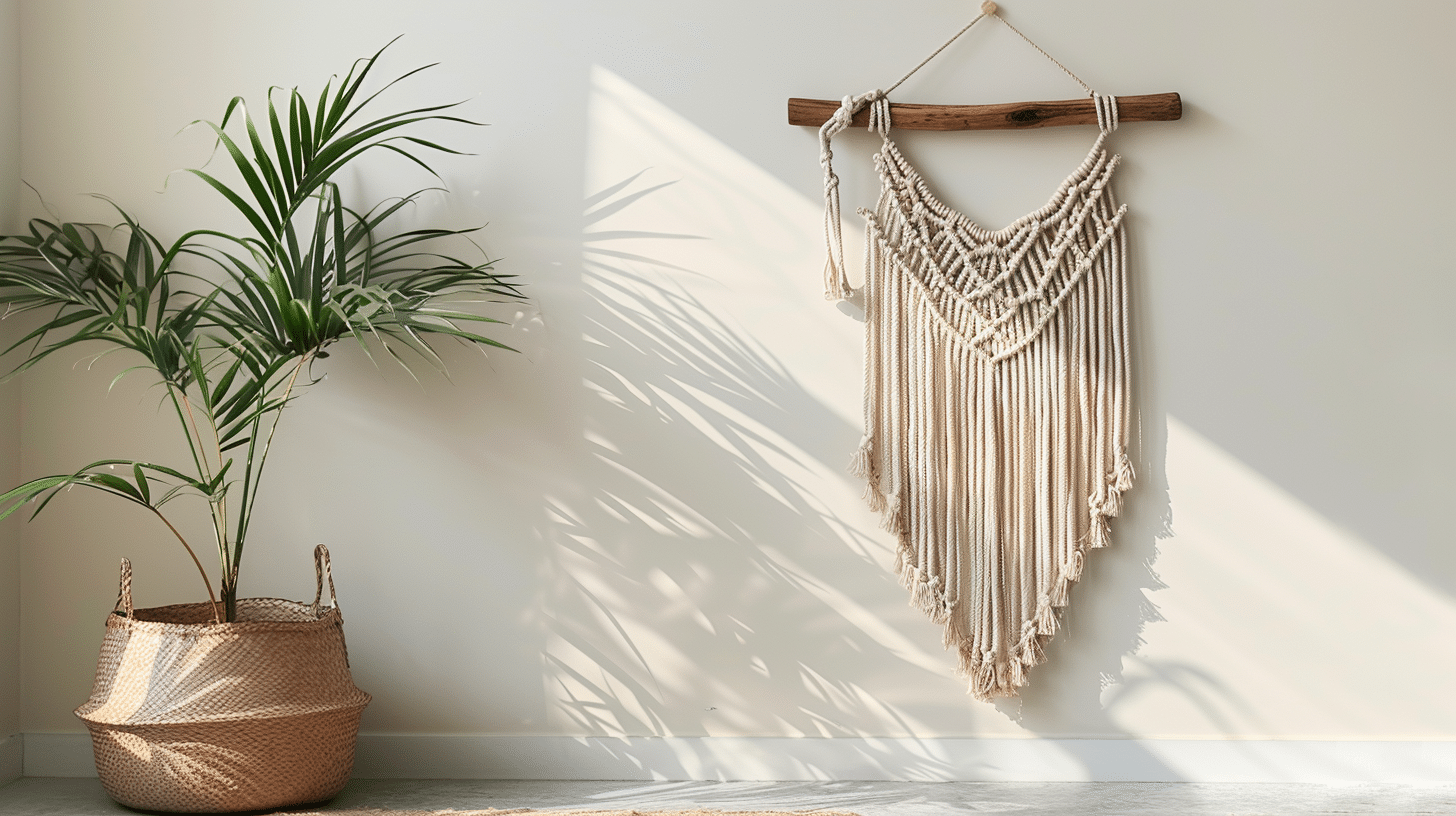
Macramé uses knots to create patterns with cord or rope. Learn four basic knots from free online videos: square knot, half hitch, lark’s head, and spiral knot. Macramé pieces add a boho vibe to any room and look much more expensive than they actually cost.
- Best Room: Living room or bedroom
- Total Time: 3 to 4 hours
- Approximate Budget: $15 to $25
- Materials Needed: Macramé cord or cotton rope (100 feet), Wooden dowel or branch (12-18 inches), Scissors, Measuring tape, Comb for fringing ends, Command strips for hanging
6. Fabric Tapestries
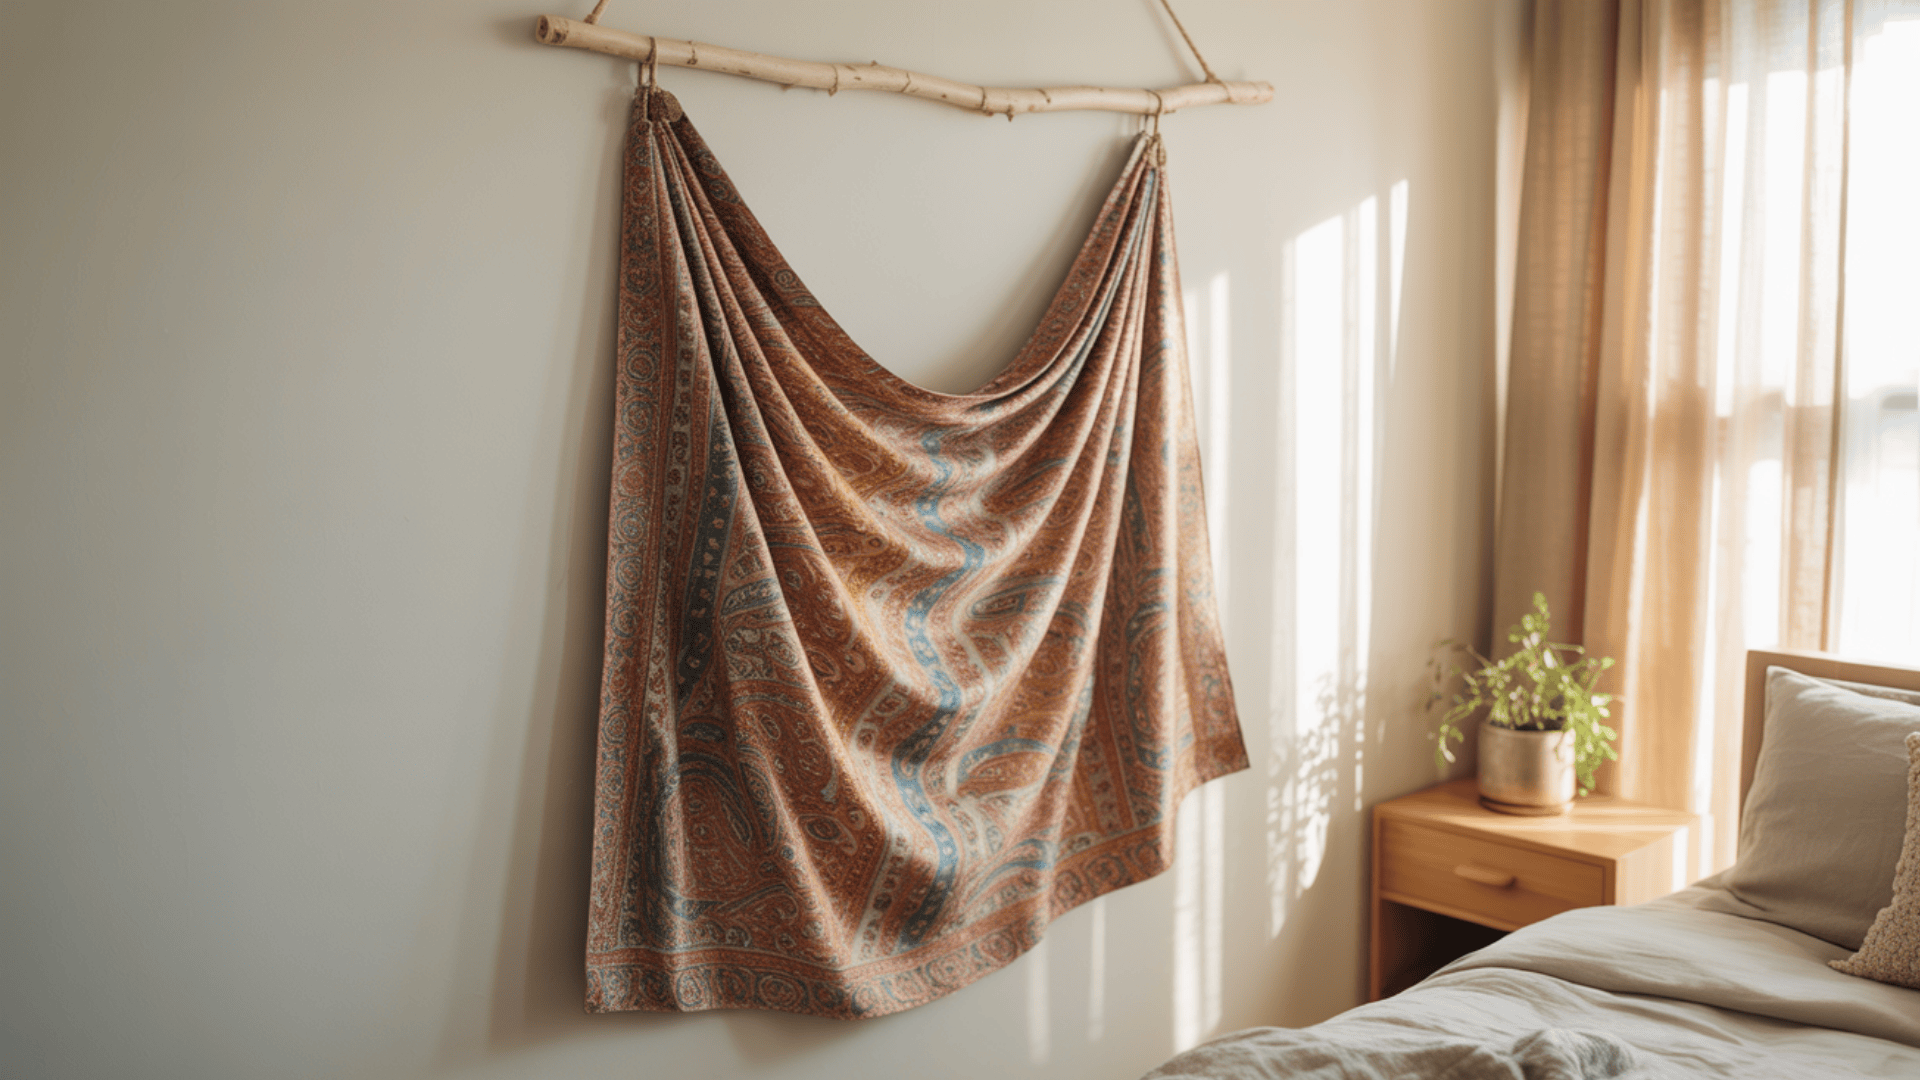
Find a beautiful fabric piece at a thrift store or use a decorative scarf. Attach a curtain rod or wooden dowel to the top edge using fabric glue or by sewing a simple pocket. Hang it like a banner using command hooks.
- Best Room: Bedroom or dining room
- Total Time: 15 to 30 minutes
- Approximate Budget: $8 to $18
- Materials Needed: Decorative fabric or a large scarf, a wooden dowel or small curtain rod, Fabric glue or needle and thread, Command hooks, Scissors, and an iron for removing wrinkles
7. Embroidery Hoop Art
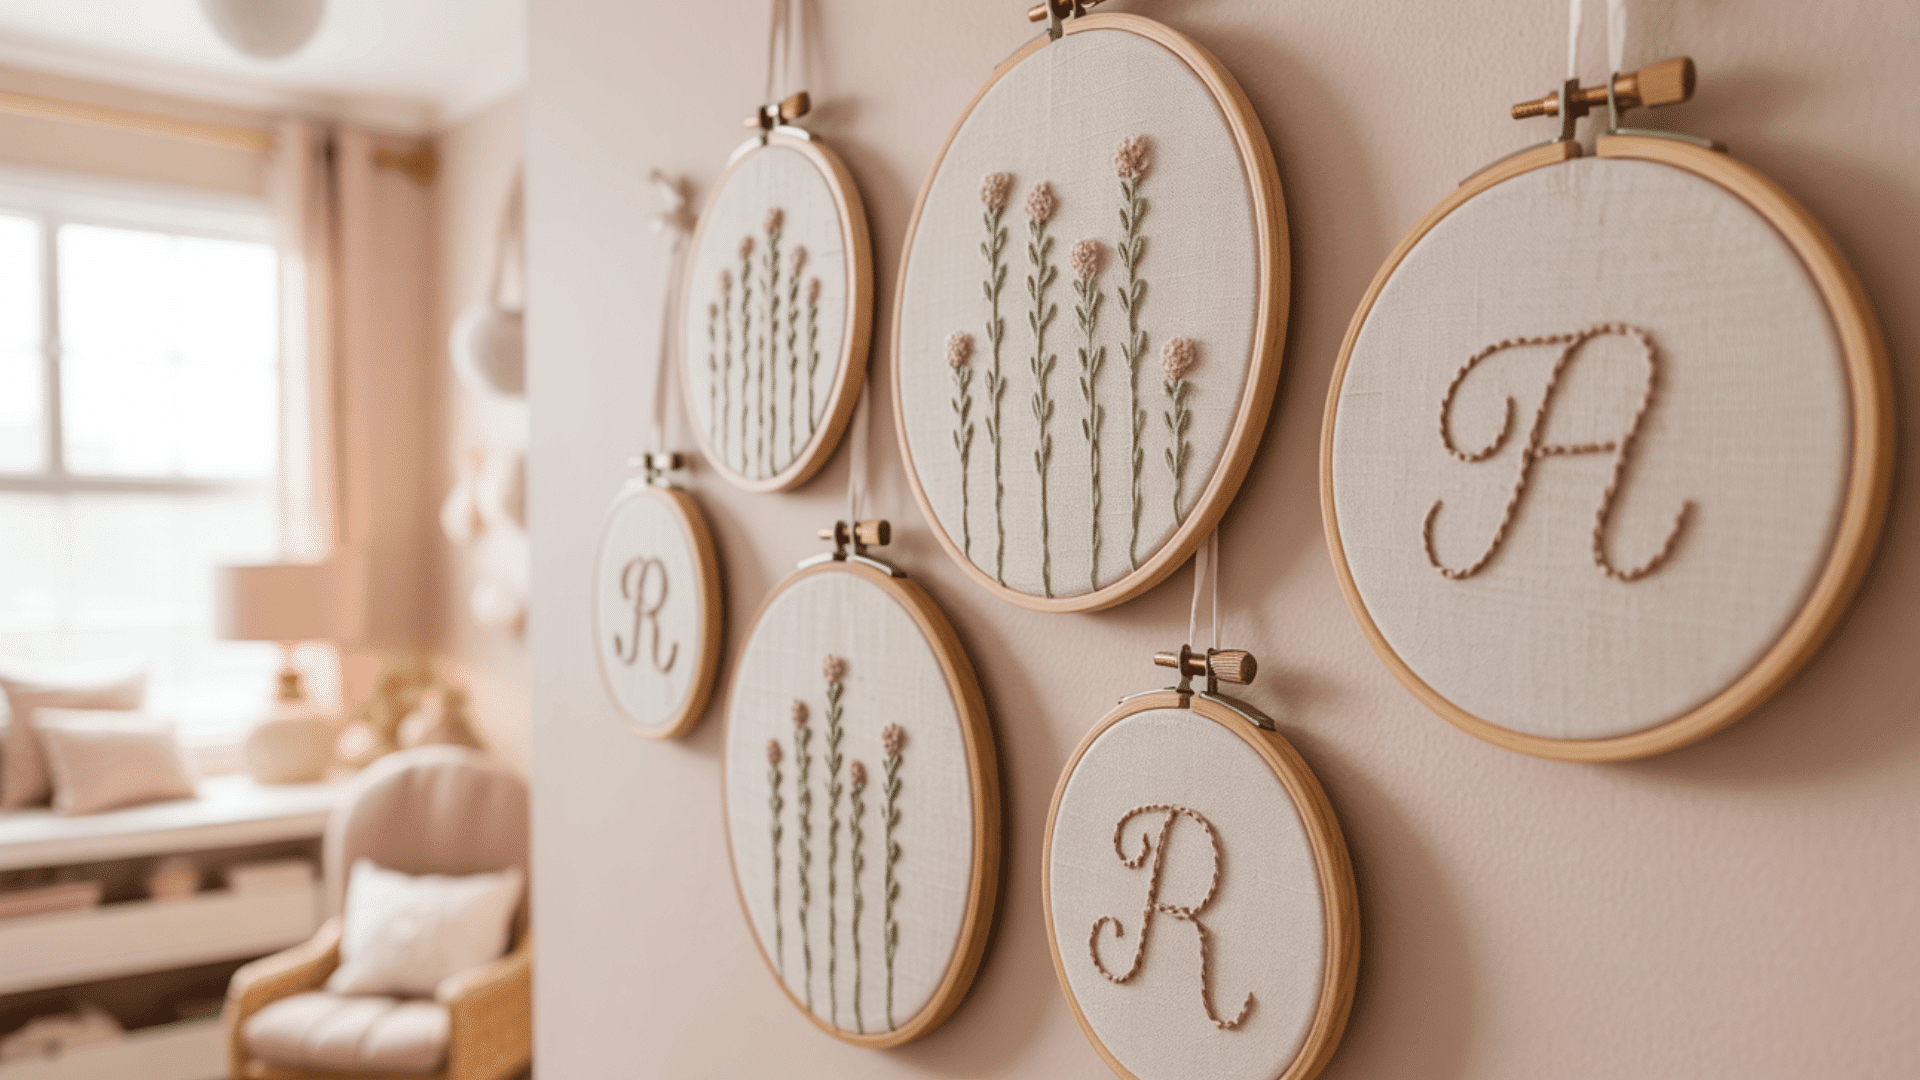
Stretch the fabric tightly inside an embroidery hoop and secure it. You can leave the fabric plain for a minimalist style, or add simple stitched designs, such as your initial or a small flower.
Group three to five hoops together in different sizes for maximum impact.
- Best Room: Nursery or bedroom
- Total Time: 20 to 40 minutes per hoop
- Approximate Budget: $10 to $20 for a set of three
- Materials Needed: Embroidery hoops in various sizes (5-10 inches), Fabric pieces or scraps, Embroidery thread (optional for designs), Embroidery needle (optional), Scissors, Small nails or command strips
8. Woven Wall Pieces
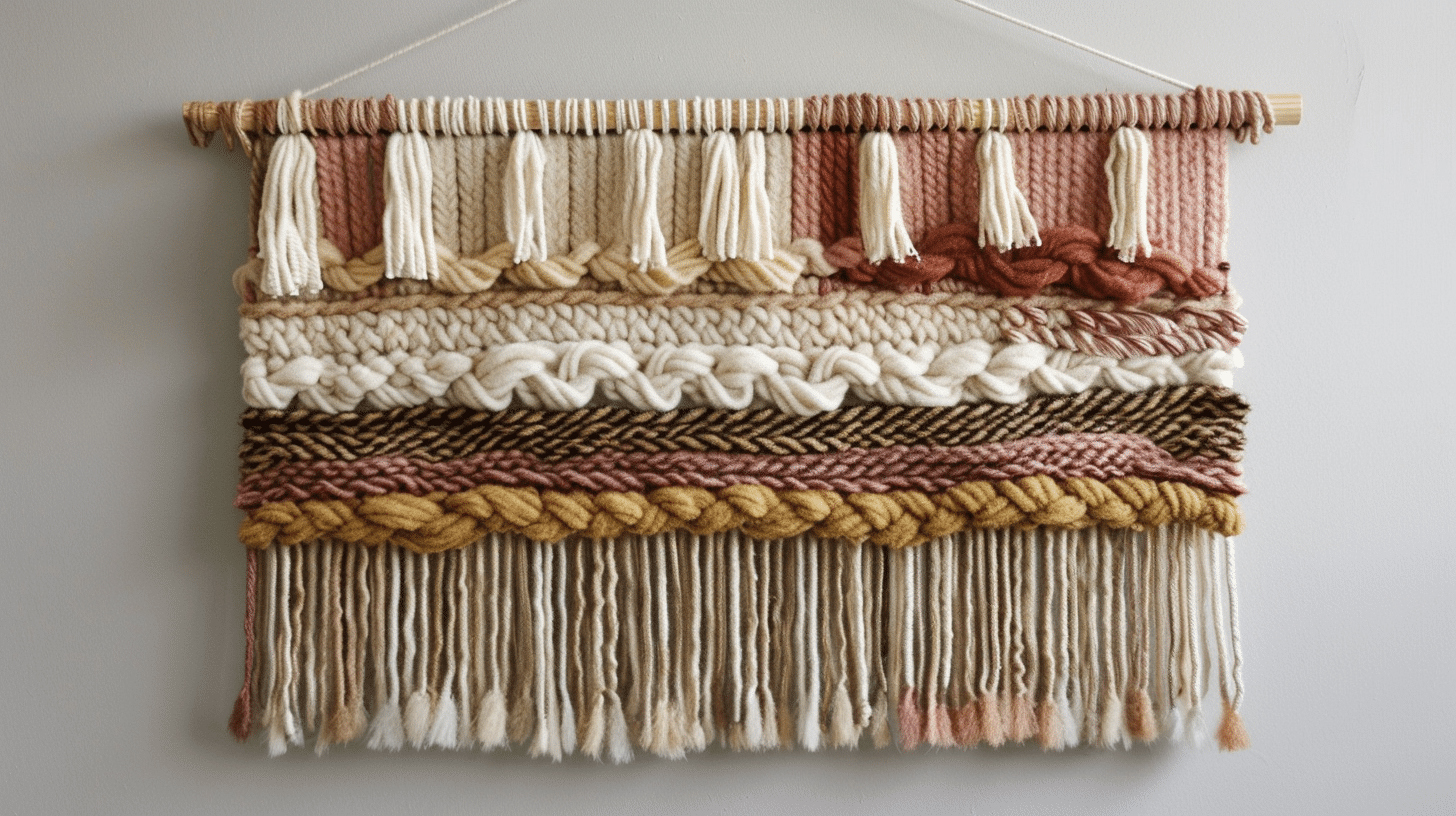
Use a small weaving loom or make one from cardboard by cutting notches along the top and bottom edges. String your vertical warp threads first, then weave yarn, fabric strips, or ribbon horizontally through them.
- Best Room: Living room or entryway
- Total Time: 4 to 6 hours
- Approximate Budget: $12 to $28
- Materials Needed: Small weaving loom or cardboard (8×10 inches), Yarn in multiple colors and textures, Fabric strips or ribbon, Wooden dowel for hanging, Scissors, Large needle or shuttle, Cotton string for warp threads
9. Accent Walls
Pick one wall to paint a bold color that contrasts with the rest of your walls. Choose a color two shades darker than your other walls for subtle drama or go bold with a completely different hue.
Use painter’s tape along edges, ceiling lines, and baseboards for clean, professionally done lines.
- Best Room: Any room (most popular: bedroom or living room)
- Total Time: 3 to 5 hours (including drying time)
- Approximate Budget: $30 to $50
- Materials Needed: One gallon of paint in the chosen color, Paint roller and tray, Angled brush for edges, Painter’s tape (2-inch width), drop cloth or old sheets, Primer (if painting dark over light), Stir stick
10. Ombré Effects
Ombré blends one color from dark to light across your wall. Start with your darkest shade at the bottom third of the wall. Add white paint to lighten it as you move up the wall in sections. Blend where colors meet using a damp sponge in circular motions while the paint is still wet.
- Best Room: Bedroom or bathroom
- Total Time: 4 to 6 hours
- Approximate Budget: $35 to $55
- Materials Needed: Base color paint (one quart), White paint for lightning (one quart), Multiple paint trays for mixing, Paint roller, Large damp sponges (3-4), Painter’stape, Drop cloth, Mixing cups and stir sticks
11. Geometric Patterns
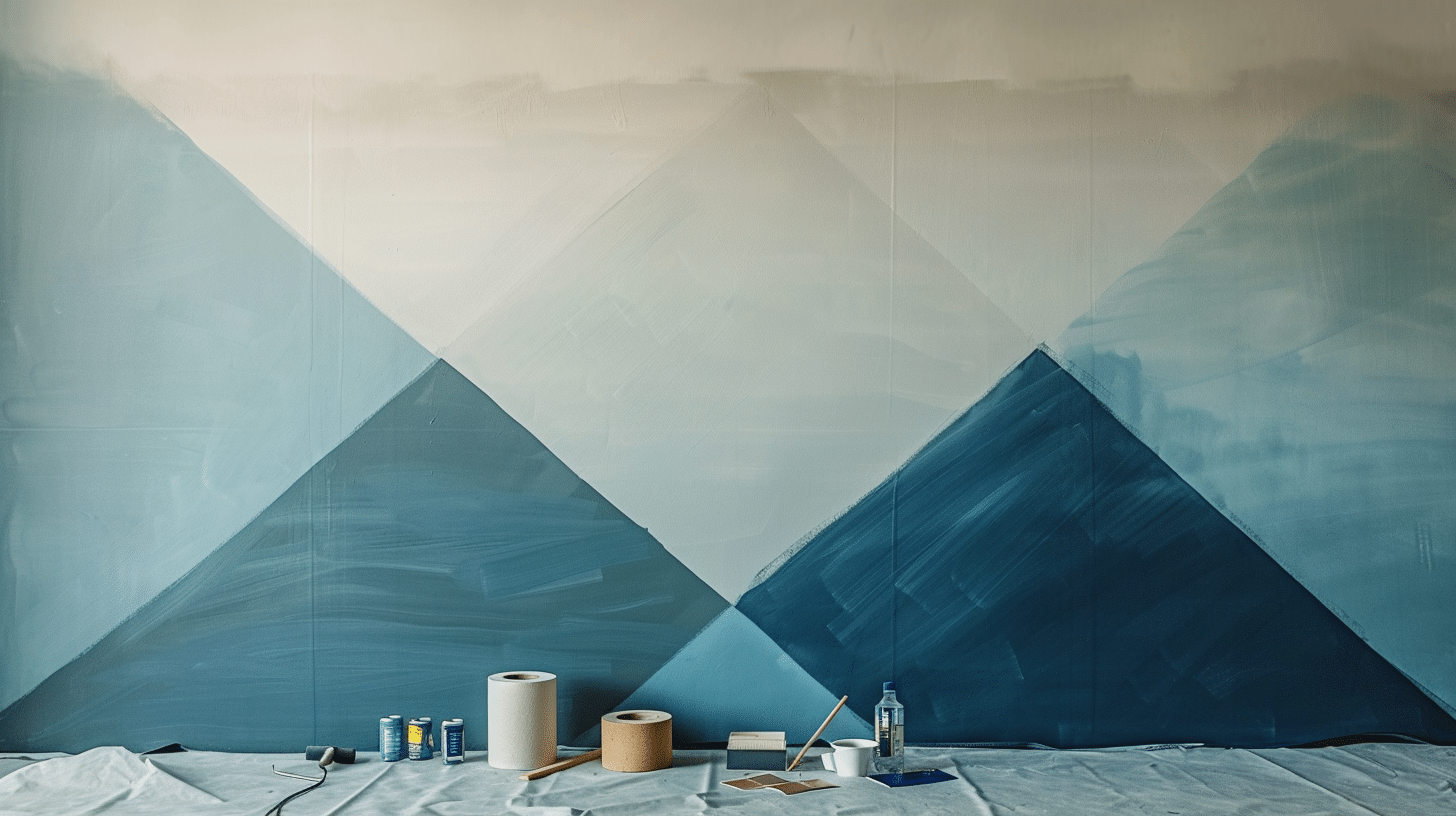
Use painter’s tape to create triangles, chevrons, stripes, or hexagons directly on your wall. Press the tape down firmly with a credit card to prevent paint from bleeding underneath.
Paint your design using a foam roller for smooth coverage. Remove tape while paint is still slightly wet for the crispest lines and sharpest angles.
- Best Room: Home office or kids’ room
- Total Time: 5 to 7 hours (including taping and drying)
- Approximate Budget: $40 to $60
- Materials Needed: Two or more paint colors (sample sizes work), High-quality painter’s tape, Level and measuring tape, Pencil for light marking, Foam rollers or brushes, Drop cloth, Credit card for pressing tape, Paint trays
12. Stenciled Quotes or Shapes
Buy ready-made stencils or cut your own from cardboard or plastic sheets. Tape the stencil flat against your wall using painter’s tape at all edges.
Dab paint through the openings using a foam pouncer or stencil brush. Use very little paint on your brush. Lift the stencil straight up carefully to reveal clean shapes.
- Best Room: Home office and bedroom
- Total Time: 2 to 4 hours
- Approximate Budget: $20 to $35
- Materials Needed: Stencils (bought or homemade), Acrylic paint or wall paint, Foam pouncers or stencil brushes, Painter’s tape, Paper towels for blotting, Level for positioning, Pencil for marking placement, Small container for paint
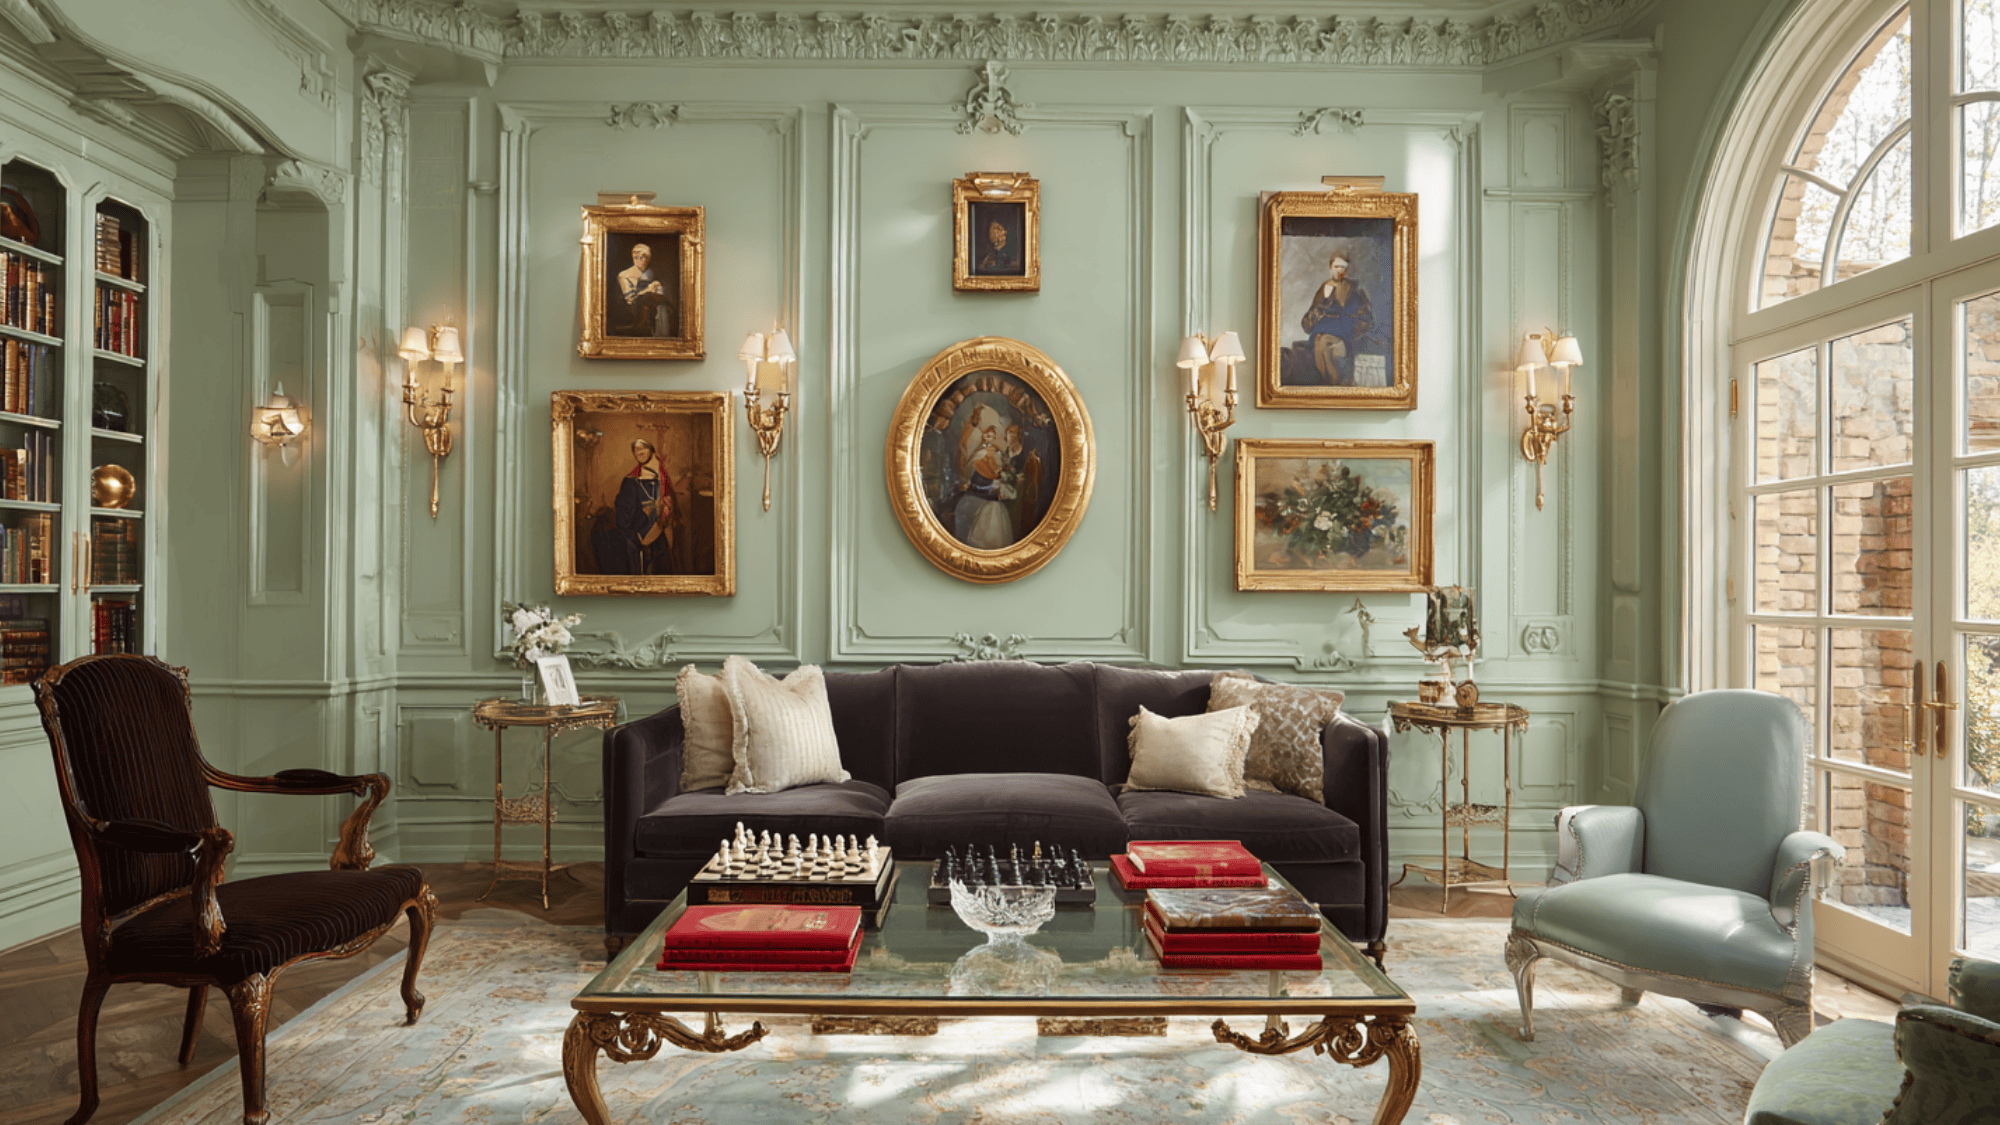
13. Gallery Walls
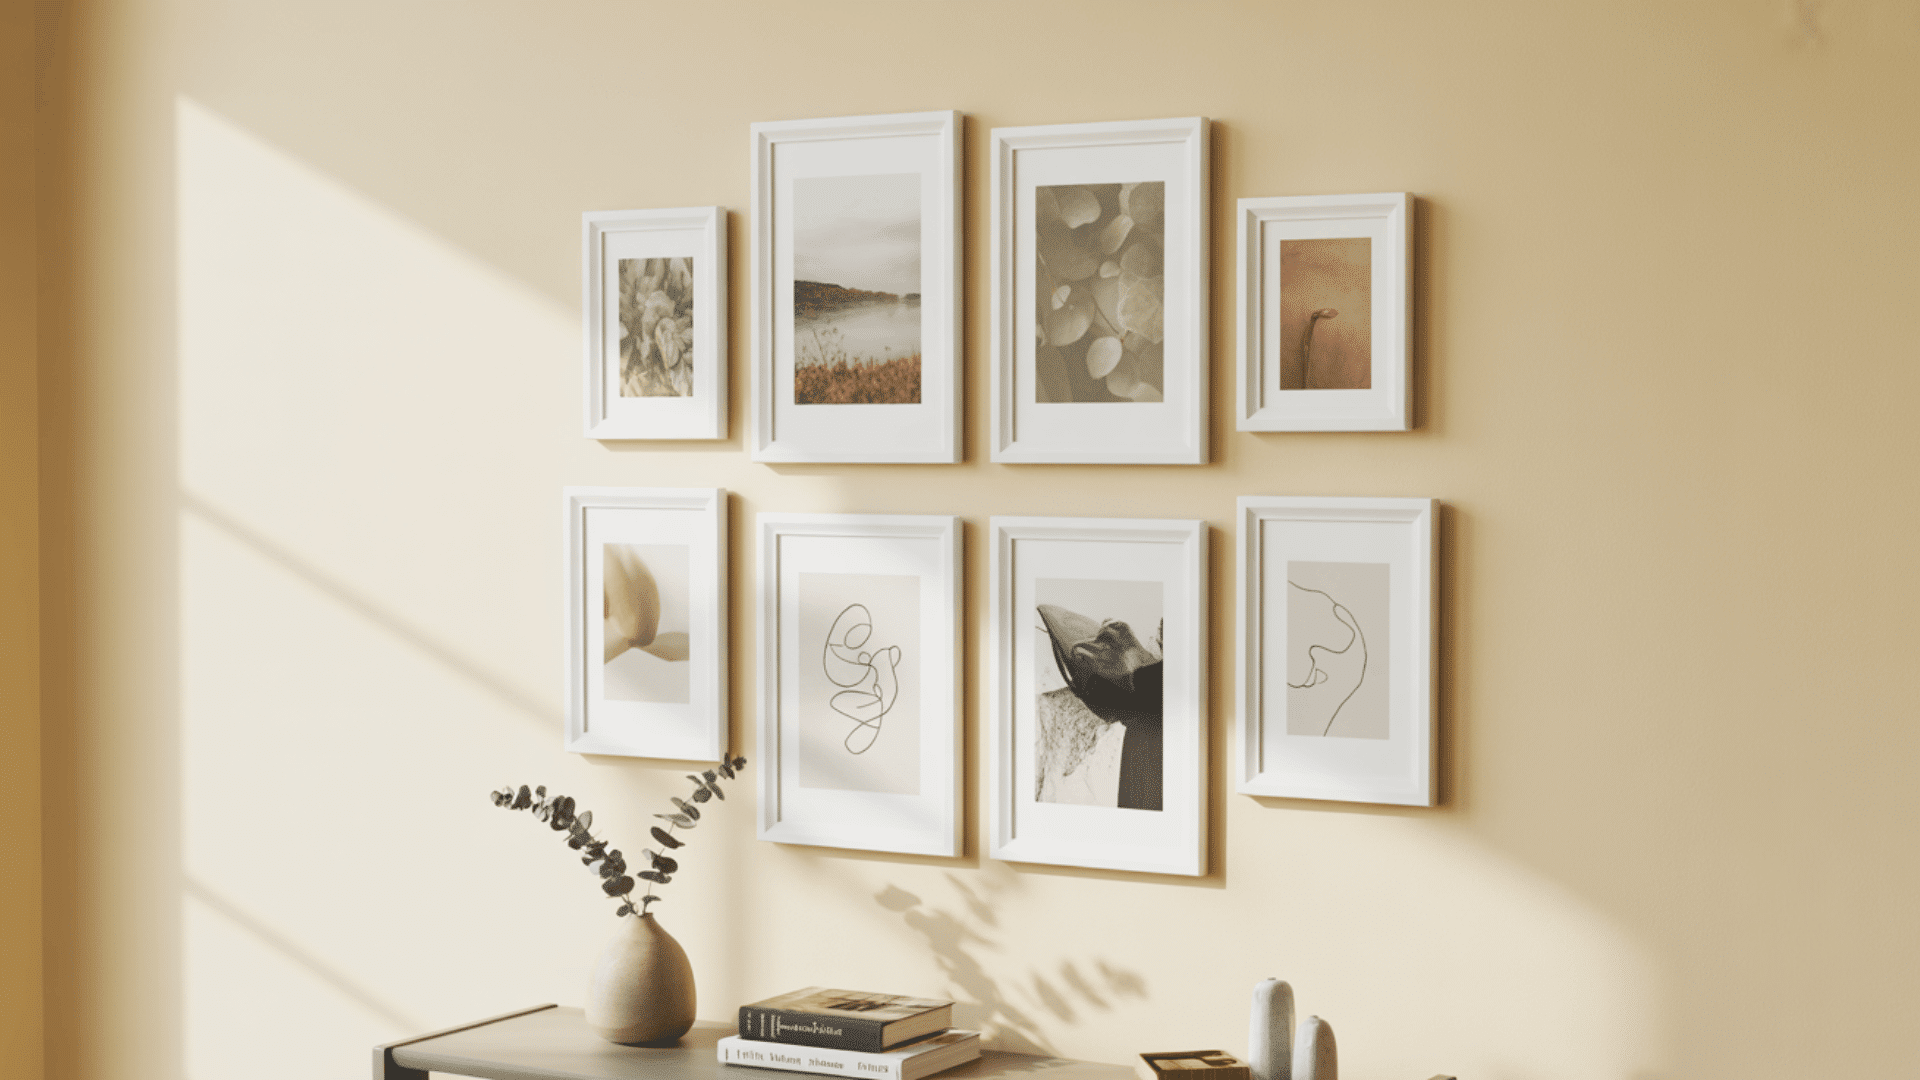
Arrange multiple frames in a cluster on one wall to create visual impact. Lay your arrangement on the floor first to test different configurations. Take a photo of your final floor layout to use as your hanging template.
- Best Room: Living room or hallway
- Total Time: 2 to 3 hours
- Approximate Budget: $30 to $60
- Materials Needed: Picture frames in various sizes (5-9 frames), Printed photos, Picture hanging hooks or nails, Level and measuring tape, Pencil for marking, Hammer, Paper templates (trace frames)
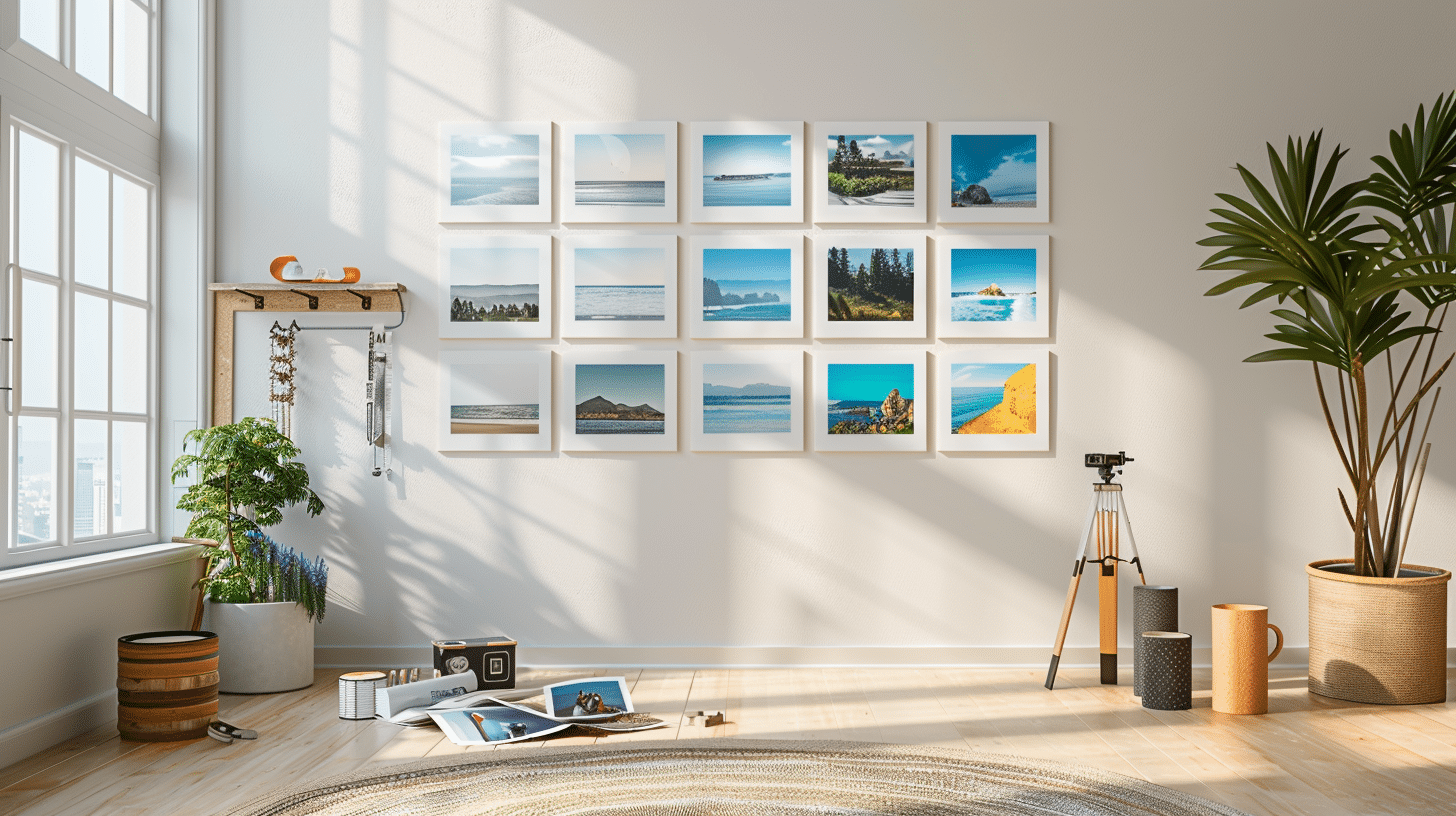
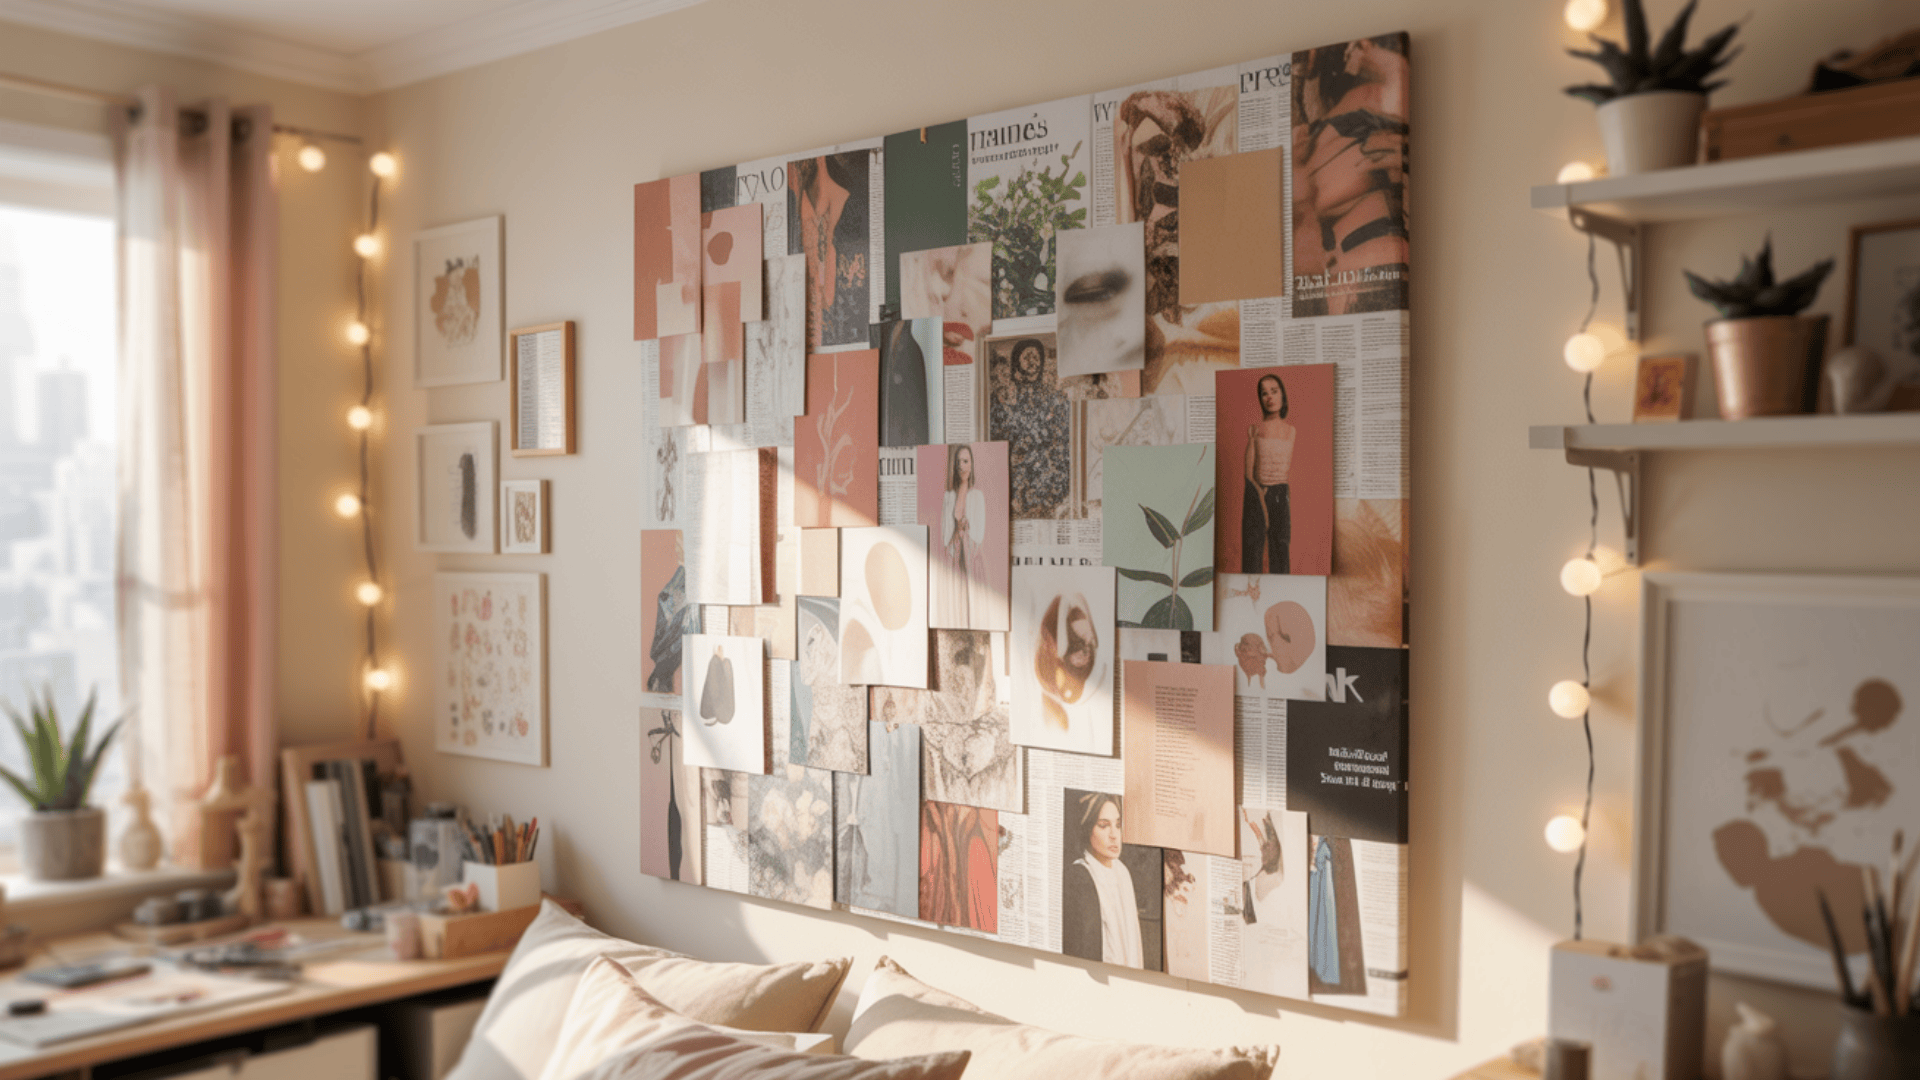
14. String Lights With Photos

Clip photos to fairy lights using mini clothespins for a whimsical display. Drape the lights across your wall in swoops, straight lines, or zigzag patterns. It adds both ambient light and decoration to your space.
- Best Room: Bedroom or dorm room
- Total Time: 30 to 45 minutes
- Approximate Budget: $15 to $25
- Materials Needed: String lights or fairy lights (10-20 feet), Mini wooden clothespins (20-30 pieces), Printed photos (4×6 or smaller), Command hooks for securing lights, Scissors, Batteries (if battery-powered lights)
15. Clipboards as Frames
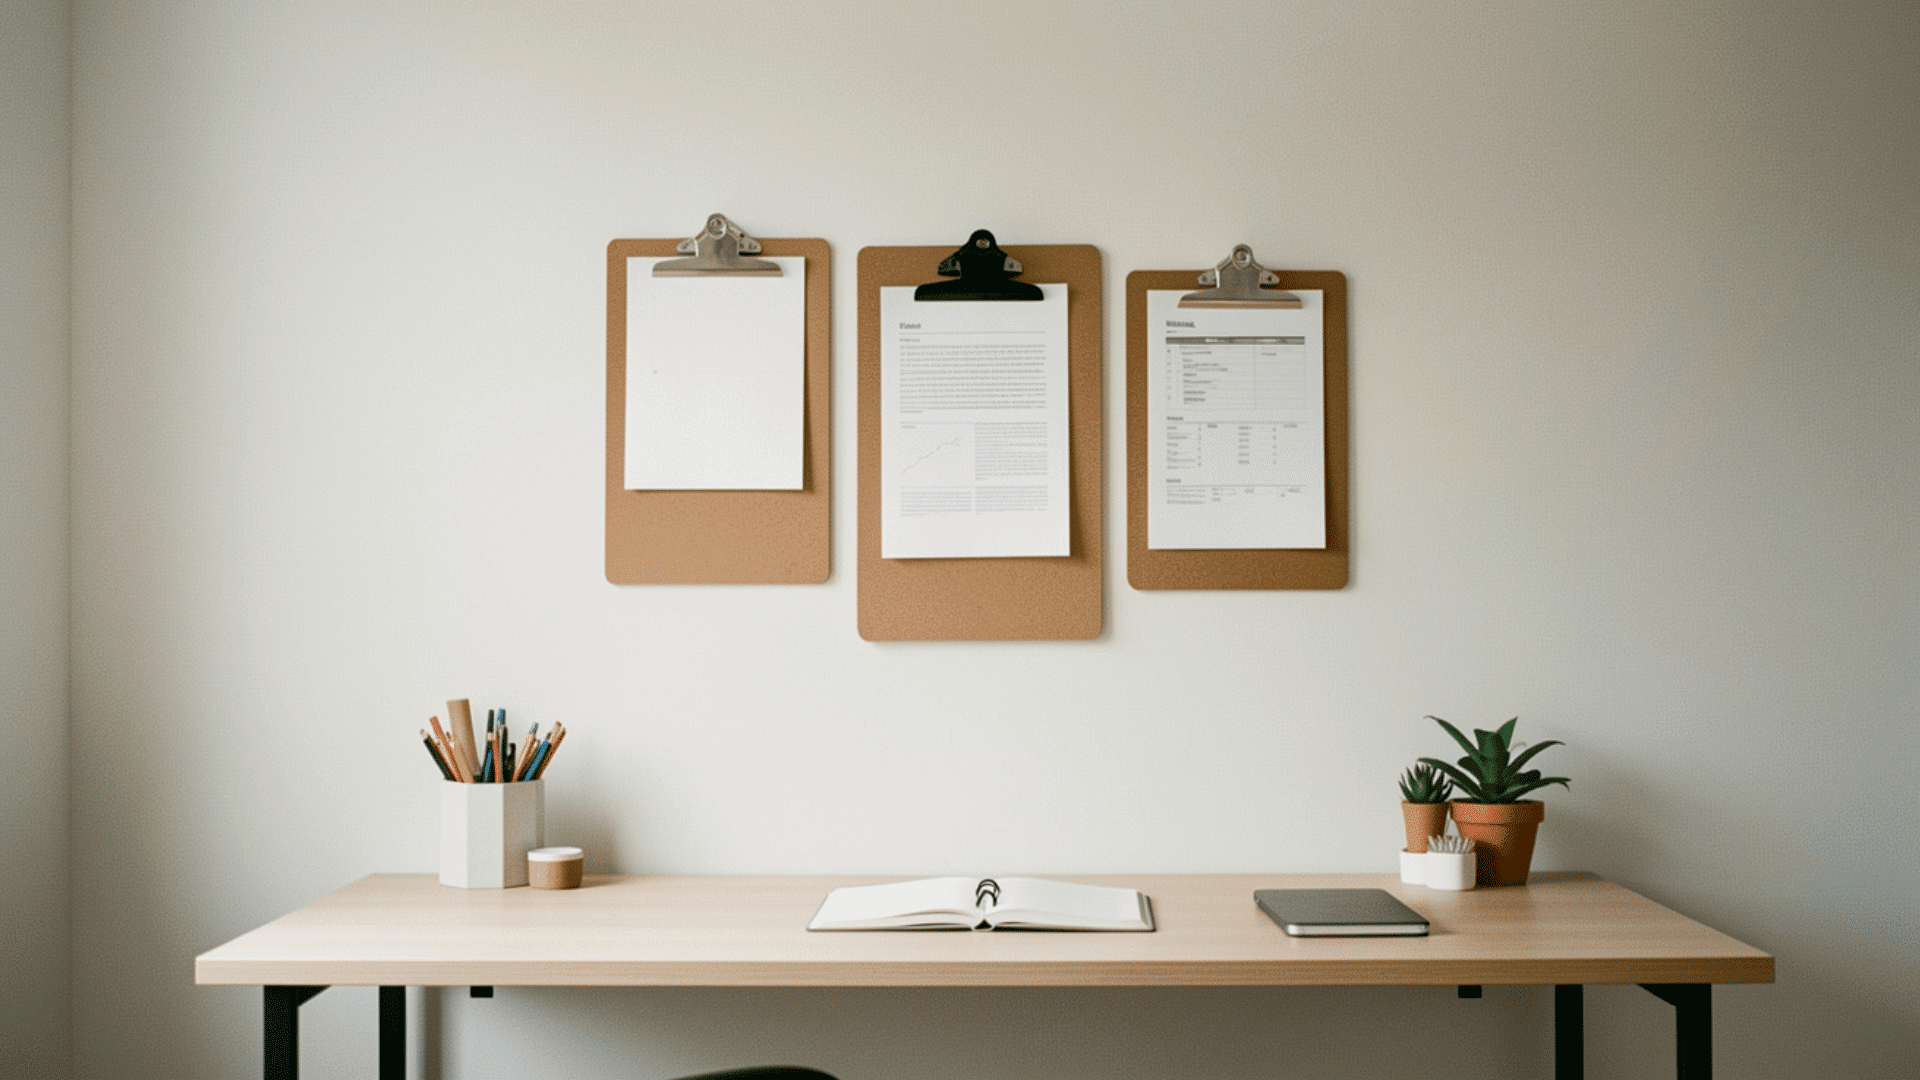
Hang clipboards on your wall at various heights to create an edgy, industrial look. Clip different photos to each board for instant rotation capability. Swap pictures whenever you want fresh content without any tools or hassle.
- Best Room: Home office or kids’ room
- Total Time: 45 minutes to 1 hour
- Approximate Budget: $12 to $20
- Materials Needed: Clipboards in various sizes (4-6 pieces), Printed photos, Command strips or small nails, Level for straight hanging, Pencil for marking spots, Measuring tape
16. Washi Tape Photo Grids
Use colorful washi tape to create a grid directly on your wall without damaging the wall. Tape photos inside each grid square using small loops of tape on the back. The removable method works perfectly for renters who need damage-free solutions.
- Best Room: Teen bedroom or dorm room
- Total Time: 1 to 2 hours
- Approximate Budget: $10 to $18
- Materials Needed: Washi tape in 2-3 complementary colors, printed photos (all the same size works best), Level and ruler, Pencil for light guidelines, Scissors, Removable adhesive dots (optional)
With these beginner-friendly wall decor ideas, you can build confidence while creating something beautiful for your home. Start small, have fun, and enjoy the satisfaction of changing your space with your own hands.
Intermediate DIY Wall Art Ideas
These intermediate projects challenge you with new materials and techniques while remaining totally doable. These projects take more time and planning but deliver impressive results.
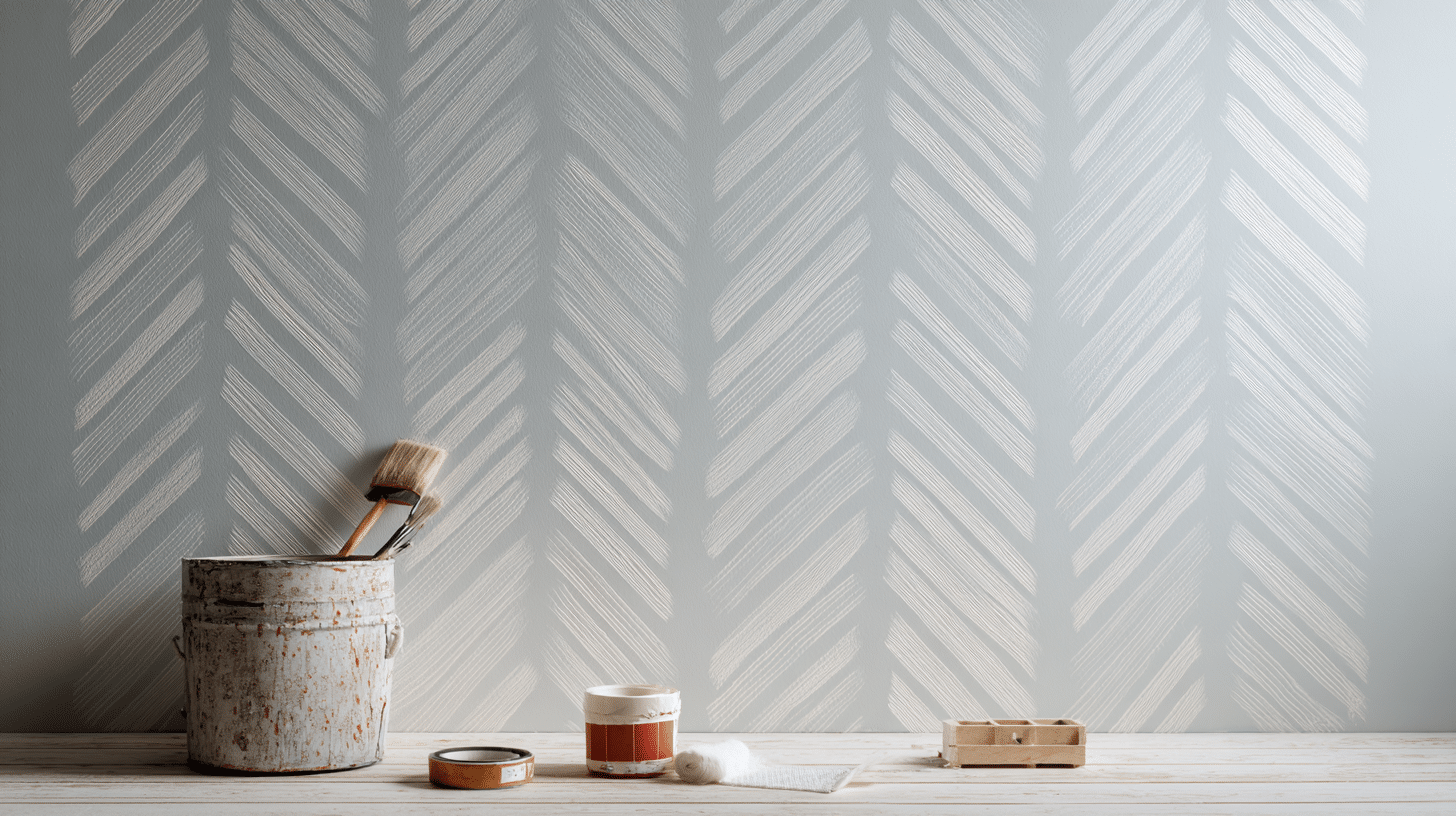
17. Pallet Wood Signs
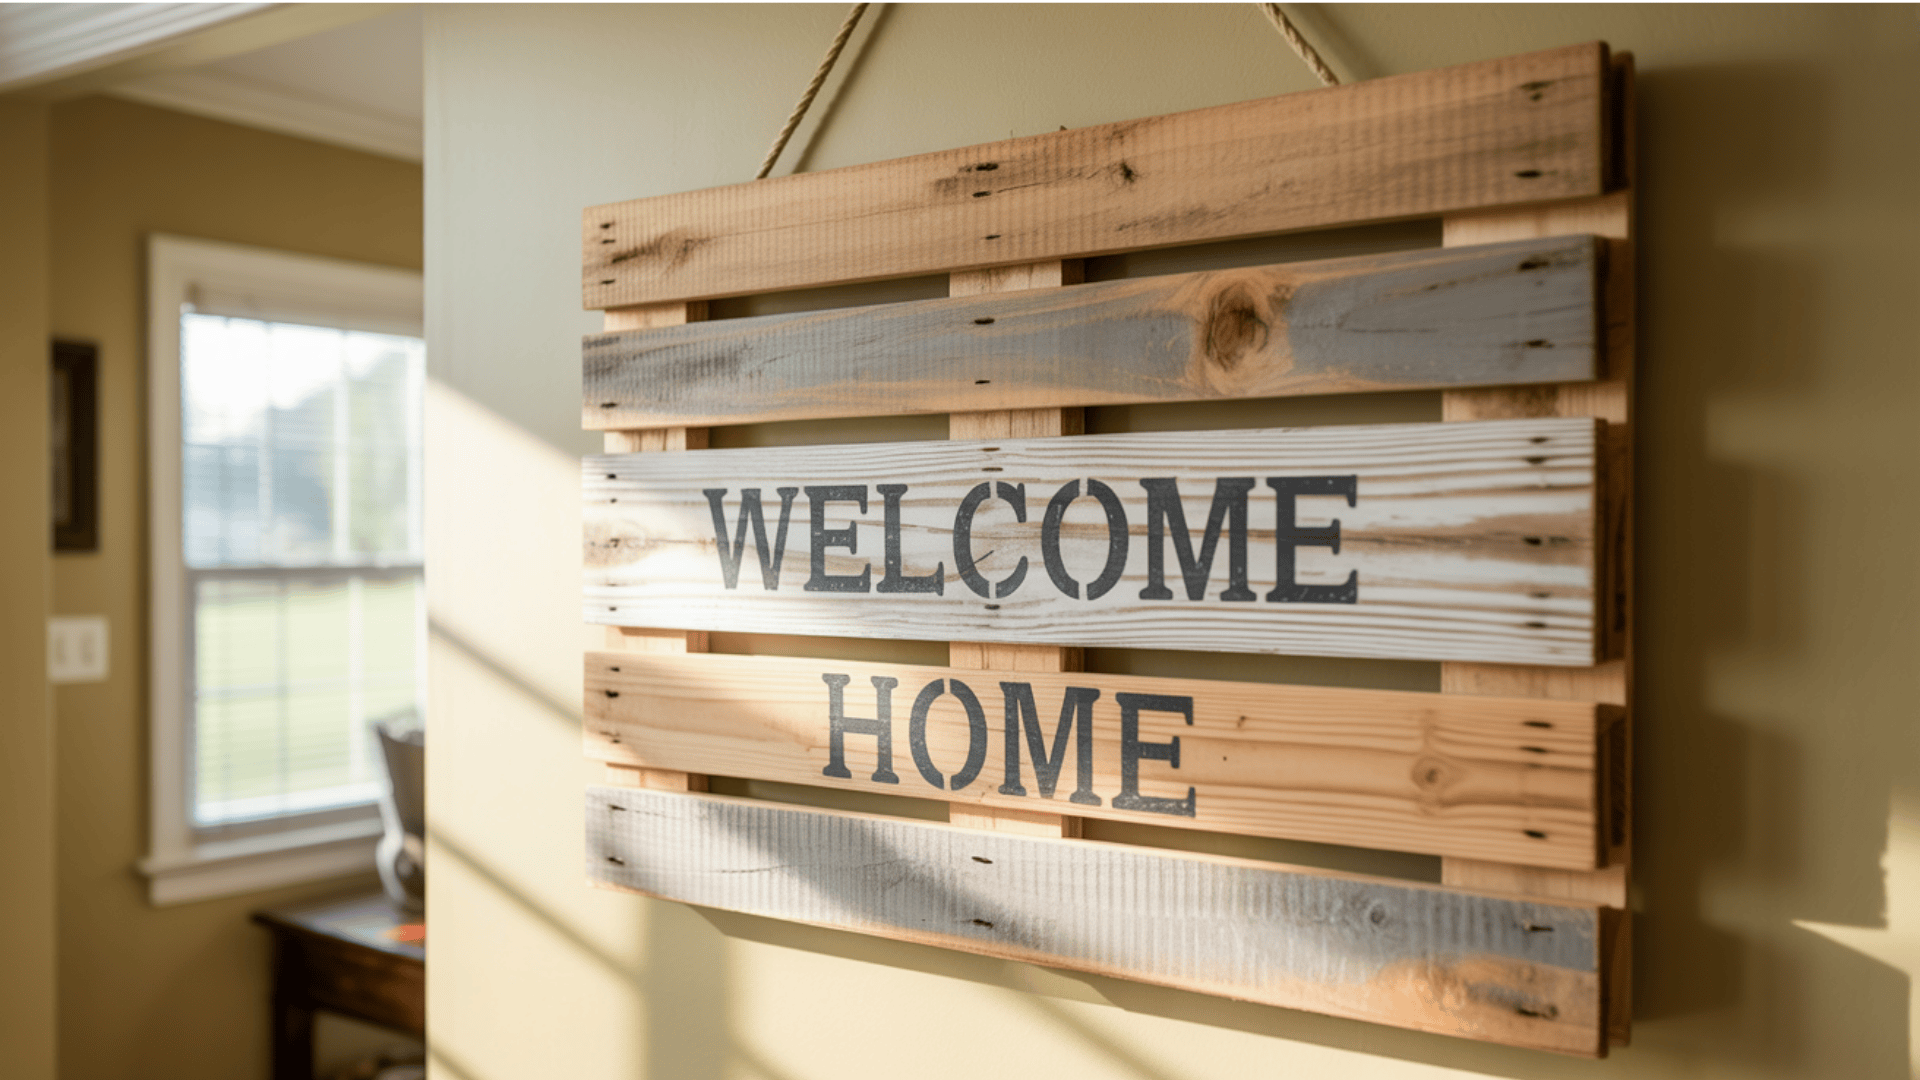
Disassemble pallets and sand the boards smooth to remove splinters. Arrange boards side by side on a flat surface and connect them with backing slats. Paint or stain your message directly onto the wood using stencils or freehand lettering.
- Best Room: Entryway or kitchen
- Total Time: 3 to 5 hours
- Approximate Budget: $10 to $25
- Materials Needed: Pallet wood boards (4-6 pieces), Sandpaper (medium and fine grit), Wood backing slats, Wood glue and trim nails, Paint or wood stain, Stencils or painter’s tape, Paintbrushes, Sawtooth hanger
18. Floating Shelves With Decor
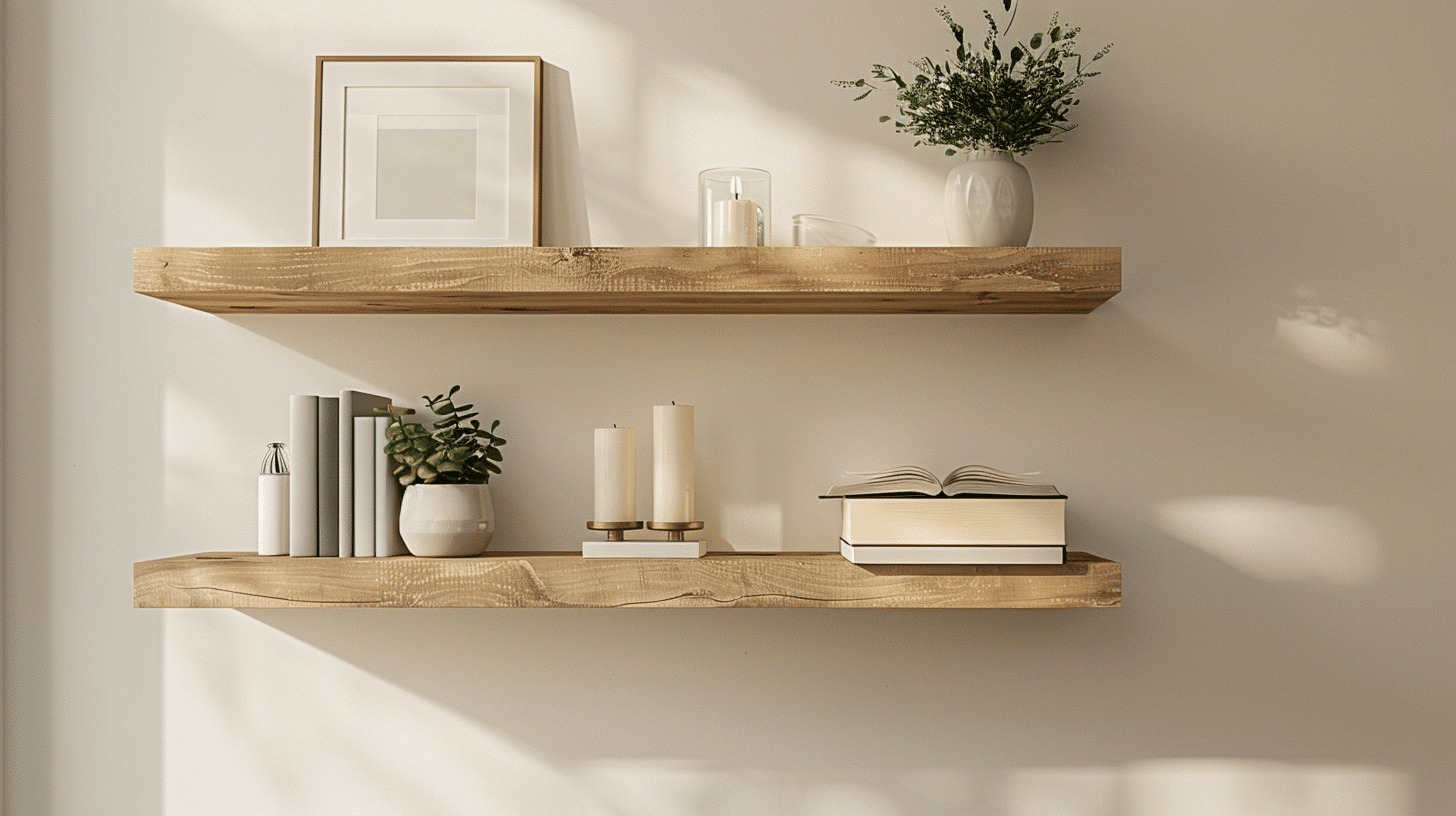
Cut wood boards to your desired length using a handsaw or have the hardware store cut them for you. Sand all edges smooth and stain or paint the wood.
Mount the floating shelf brackets to your wall studs for secure support. Style the shelves with small plants, books, candles, or framed photos to create functional wall art.
- Best Room: Living room or bathroom
- Total Time: 2 to 3 hours
- Approximate Budget: $25 to $45
- Materials Needed: Wood boards (1×6 or 1×8 inches), Floating shelf brackets, Wood stain or paint, Sandpaper, Level and stud finder, Screws and wall anchors, Drill with bits, Decorative items for styling
19. Geometric Wood Art
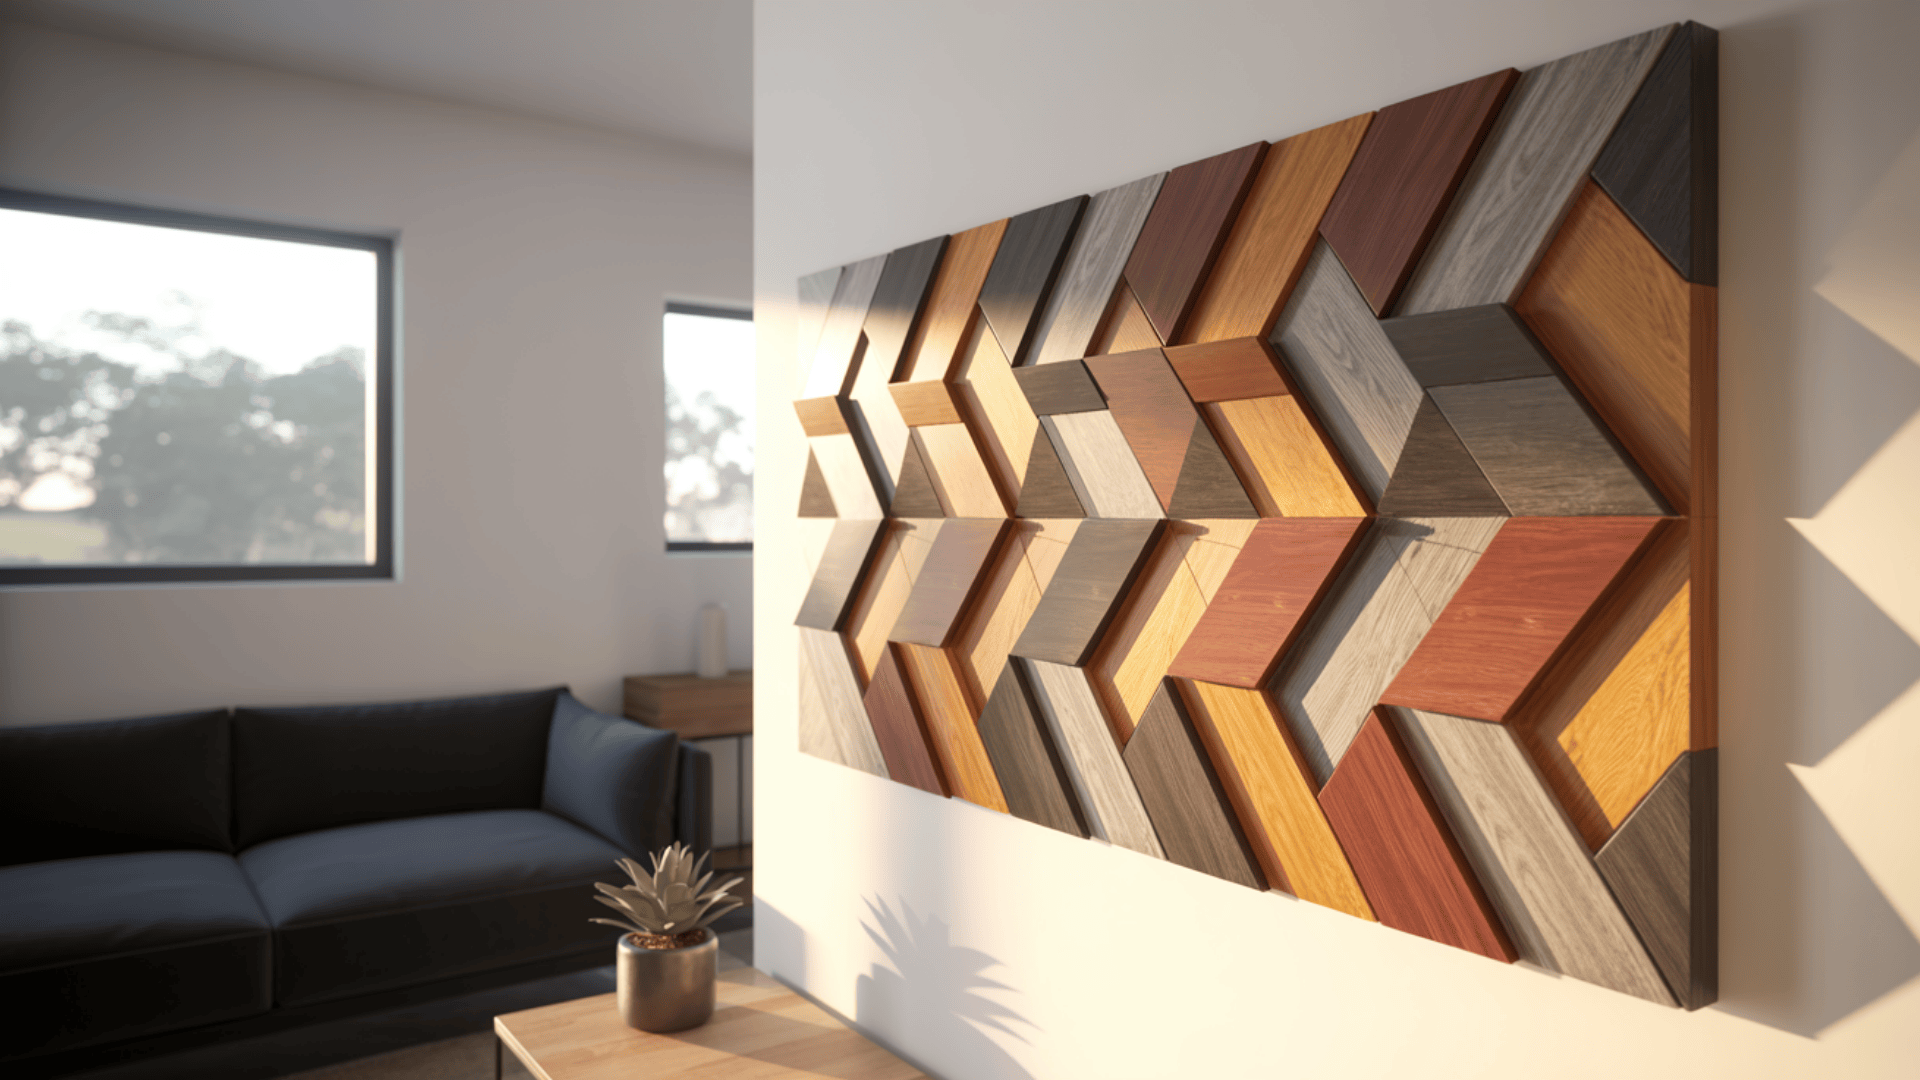
Cut wood strips into equal lengths to create triangle, hexagon, or chevron patterns. Arrange pieces in your chosen geometric design on a backing board.
Stain each piece in different shades or paint them in complementary colors. Glue the pieces down and let them dry completely before hanging.
- Best Room: Living room or home office
- Total Time: 4 to 6 hours
- Approximate Budget: $20 to $40
- Materials Needed: Wood strips or trim pieces, Plywood backing board, Wood stain in multiple shades, Wood glue, Miter saw or hand saw, measuring tape and pencil, Clamps for gluing, Sandpaper, and picture hanging hardware
20. Reclaimed Wood Installations
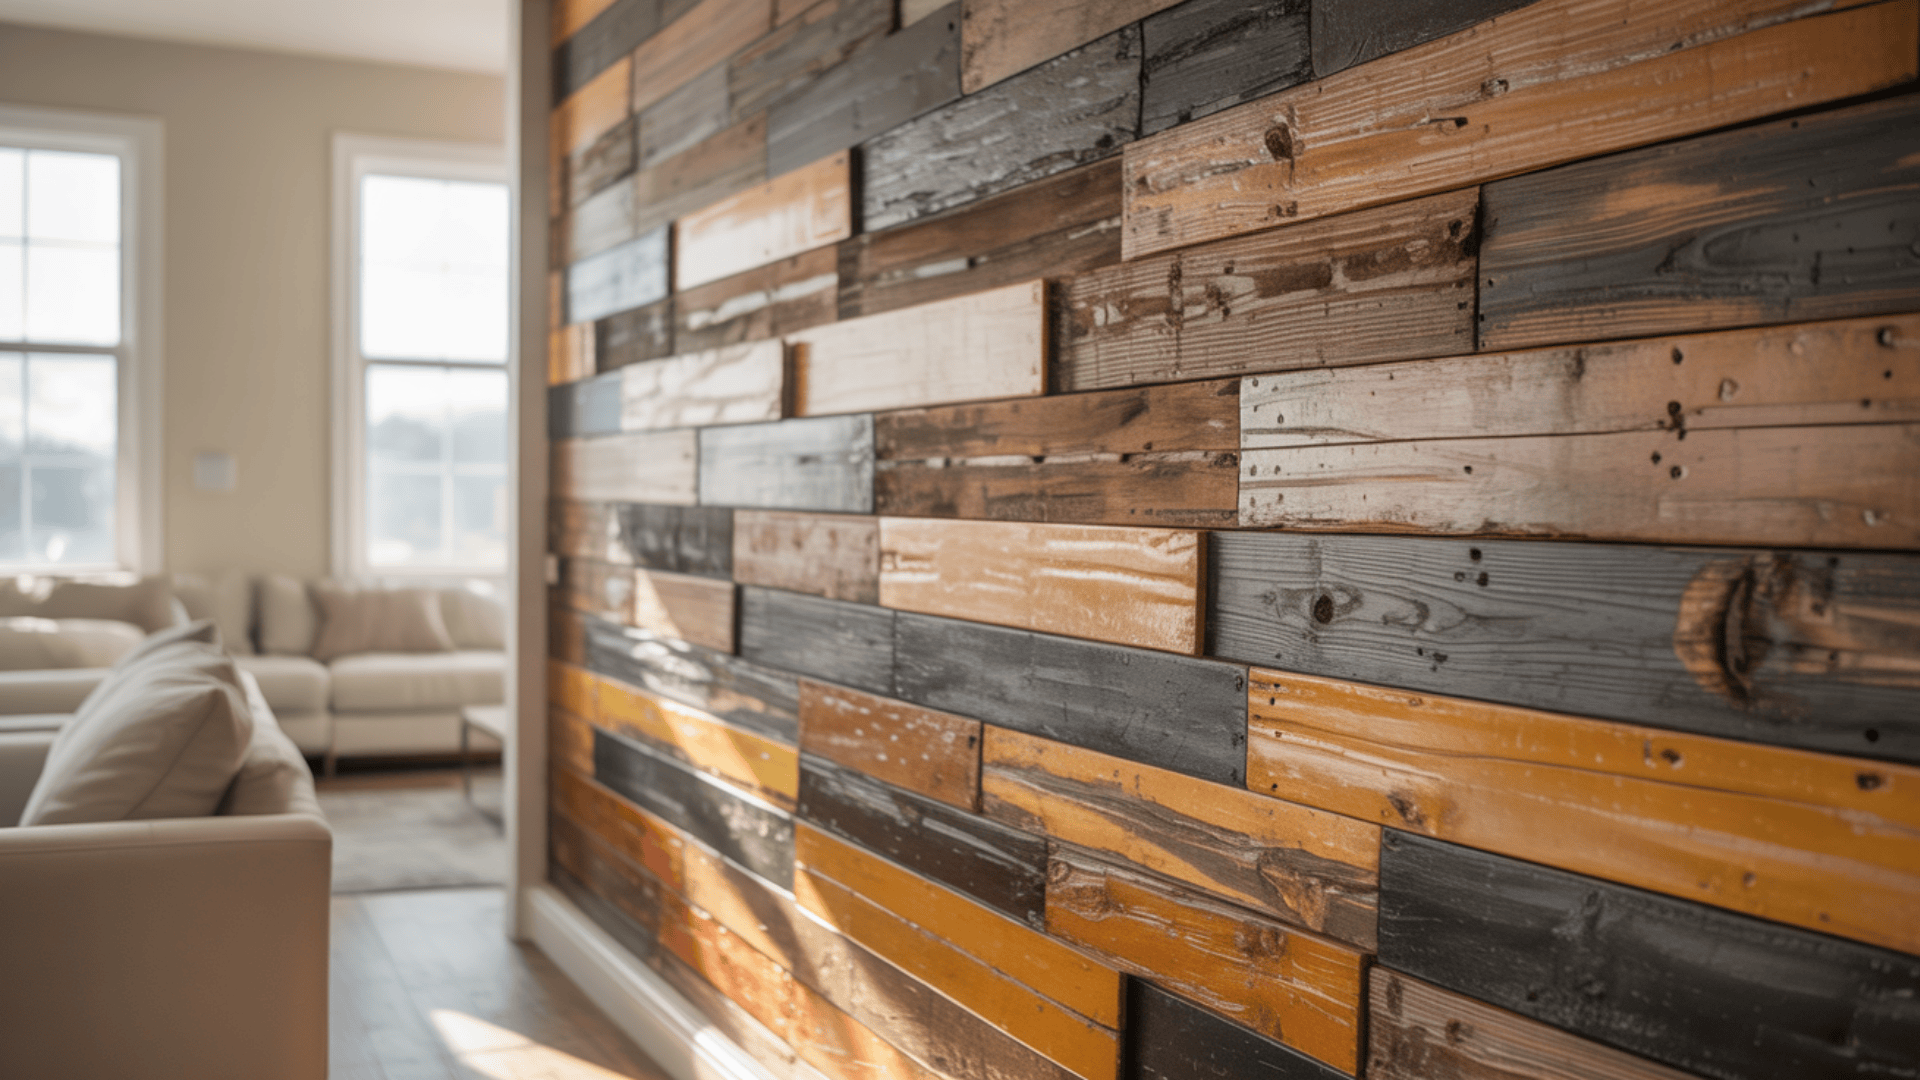
Collect weathered boards from old fences, barns, or demolished structures with permission. Clean the wood and remove any loose debris or nails.
Arrange boards horizontally, vertically, or in a herringbone pattern directly on your wall. Attach each board to wall studs using finishing nails or construction adhesive.
- Best Room: Living room or dining room
- Total Time: 6 to 10 hours
- Approximate Budget: $30 to $70 (primarily for adhesive and hardware)
- Materials Needed: Reclaimed wood boards (varied lengths), Construction adhesive, or finishing nails, Nail gun or hammer, Level and stud finder, Saw for cutting boards to fit, Sandpaper or a wire brush, Safety glasses and gloves, Measuring tape
21. Textured Canvas Art
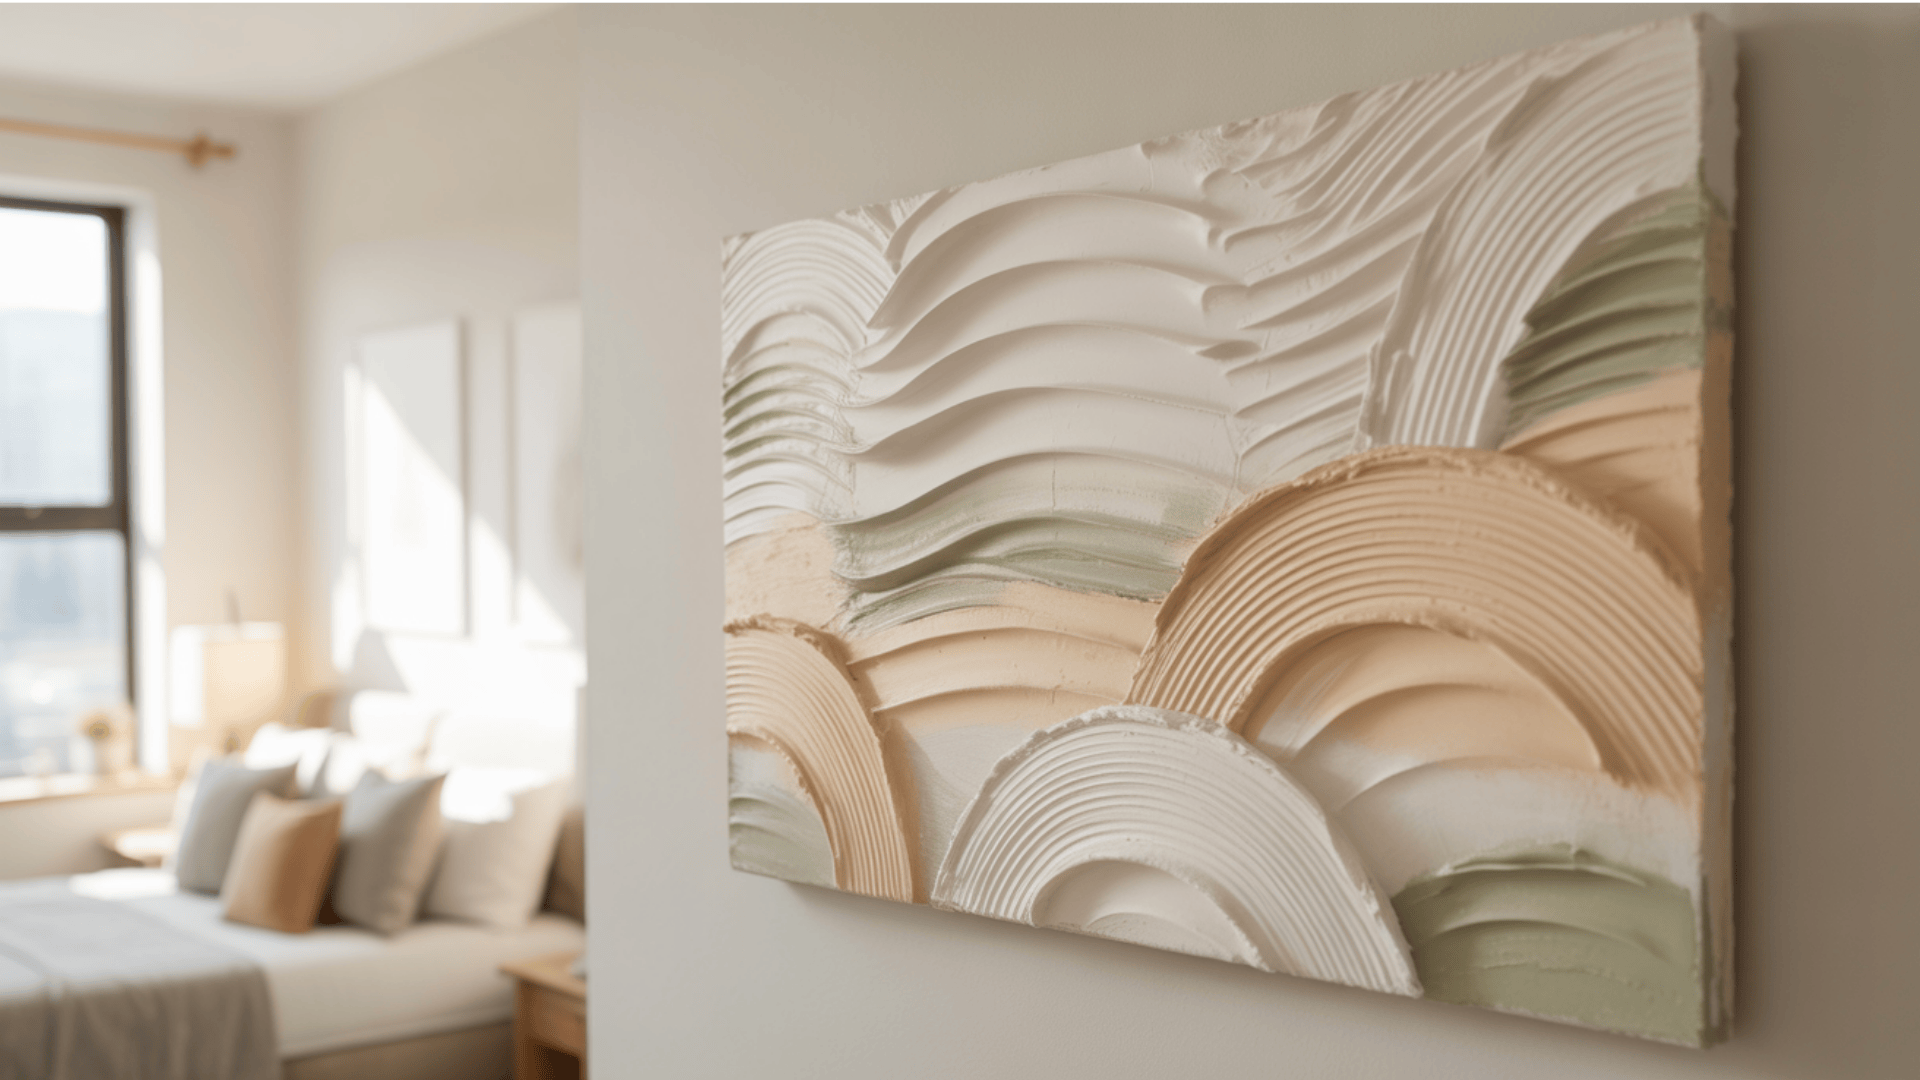
Apply modeling paste or joint compound to a canvas using a palette knife to create raised textures. Drag the knife in different directions to form peaks, waves, or geometric patterns.
Let the texture dry completely for 24 hours. Paint over the dried surface with acrylic paints in your chosen colors.
- Best Room: Bedroom or living room
- Total Time: 4 to 6 hours (plus drying time)
- Approximate Budget: $15 to $30
- Materials Needed: Stretched canvas (11×14 or 16×20 inches), Modeling paste or joint compound, Palette knife or old credit card, Acrylic paints in 3-4 colors, Paintbrushes, Spray sealer (optional), Drop cloth for workspace
22. Magazine Collages
Tear or cut images and text from old magazines in a color scheme that matches your room. Arrange pieces on a canvas or poster board in an overlapping pattern.
Glue each piece down with Mod Podge or diluted white glue. Seal the finished collage with clear acrylic sealer to protect it from dust and fading.
- Best Room: Teen bedroom or craft room
- Total Time: 3 to 5 hours
- Approximate Budget: $8 to $18
- Materials Needed: Old magazines (8-10 issues), Canvas board or heavy cardstock, Mod Podge or white glue, Foam brush for applying glue, Scissors, Clear acrylic sealer spray, Newspaper to protect the workplace
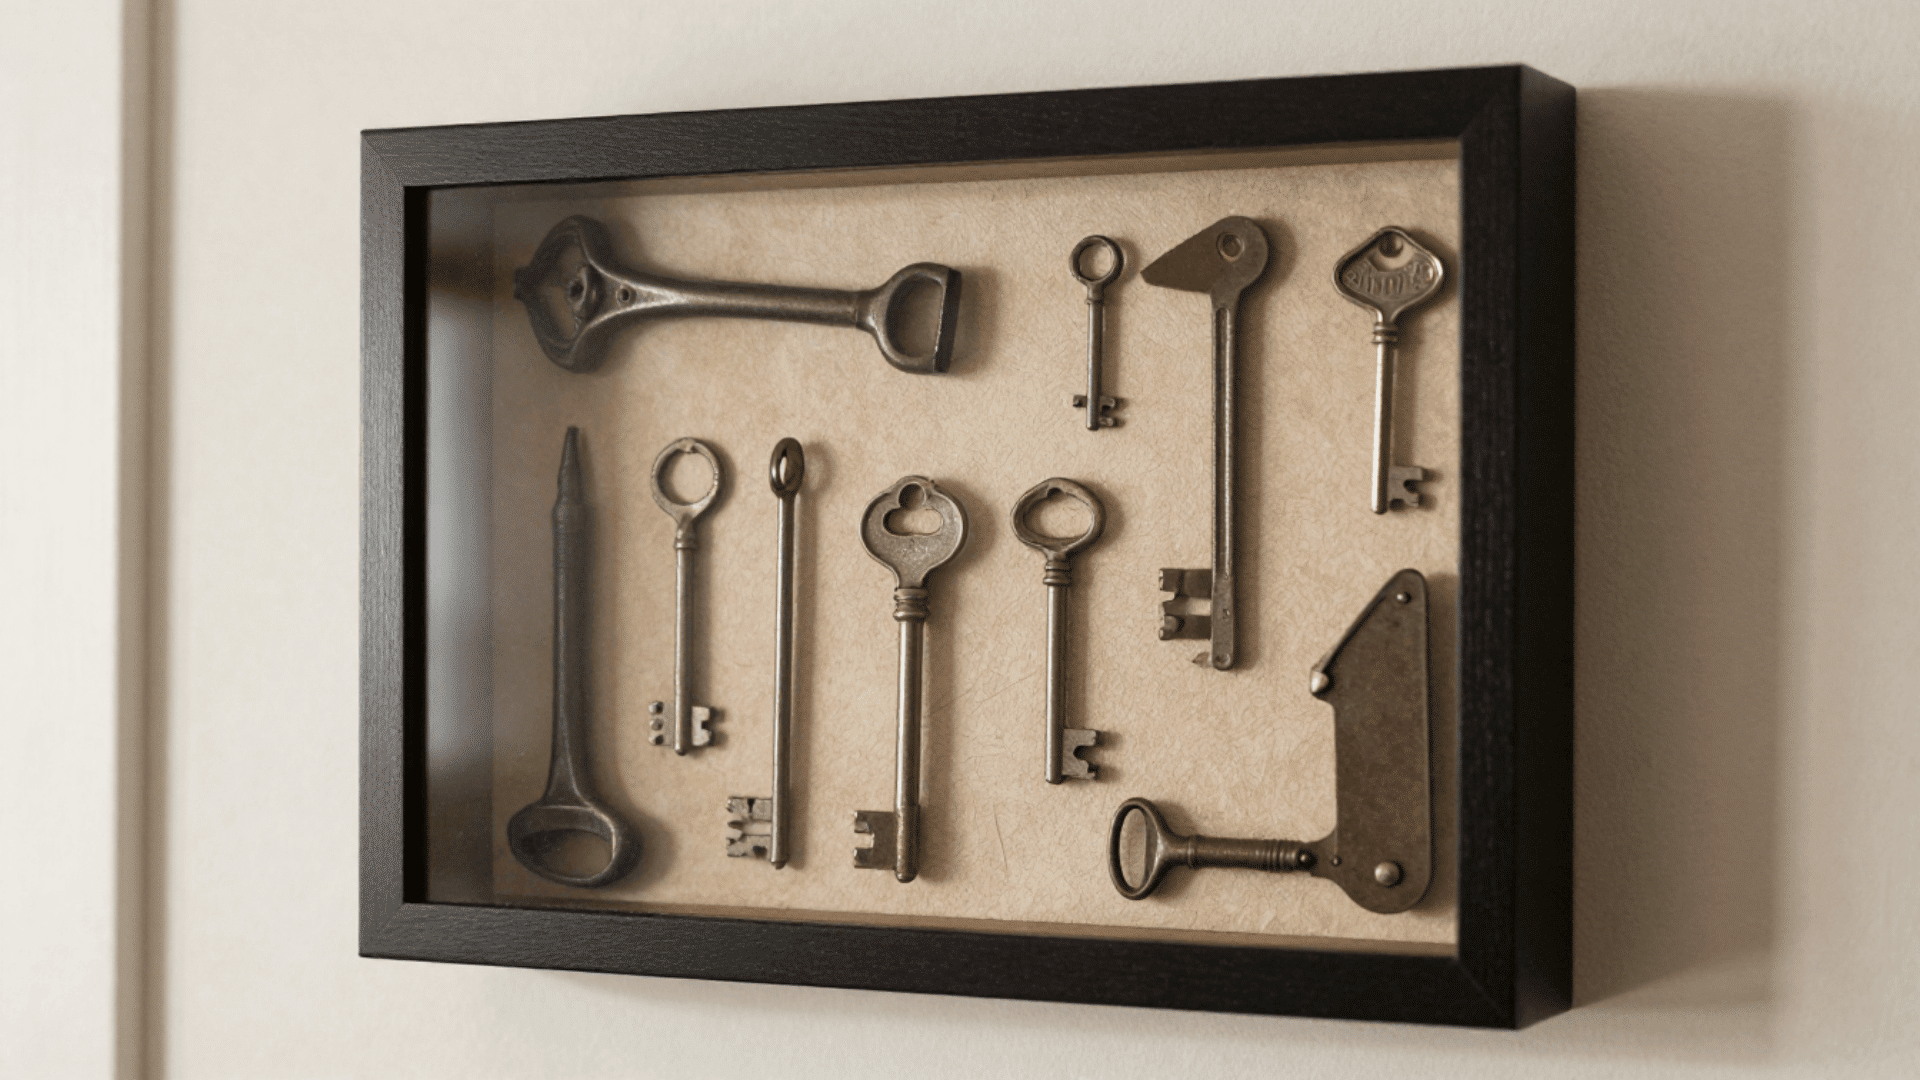
23. Shadow Boxes
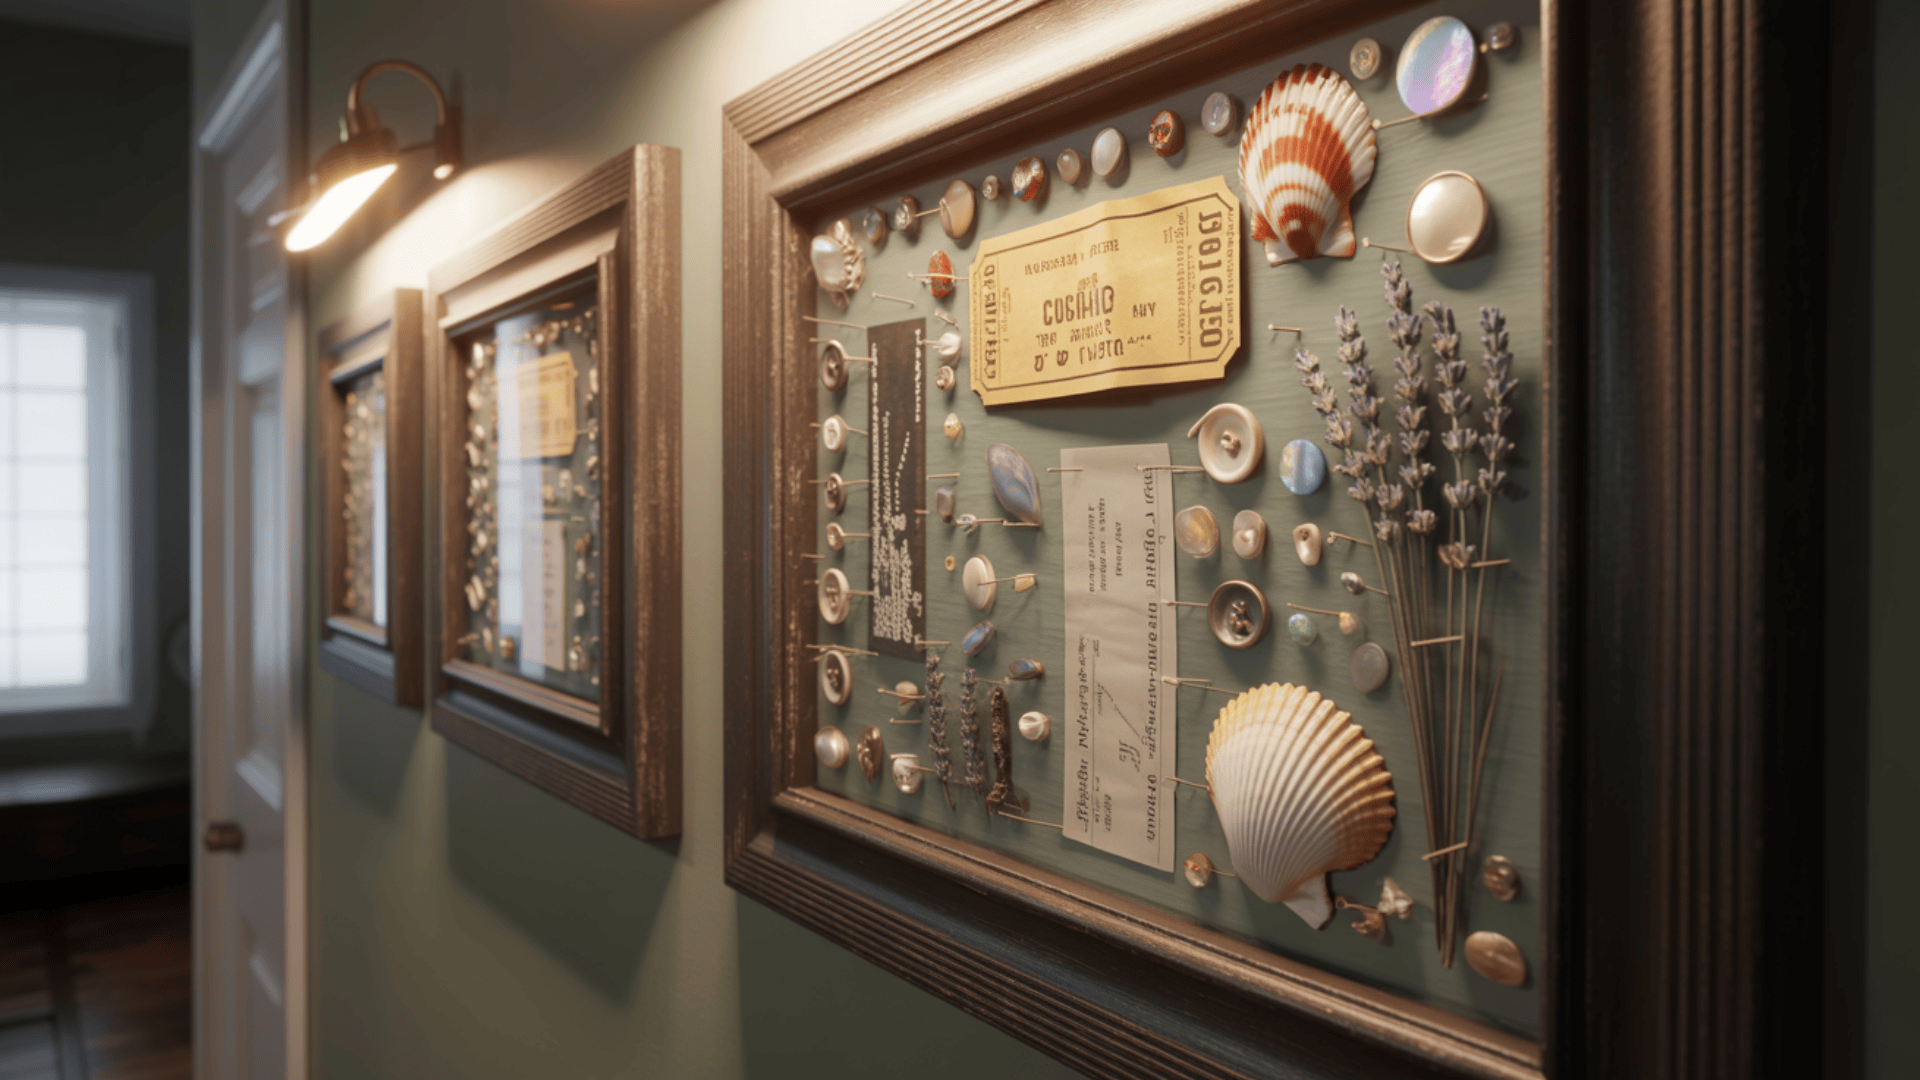
Choose a shadow box frame with a depth of at least 2 inches. Paint or cover the back panel with decorative paper. Attach items using hot glue, pins, or small wire.
Objects can include ticket stubs, seashells, small toys, dried flowers, or vintage buttons. Close the glass front and hang your three-dimensional memory keeper.
- Best Room: Hallway or home office
- Total Time: 2 to 4 hours
- Approximate Budget: $20 to $35
- Materials Needed: Shadow box frame (8×10 or larger), Small collected objects, Hot glue gun and glue sticks, Decorative paper or paint for backing, Small pins or wire, Scissors, Tweezers for placing tiny items
24. Three-Dimensional Installations
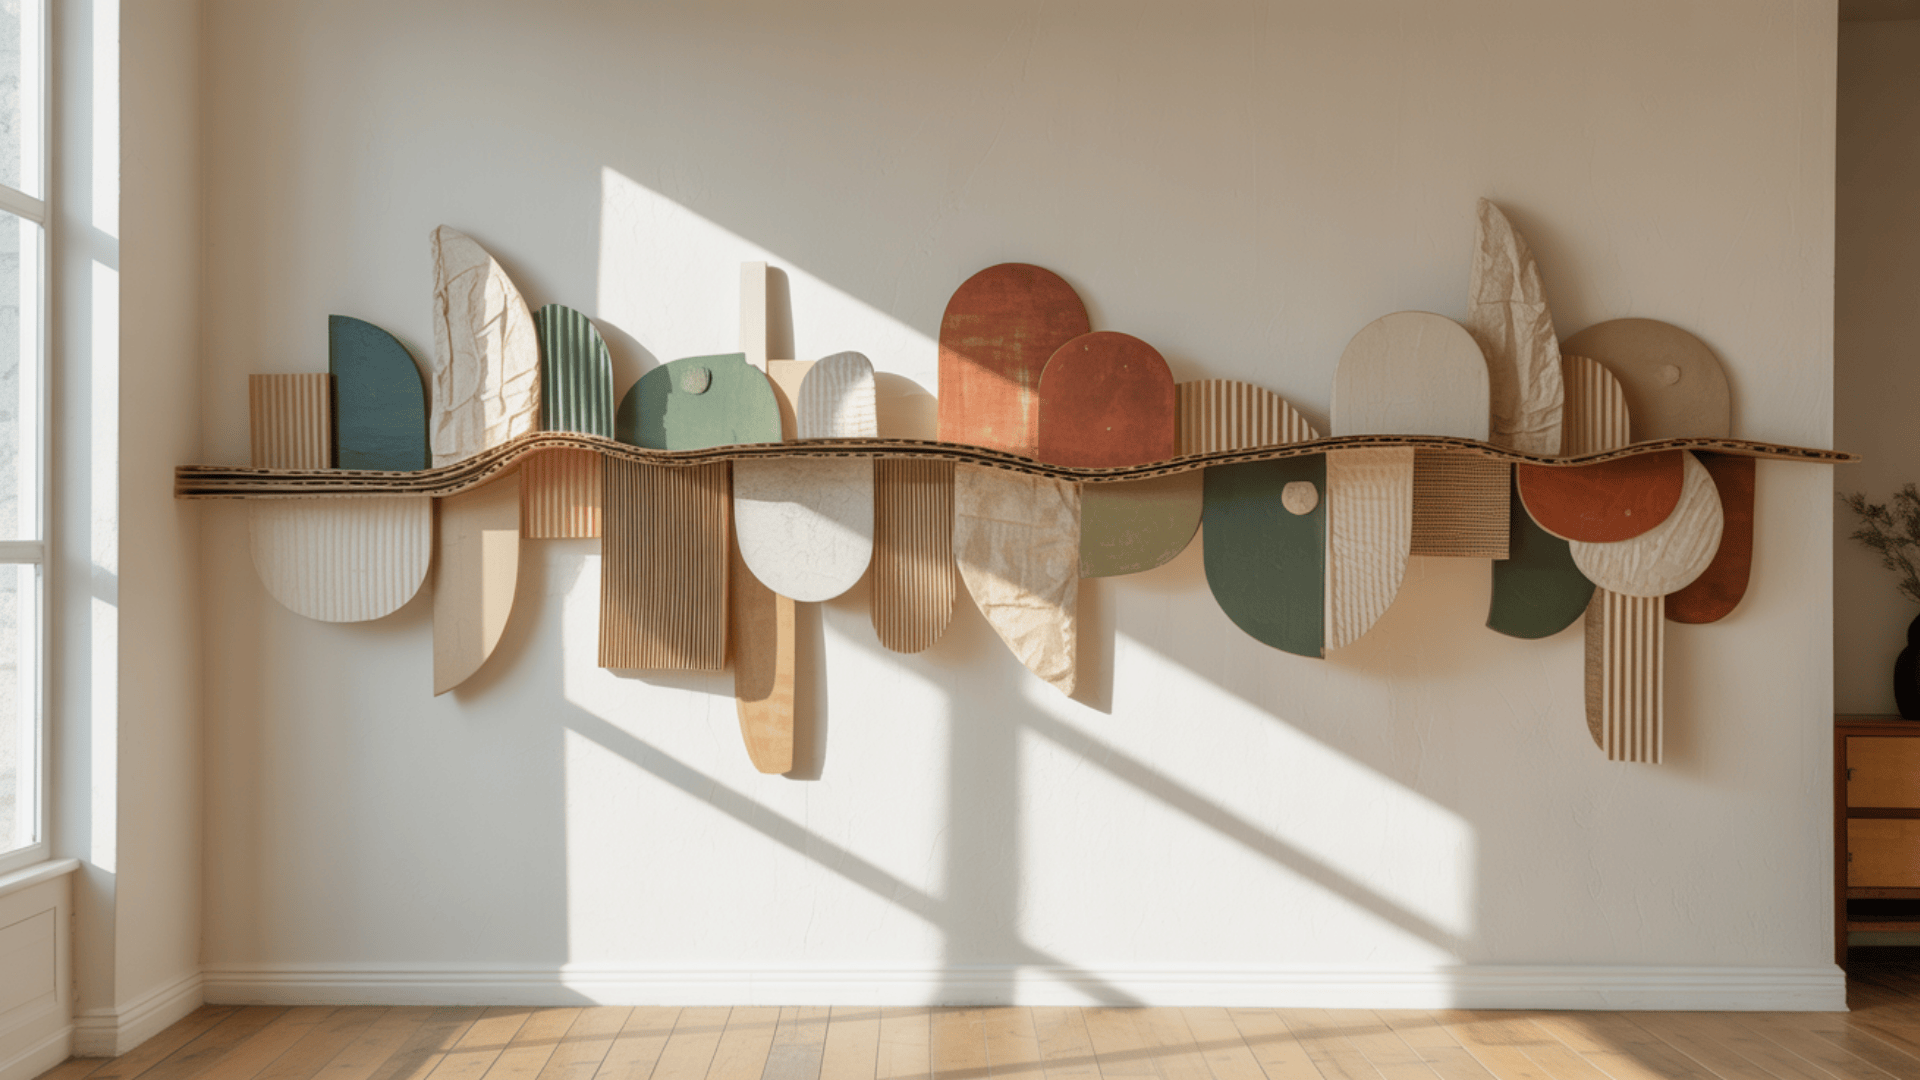
Create art that extends off the wall using lightweight objects mounted at different depths. Cut shapes from cardboard or foam board and cover them with fabric, paper, or paint.
Attach objects to a backing board using foam mounting squares that create spacing. Mount the entire piece on your wall using sturdy picture hangers.
- Best Room: Living room or entryway
- Total Time: 5 to 8 hours
- Approximate Budget: $25 to $45
- Materials Needed: Foam board or heavy cardboard, Assorted craft materials (fabric, paper, wire), Foam mounting squares in various thicknesses, Hot glue gun, Acrylic paints, Scissors and craft knife, Strong picture hanging hardware, ruler, and pencil
25. Custom Wall Decals
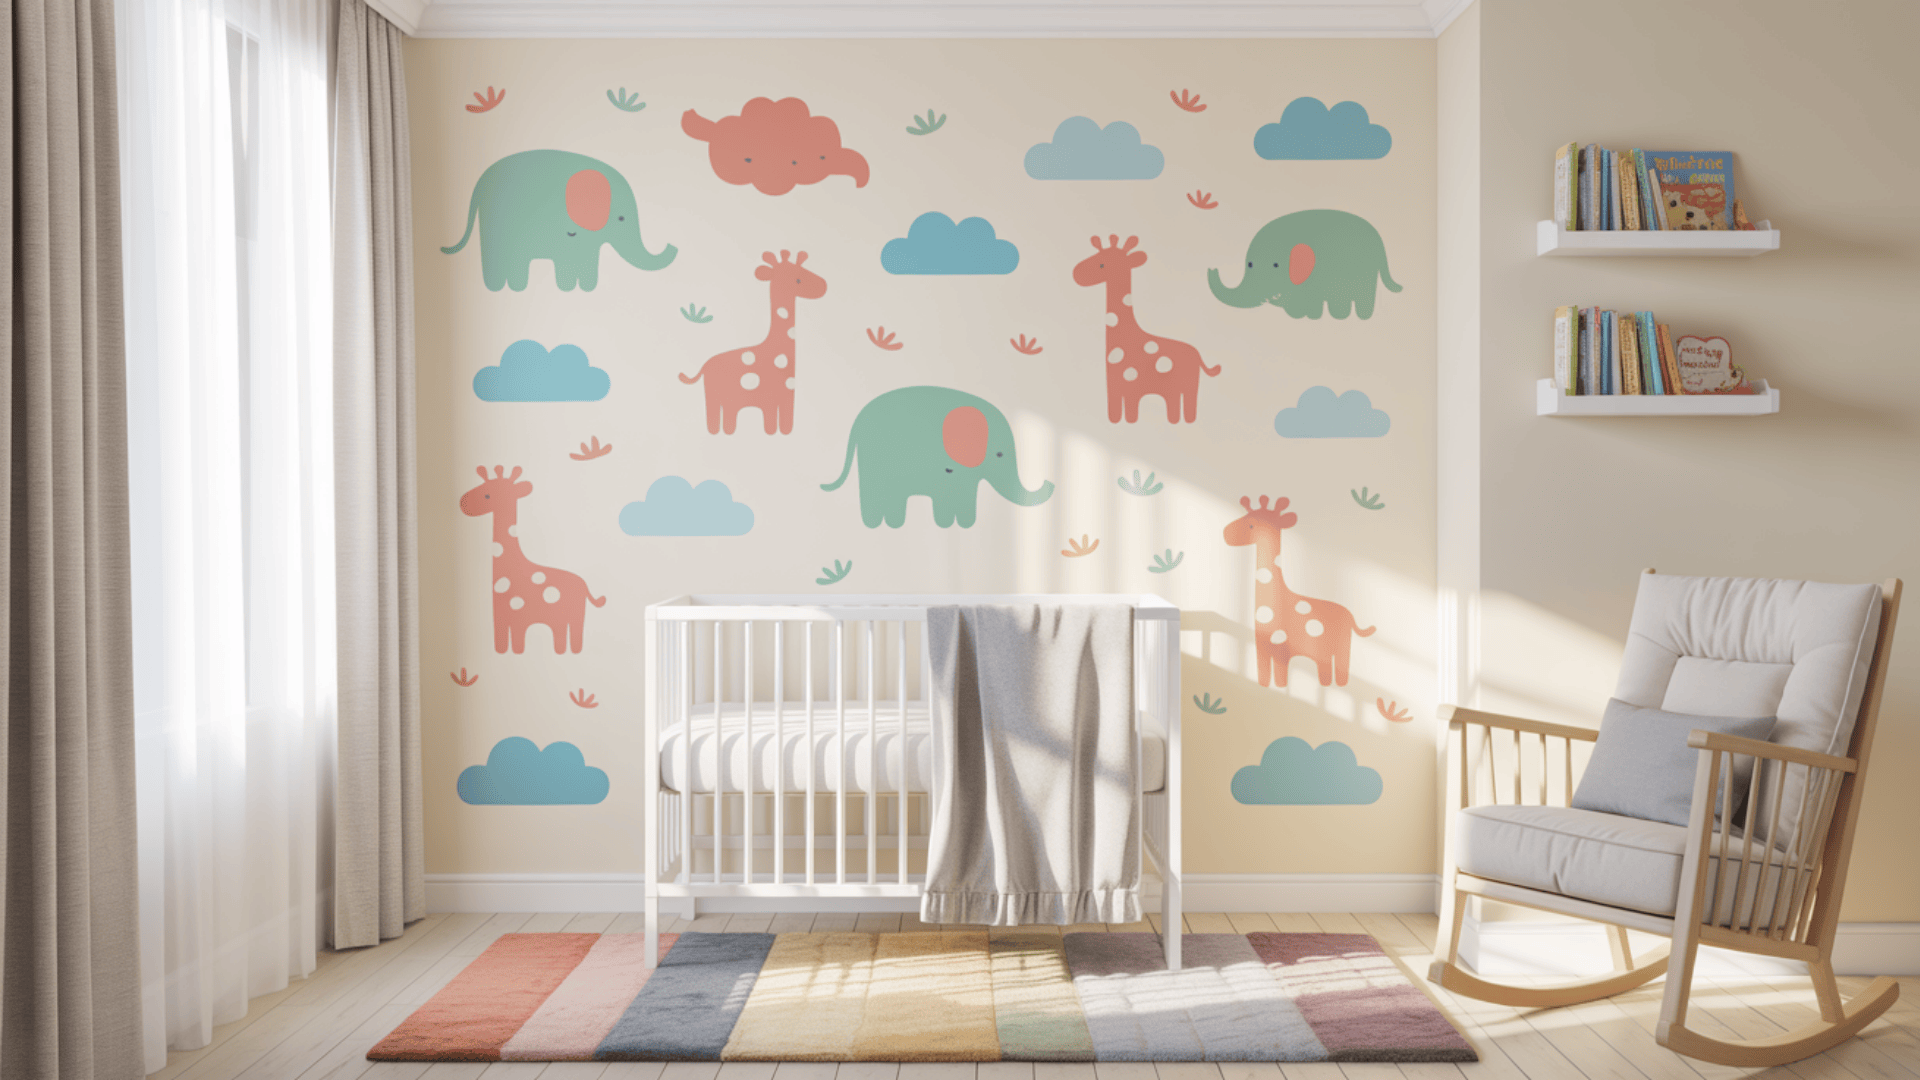
Purchase pre-cut vinyl decals online or from craft stores in thousands of designs. Clean your wall with rubbing alcohol to remove dust and oils.
Use a credit card to smooth out air bubbles by pushing from the center outward. Remove the transfer tape carefully at a sharp angle, leaving only the decal on your wall.
- Best Room: Nursery or kids’ room
- Total Time: 30 minutes to 1 hour
- Approximate Budget: $10 to $30
- Materials Needed: Vinyl wall decals in a chosen design, rubbing alcohol and a clean cloth, Credit card or squeegee, Level and measuring tape, Pencil for light marking, Scissors (if trimming needed)
26. Vinyl Lettering Quotes

Order custom vinyl lettering cut to your specifications or buy pre-made quote decals. Plan your layout on the wall using painter’s tape to mark letter positions. Apply each word or letter individually, keeping spacing consistent.
- Best Room: Home office or hallway
- Total Time: 1 to 2 hours
- Approximate Budget: $15 to $35
- Materials Needed: Vinyl lettering decals, Level and ruler, Painter’s tape for planning, Rubbing alcohol for cleaning, Application squeegee or credit card, Pencil for guidelines, Helper for large installations
27. Removable Wallpaper Accents
Measure your wall section and add 2 inches to all sides for trimming. Clean the wall surface thoroughly and let it dry completely. Peel back 6 inches of backing paper and align the wallpaper at the top corner.
Use a smoothing tool to push out bubbles as you work downward. Trim excess paper from the edges using a sharp craft knife and a straightedge.
- Best Room: Bedroom or powder room
- Total Time: 2 to 4 hours per wall
- Approximate Budget: $30 to $60 per wall section
- Materials Needed: Peel-and-stick removable wallpaper, measuring tape and level, Sharp craft knife or scissors, smoothing tool or credit card, Straightedge ruler, Clean cloth and rubbing alcohol, Step stool or ladder
With these intermediate diy wall decor ideas, you can add depth, texture, and personality to your space without hiring a professional. Take your time, enjoy the process, and don’t be afraid to experiment. This is where DIY truly shines.
Advanced DIY Wall Art Ideas for Creative Enthusiasts
These advanced DIY wall decor ideas push your creativity to new heights with large-scale installations and unconventional materials. These projects take multiple days and require real skill, but the payoff is enormous.
28. Oversized Canvas Art
Stretch canvas over wooden frames that measure 4 feet by 6 feet or larger. Prime the canvas with gesso if it doesn’t come pre-primed.
Paint abstract designs using wide brushes or rollers for broad color blocks. You can also create geometric patterns using painter’s tape to section off areas.
- Best Room: Living room or dining room
- Total Time: 8 to 12 hours (spread over multiple days for drying)
- Approximate Budget: $60 to $120
- Materials Needed: Large stretched canvas or canvas roll with stretcher bars, Gesso primer, Acrylic paints in various colors, Large brushes and foam rollers, Painter’s tape for patterns, Drop cloths, Palette or paint trays, Heavy-duty picture hanging hardware
29. Wall Murals
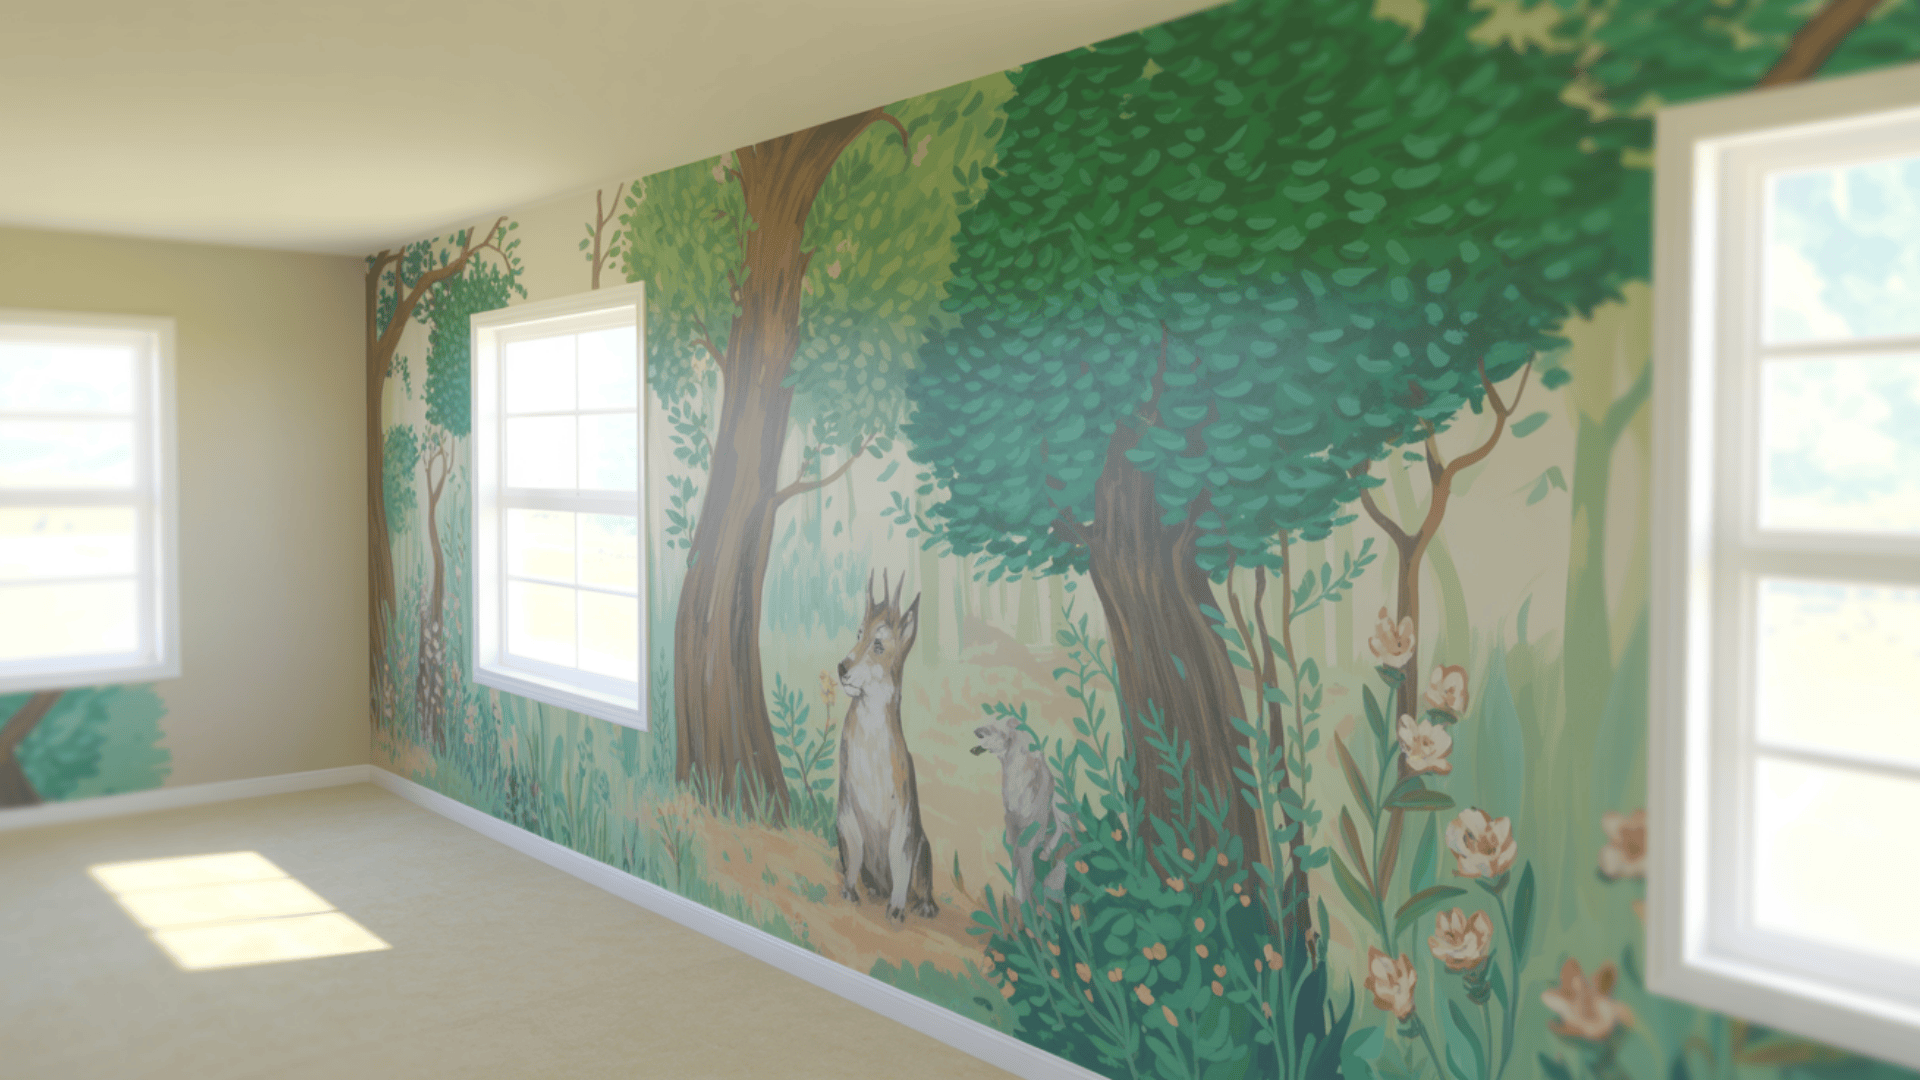
Sketch your design on paper first to plan the composition and colors. Use a projector to trace your design onto the wall at full scale.
Fill in sections with acrylic or latex paint using brushes appropriate to the level of detail. Seal finished murals with clear matte varnish to protect from smudges and fading.
- Best Room: Kids’ room or living room
- Total Time: 15 to 30 hours (depending on complexity)
- Approximate Budget: $50 to $150
- Materials Needed: Latex or acrylic paints in the needed colors, Various paintbrush sizes, A projector for transferring the design, Pencils and erasers, Paint trays and rollers, drop cloths and painter’s tape, a step ladder, and clear matte varnish spray
30. Molding or Paneling
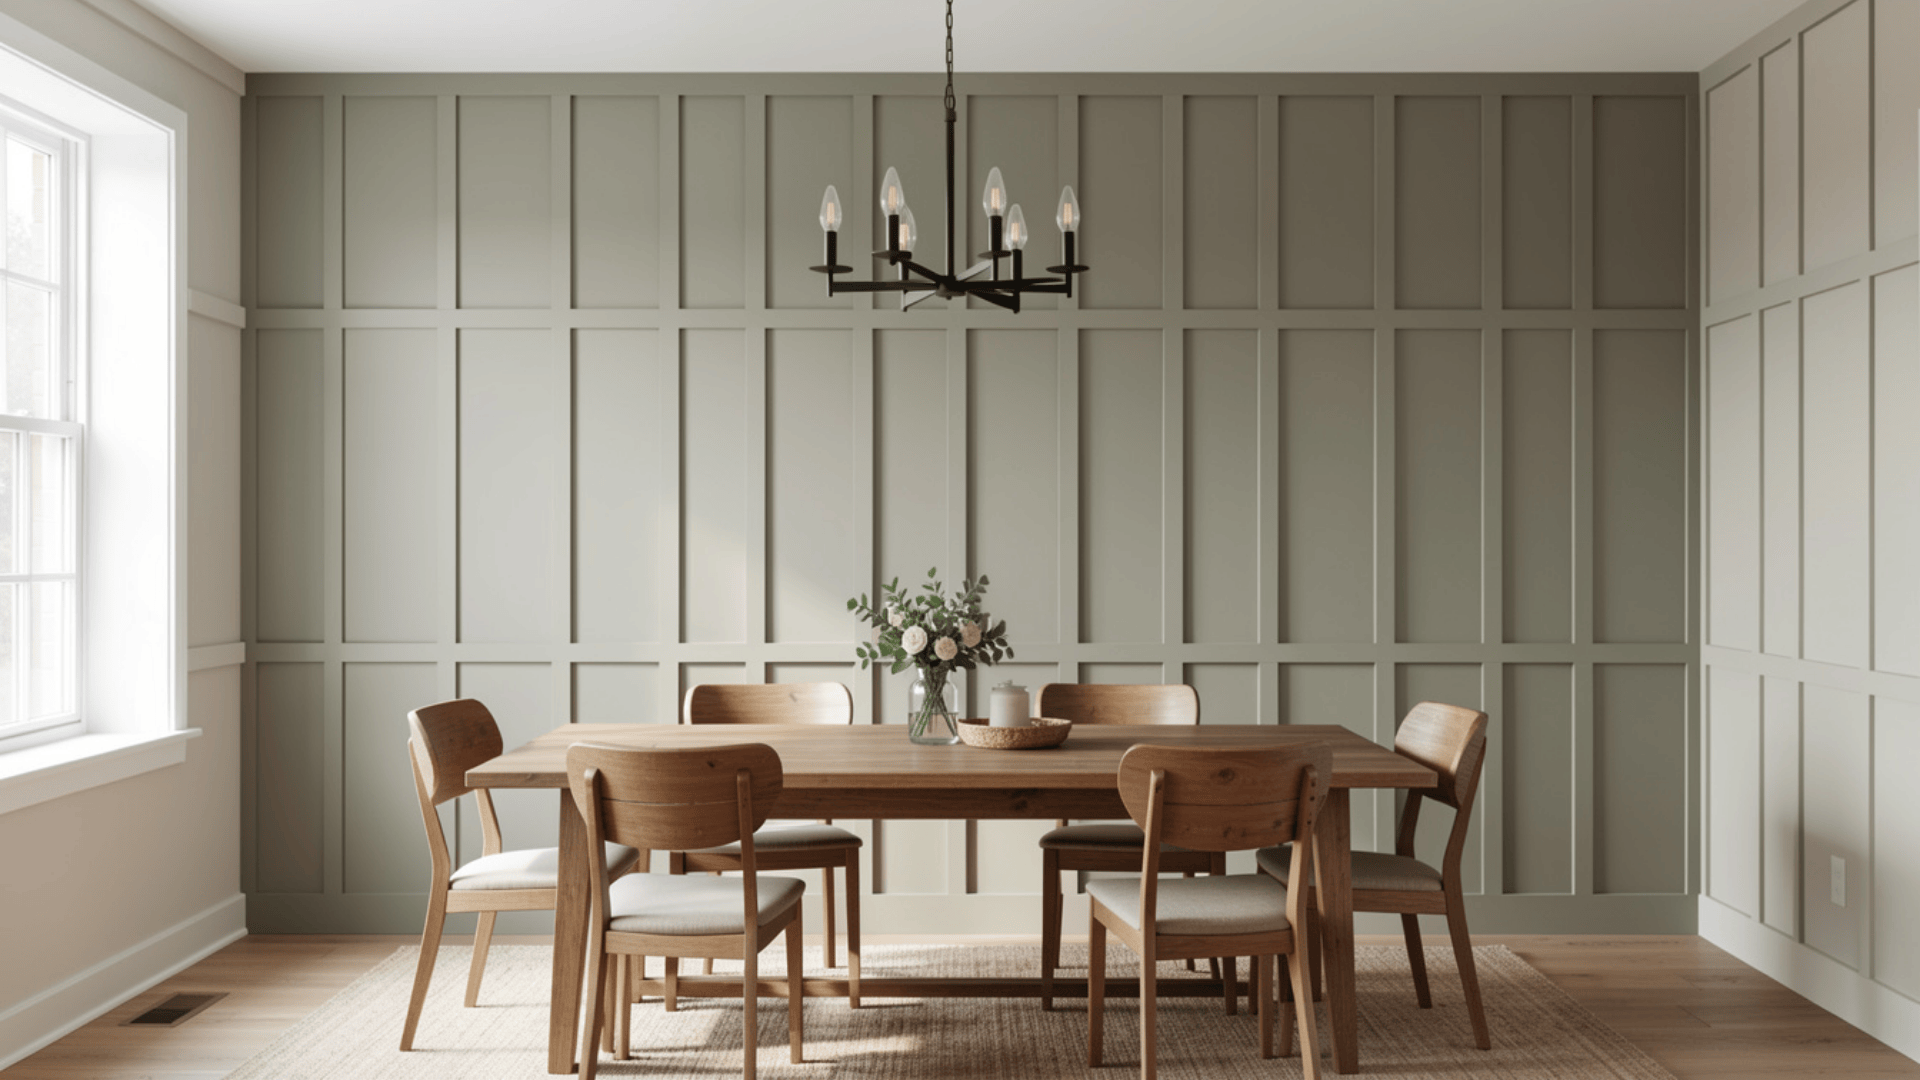
Install board-and-batten paneling by attaching vertical boards to your wall at regular intervals. Cut boards to run from floor to ceiling or to chair-rail height. Attach boards to wall studs using finishing nails.
Add a horizontal top rail and bottom rail to complete the look. Fill nail holes with wood filler and sand smooth. Paint the entire installation in a single color for a classic style, or use contrasting colors for a modern flair.
- Best Room: Dining room or hallway
- Total Time: 12 to 20 hours
- Approximate Budget: $100 to $250 per wall
- Materials Needed: 1×2 or 1×3 boards for vertical battens, 1×4 boards for top and bottom rails, finishing nails or using a nail gun, Wood filler and sandpaper, Paint and primer, Miter saw or hand saw, Level and stud finder, measuring tape and pencil, Caulk for sealing gaps
31. Mirror Projects
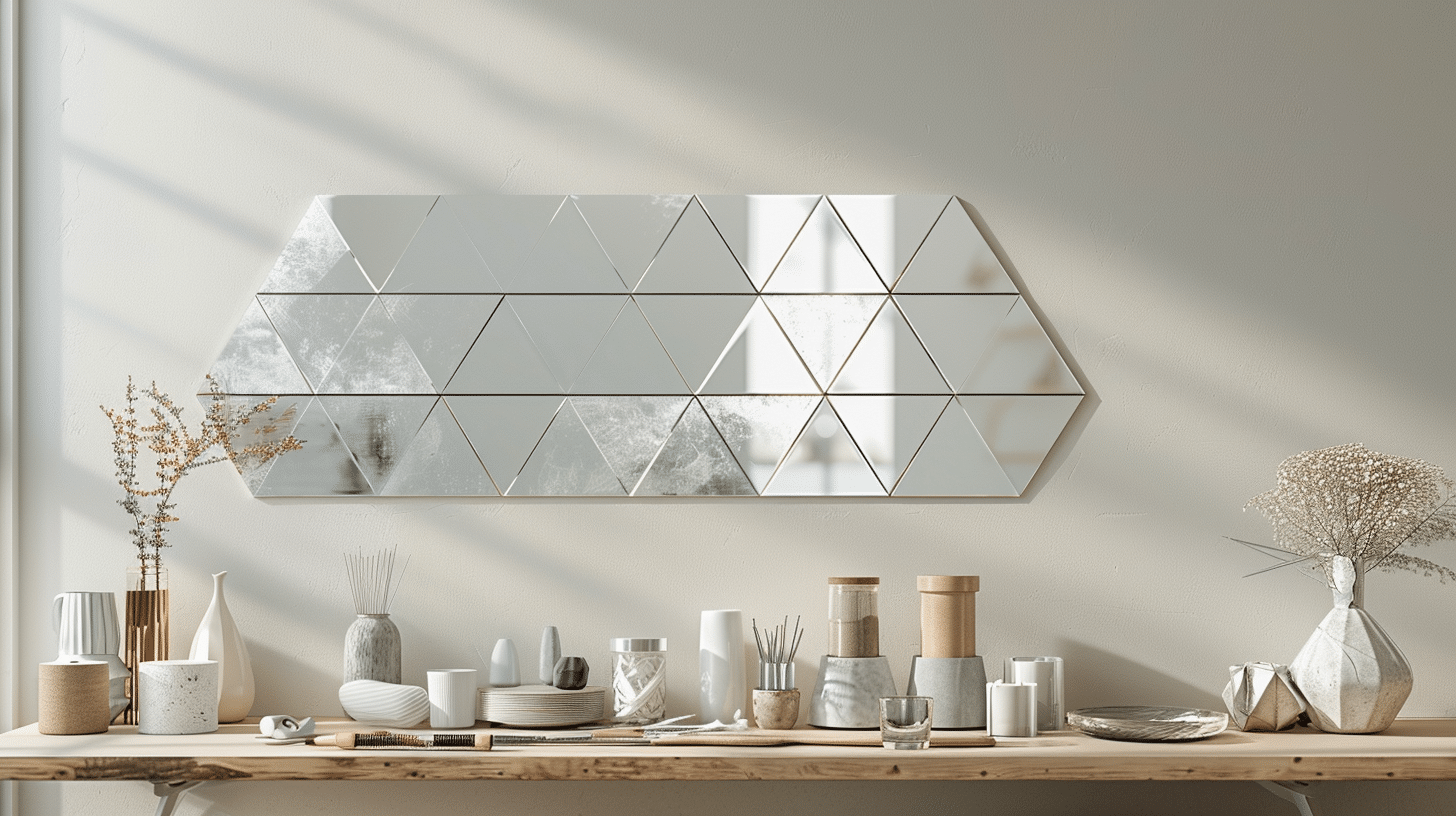
Arrange small mirrors in geometric patterns to create a striking focal wall. Cut mirror tiles into shapes using a glass cutter or buy pre-cut pieces. Attach mirrors to a backing board using mirror adhesive that protects the reflective coating.
- Best Room: Entryway or bathroom
- Total Time: 4 to 6 hours
- Approximate Budget: $30 to $60
- Materials Needed: Mirror tiles or small mirrors in various sizes, Backing board (plywood or foam board), Mirror adhesive or construction adhesive, Glass cutter (if cutting custom shapes), Safety glasses and gloves, Level and measuring tape, Pencil
32. Metal Wall Art
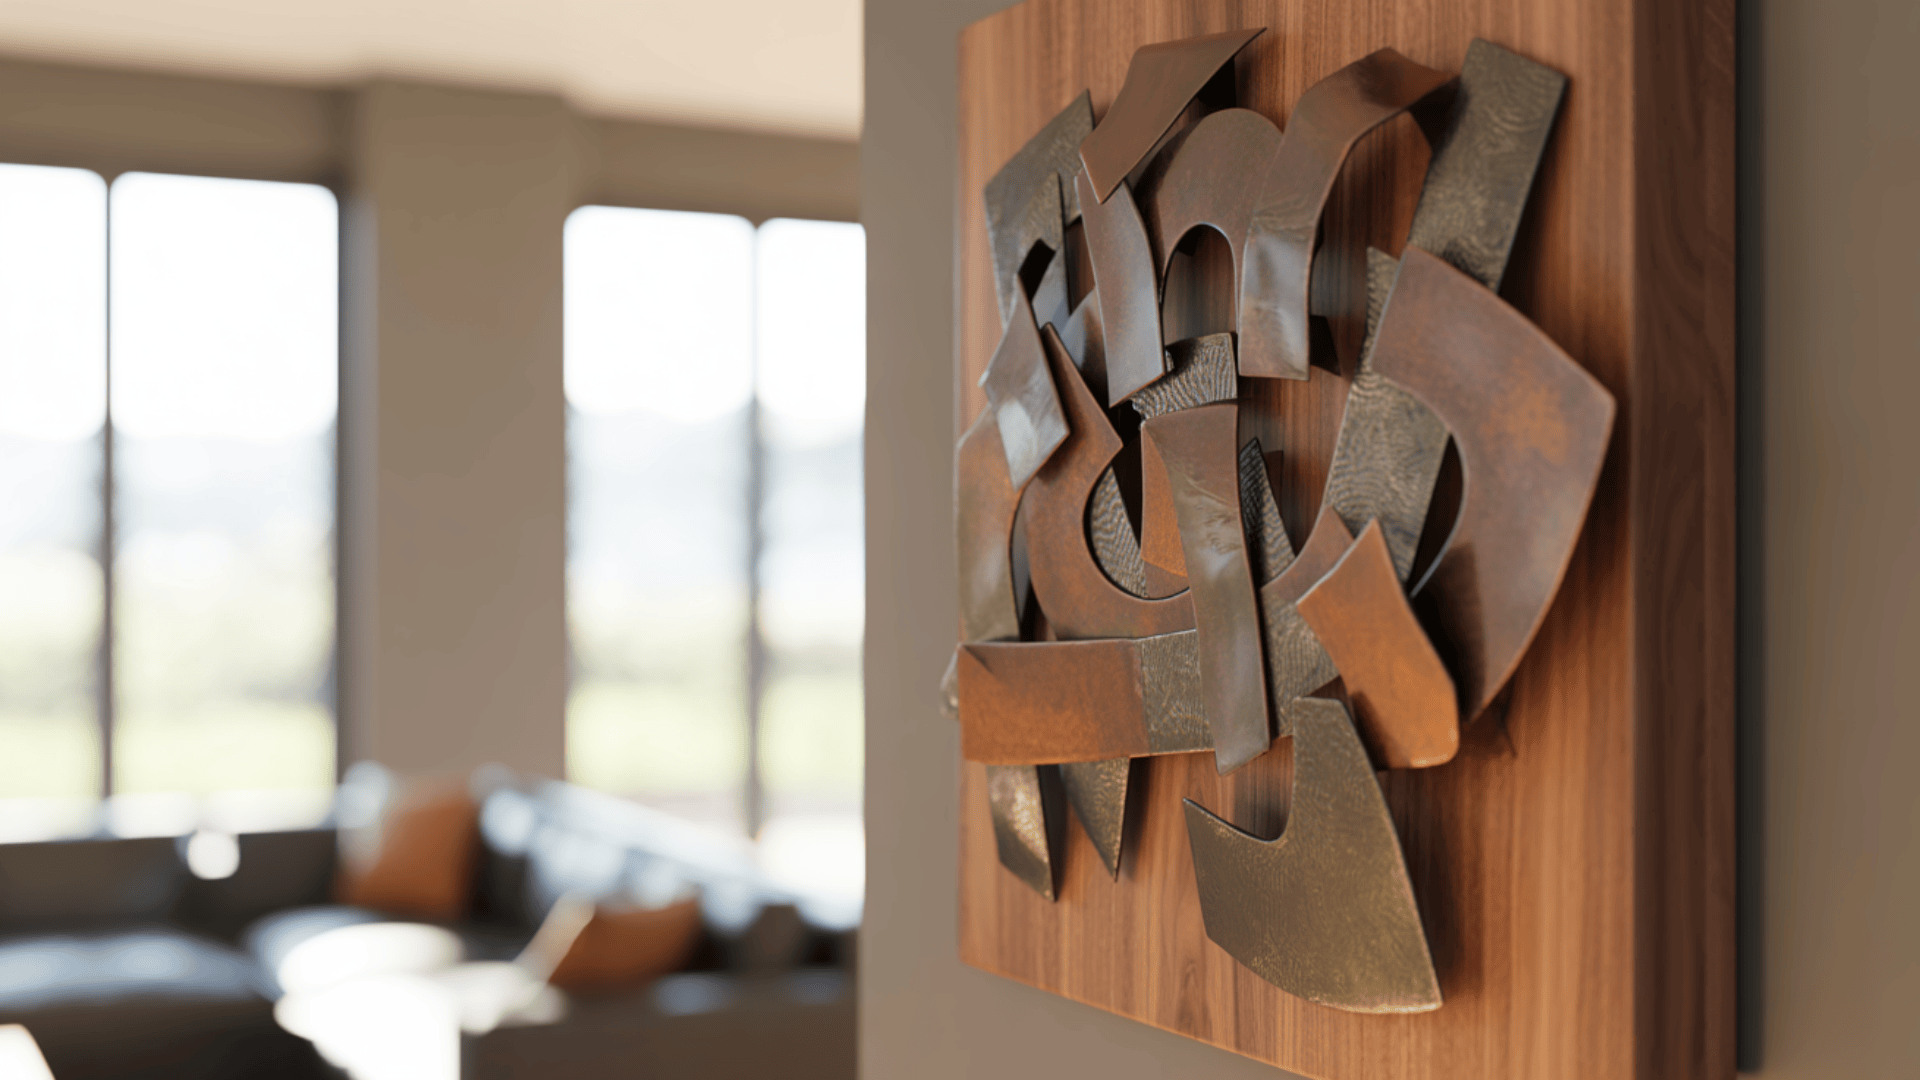
Cut sheet metal or aluminum flashing into shapes using tin snips. Bend the metal by hand or with pliers to create dimensional forms.
Attach metal pieces to a wooden backing using small screws or rivets. You can leave it natural for an industrial style or spray paint it in metallic colors like copper or bronze.
- Best Room: Living room or patio/covered balcony
- Total Time: 5 to 8 hours, approximately.
- Approximate Budget: $25 to $50
- Materials Needed: Sheet metal or aluminum flashing, Tin snips or metal shears, Pliers for bending, Wood backing board, Small screws or pop rivets, Drill with metal bits, Work gloves and safety glasses, Spray paint (optional)
33. Rope Installations
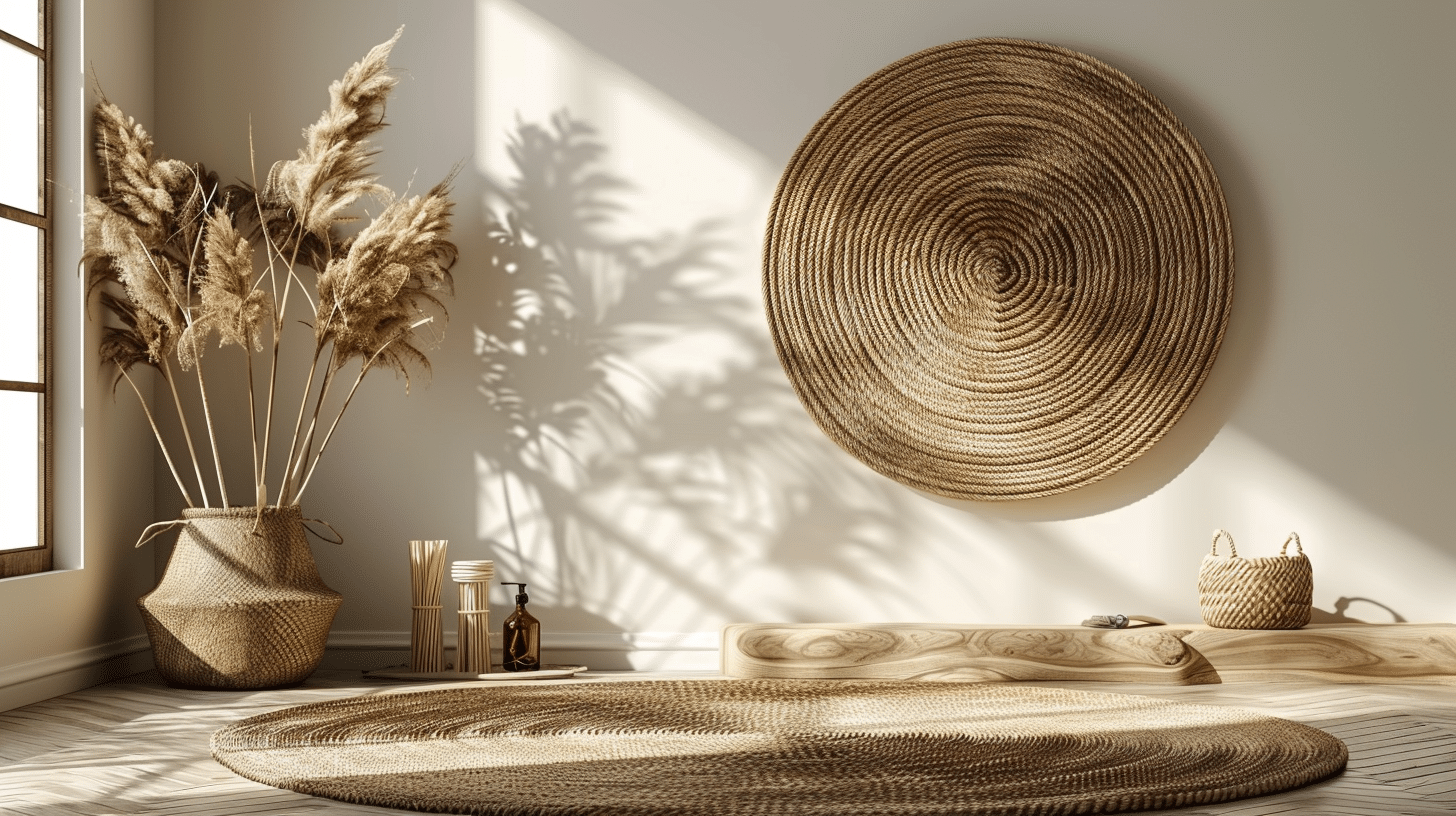
Coil thick rope into spiral patterns on a backing board. Secure each loop with hot glue as you work outward from the center. You can also wrap rope around a wooden frame to create textured borders.
Dye natural rope using fabric dye for custom colors, or use pre-colored synthetic rope. The coiled texture creates shadows that change as light shifts throughout the day.
- Best Room: Bathroom or coastal-style bedroom
- Total Time: 3 to 5 hours
- Approximate Budget: $20 to $40
- Materials Needed: Thick rope (manila, sisal, or cotton), Circular wooden base or frame, Hot glue gun and multiple glue sticks, Scissors or rope cutter, Fabric dye (optional), Picture hanging hardware, Work gloves
34. Living Walls With Plants
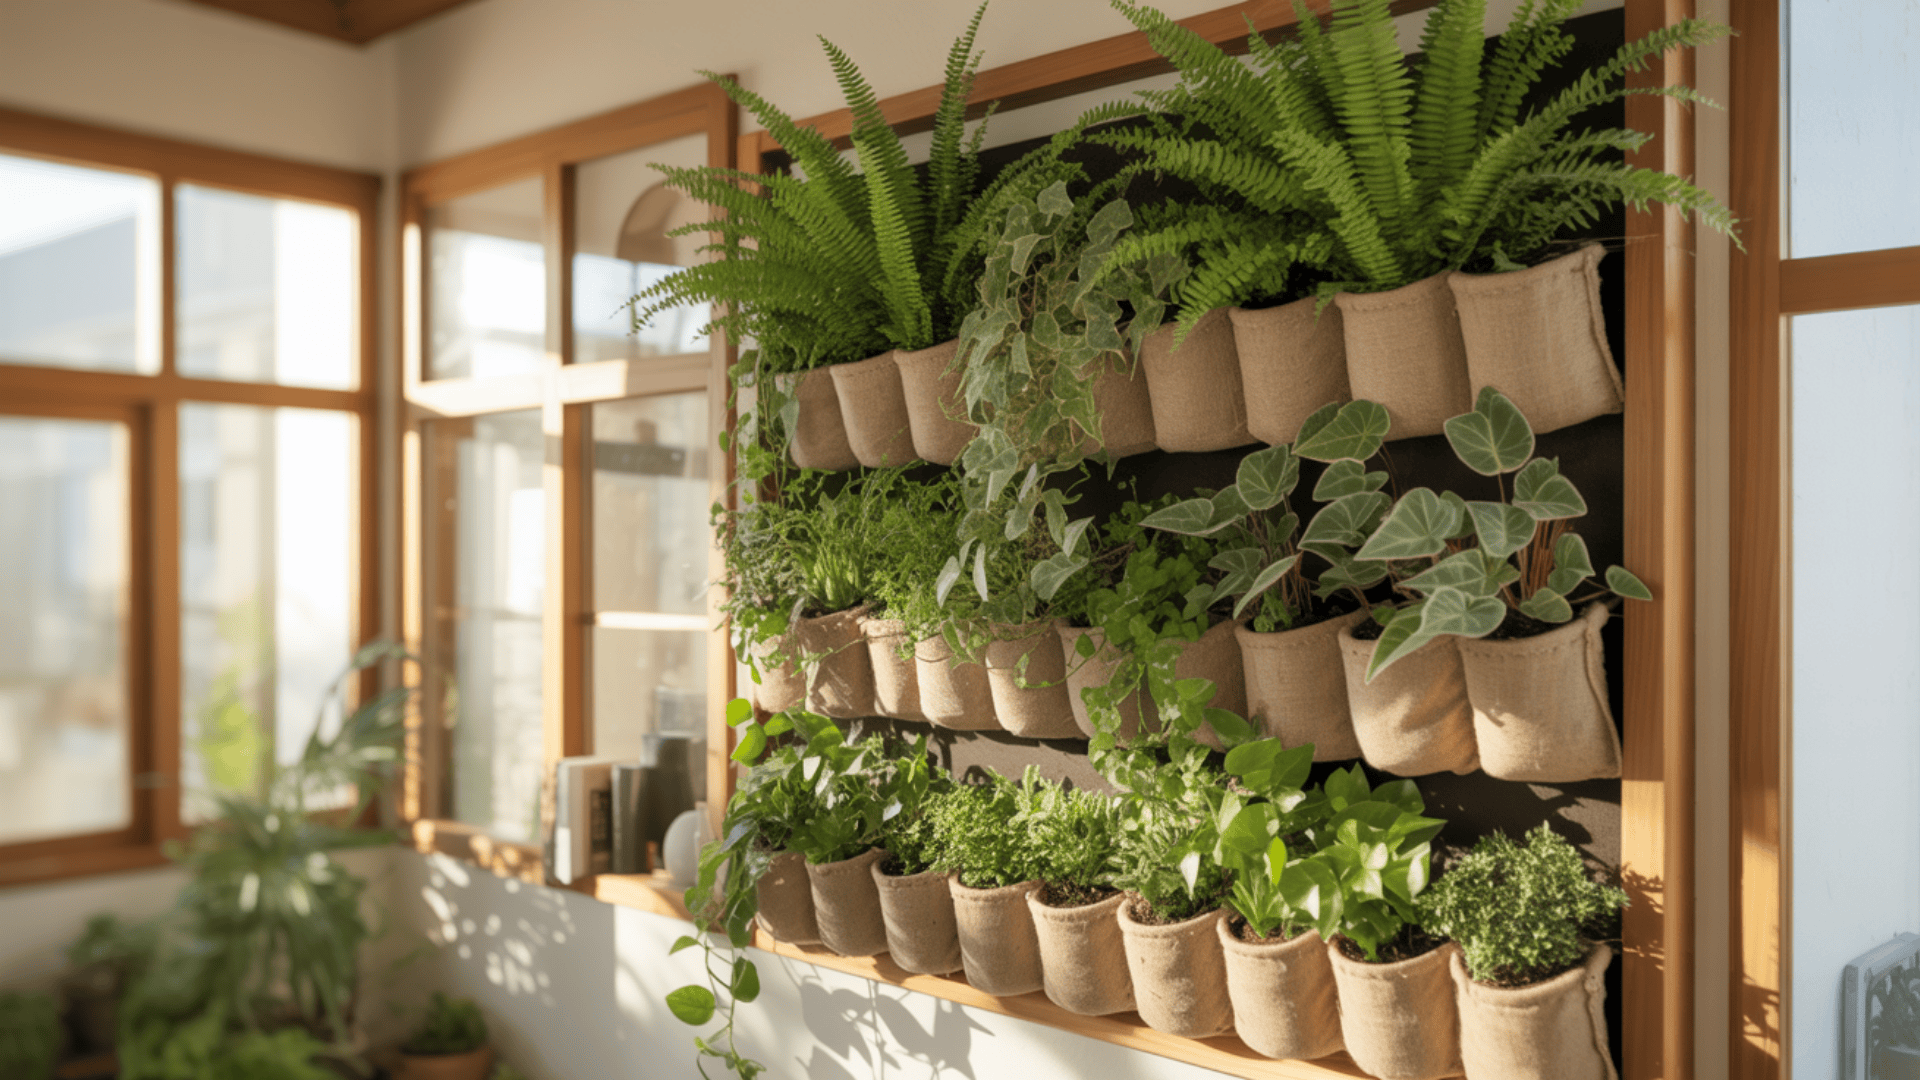
Build a vertical planter frame using wood and wire mesh. Attach small pockets made from landscape fabric to hold soil and plants. Select plants that thrive in your light conditions, such as pothos, ferns, or succulents.
- Best Room: Sunroom or living room
- Total Time: 6 to 10 hours (plus ongoing maintenance)
- Approximate Budget: $60 to $120
- Materials Needed: Wood frame (2×4 boards), Wire mesh or chicken wire, Landscape fabric for pockets, Staple gun and staples, Small plants suitable for vertical growing, Potting soil
35. Found Object Installations
Collect interesting objects from thrift stores, beaches, or nature walks. Arrange objects on a shadow box or directly on the wall in pleasing compositions.
Spray-paint all items the same color or leave them natural for eclectic charm. Attach objects using strong adhesive, wire, or small nails, depending on weight and material.
- Best Room: Entryway or home office
- Total Time: 4 to 7 hours
- Approximate Budget: $15 to $45
- Materials Needed: Collected found objects, Shadow box frame or backing board, Strong adhesive, Wire for hanging heavier items, Spray paint (optional), Small nails or pins, Pliers and wire cutters, Work surface protection
36. LED Strip Art
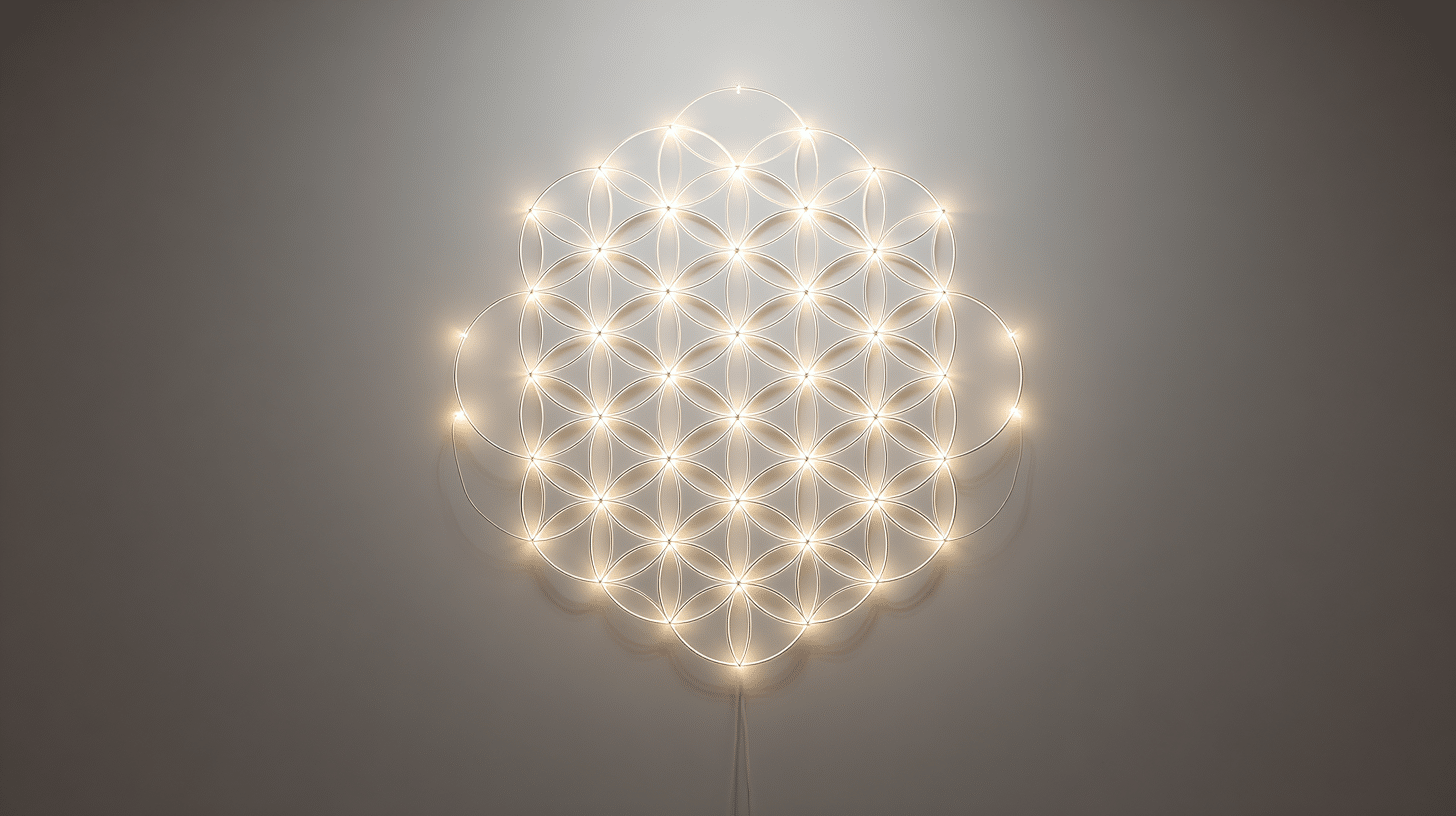
Plan your design on paper using simple shapes like circles, triangles, or abstract patterns. Mark the design lightly on your wall with a pencil. Peel the adhesive backing from the LED strips and press them along your marked lines. Connect strips to a power source or battery pack.
- Best Room: Gaming room or teen bedroom
- Total Time: 2 to 4 hours
- Approximate Budget: $20 to $45
- Materials Needed: LED strip lights (16 feet typical), Power adapter or battery pack, Mounting clips for corners, Wire connectors (if joining strips), Scissors for cutting strips at marked points, Pencil and eraser, Measuring tape, Cable management clips
37. Backlit Canvas Pieces
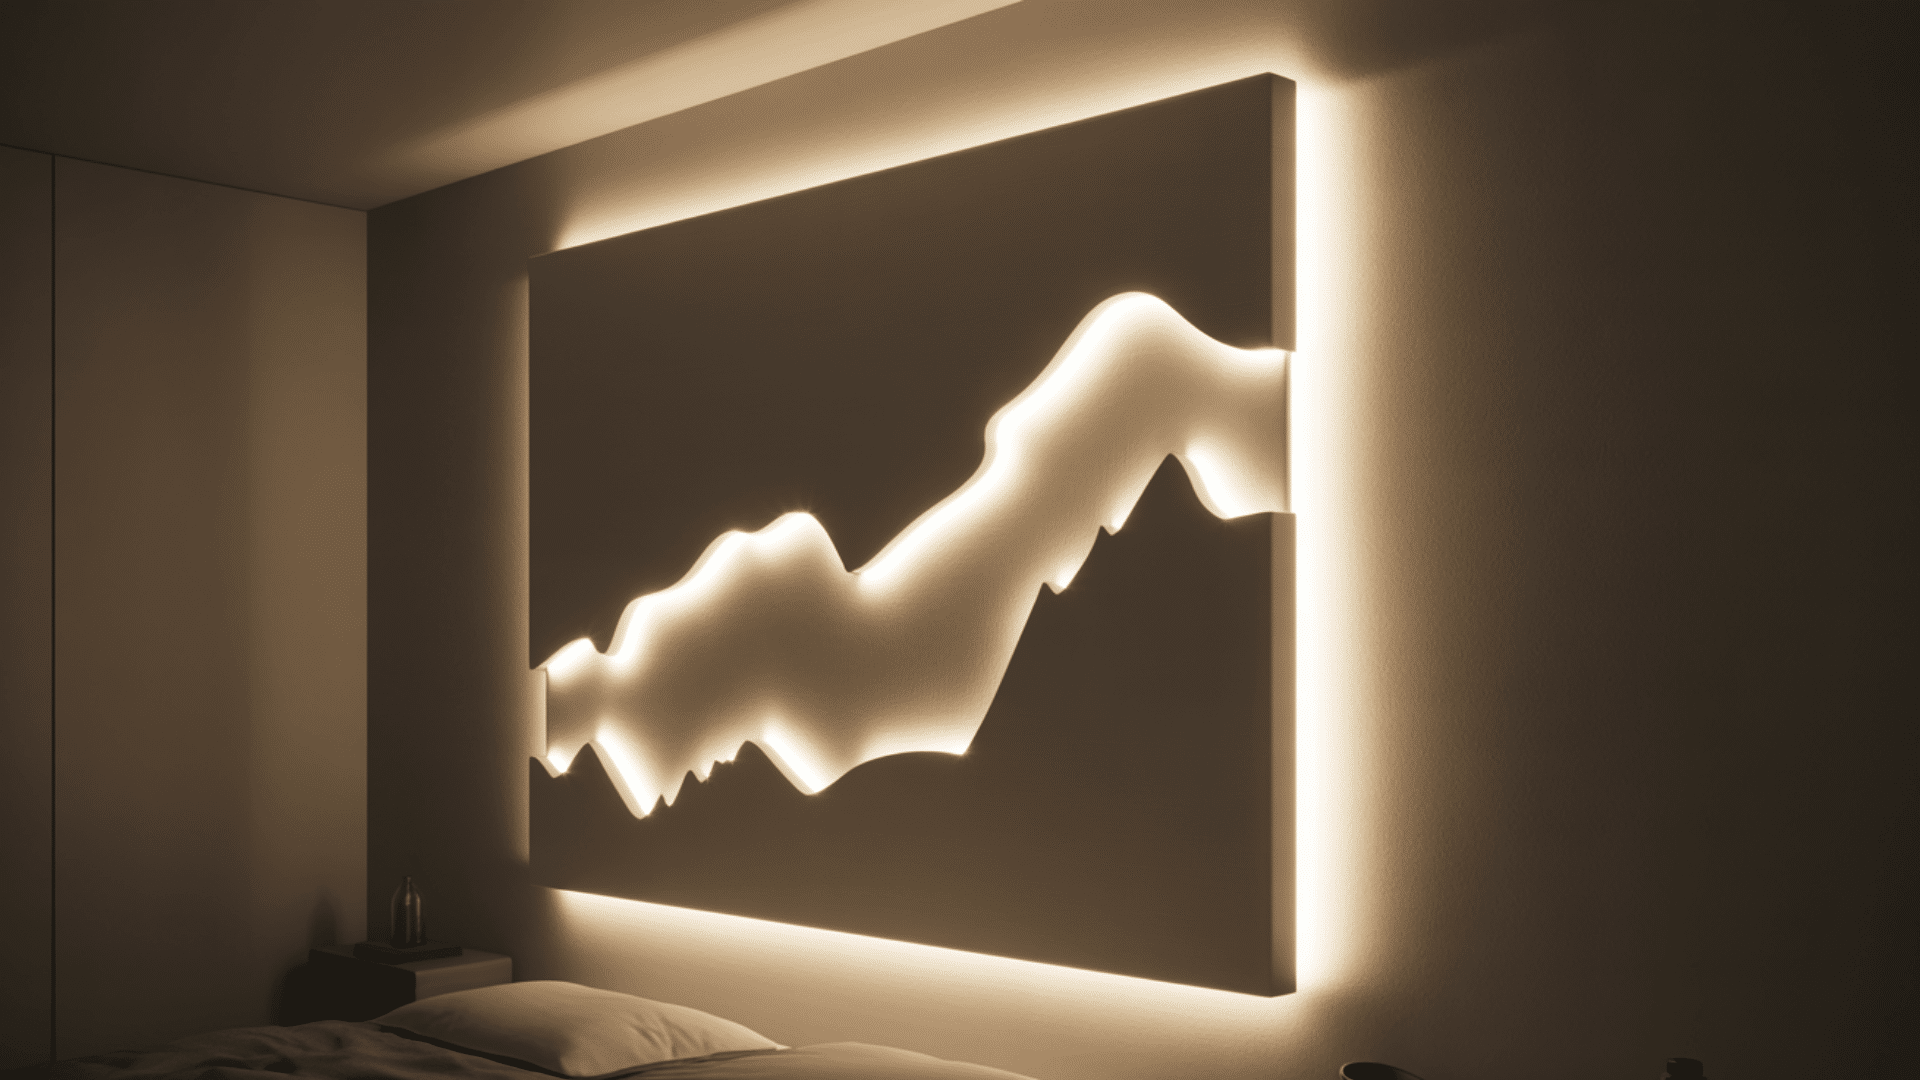
Stretch the canvas over a wooden frame, leaving 3 inches of space between the canvas and the wall. Paint or stencil a design on the front of the canvas.
Attach LED strip lights to the back of the frame facing the wall. Mount the canvas using spacers that hold it away from the wall surface.
- Best Room: Bedroom or media room
- Total Time: 5 to 7 hours
- Approximate Budget: $35 to $65
- Materials Needed: Stretched canvas on frame, Acrylic paints and brushes, LED strip lights, Wooden spacers or mounting blocks, Strong adhesive or staple gun, Power cord with switch, Picture hanging hardware, Extension cord if needed
38. Neon-Style Signs
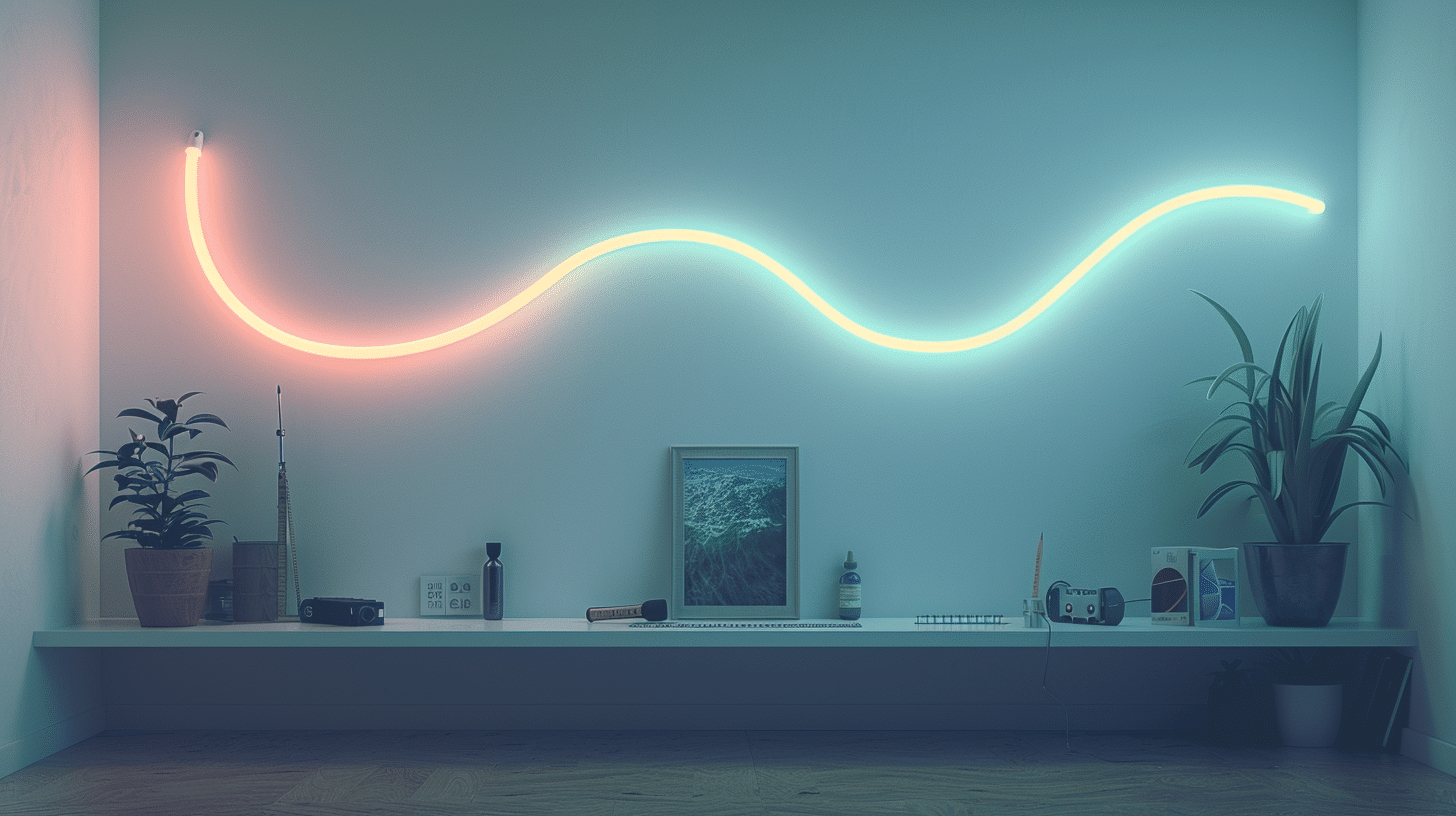
Purchase flexible LED neon rope in your chosen color. Shape the rope into words or simple designs. Secure the rope to a backing board using explicit mounting clips at 4-inch intervals. Connect the rope to its power supply and test the lighting.
- Best Room: Home bar area or teen bedroom
- Total Time: 3 to 5 hours
- Approximate Budget: $40 to $80
- Materials Needed: Flexible LED neon rope, Clear acrylic or wood backing board, Mounting clips for LED rope, Power adapter, Drill for clip installation, Pencil for planning layout, Measuring tape, Picture hanging hardware
Advanced wall art projects let you unleash your creativity and turn walls into one-of-a-kind works of art. If you enjoy hands-on craftsmanship and dramatic visual impact, these ideas offer infinite possibilities to showcase your skills.
Common Mistakes to Avoid When CreatingDIY Wall Decor
Learning from common errors saves time, money, and frustration. Many DIY wall decor failures happen because people skip basic preparation steps or rush the process.
- Improper Wall Preparation: Dirty or dusty walls prevent adhesives from sticking properly. Paint, vinyl, and command strips all need clean surfaces to bond correctly.
- Using Wrong Adhesives for Wall Types: Textured walls reject standard mounting tape. Plaster walls crumble with heavy anchors. Drywall cannot support weight without proper hardware.
- Overcrowding Walls: Hanging too many pieces makes rooms feel cluttered and smaller. Not every wall surface needs decoration.
- Ignoring Room Proportions: Tiny art disappears on large walls. Oversized pieces overwhelm small rooms. Hanging art too high forces people to crane their necks.
- Rushing the Drying Process: Removing painter’s tape too soon causes paint to peel. Handling projects before the the glue sets can cause pieces to fall and break.
The Bottom Line
I’ve covered a lot of diy wall decor ideas here, and honestly, the hardest part is just picking where to start. Each project brings something different to your space.
Some add color, others add texture, but they all make your walls feel less empty and more like home. The best part? You don’t need to be perfect at this.
My first few attempts weren’t Pinterest-worthy, but they taught me what works and what doesn’t. And that’s the whole point: learning as you go and having fun with it.
So grab some supplies this weekend and pick one project that speaks to you. Your walls are waiting, and trust me, you’ll love seeing something you made with your own hands every single day.
Ready to get started? Pick your favorite idea and make it happen today!