You finally picked the perfect hardware. Now comes the part that trips most people up: where exactly does it go?
Cabinet hardware placement sounds simple until you’re standing in front of a door with a drill in your hand, second-guessing everything. Too high? Too low? Does this even look right?
It’s one of the most common questions homeowners ask during a kitchen refresh, and the answers are easier than you’d think. Getting it right comes down to a few clear rules, the right measurements, and some smart habits before you drill a single hole.
What you’ll find here covers all of it, the right placement, the right proportions, and the small habits that make the whole kitchen look like a pro handled it.
Cabinet Hardware Placement: Knobs vs Pulls
Pulls offer a more comfortable, secure grip, making them the better choice for heavy drawers, lower cabinets, and anyone with limited hand strength or arthritis.
Knobs work well on upper cabinet doors and smaller fronts. They cost less, install faster, and are easy to clean.
Style plays a role too: traditional kitchens tend to suit knobs with decorative detail, while modern kitchens look sharper with sleek, minimal pulls.
Mixing both is completely acceptable as long as you stay consistent with the finish and follow a clear pattern, such as knobs on upper doors and pulls on lower cabinets and drawers.
Where to Put Knobs and Handles on Kitchen Cabinets?
Follow these standard placement rules to position cabinet hardware comfortably and consistently, giving your entire kitchen a clean, intentional finish.
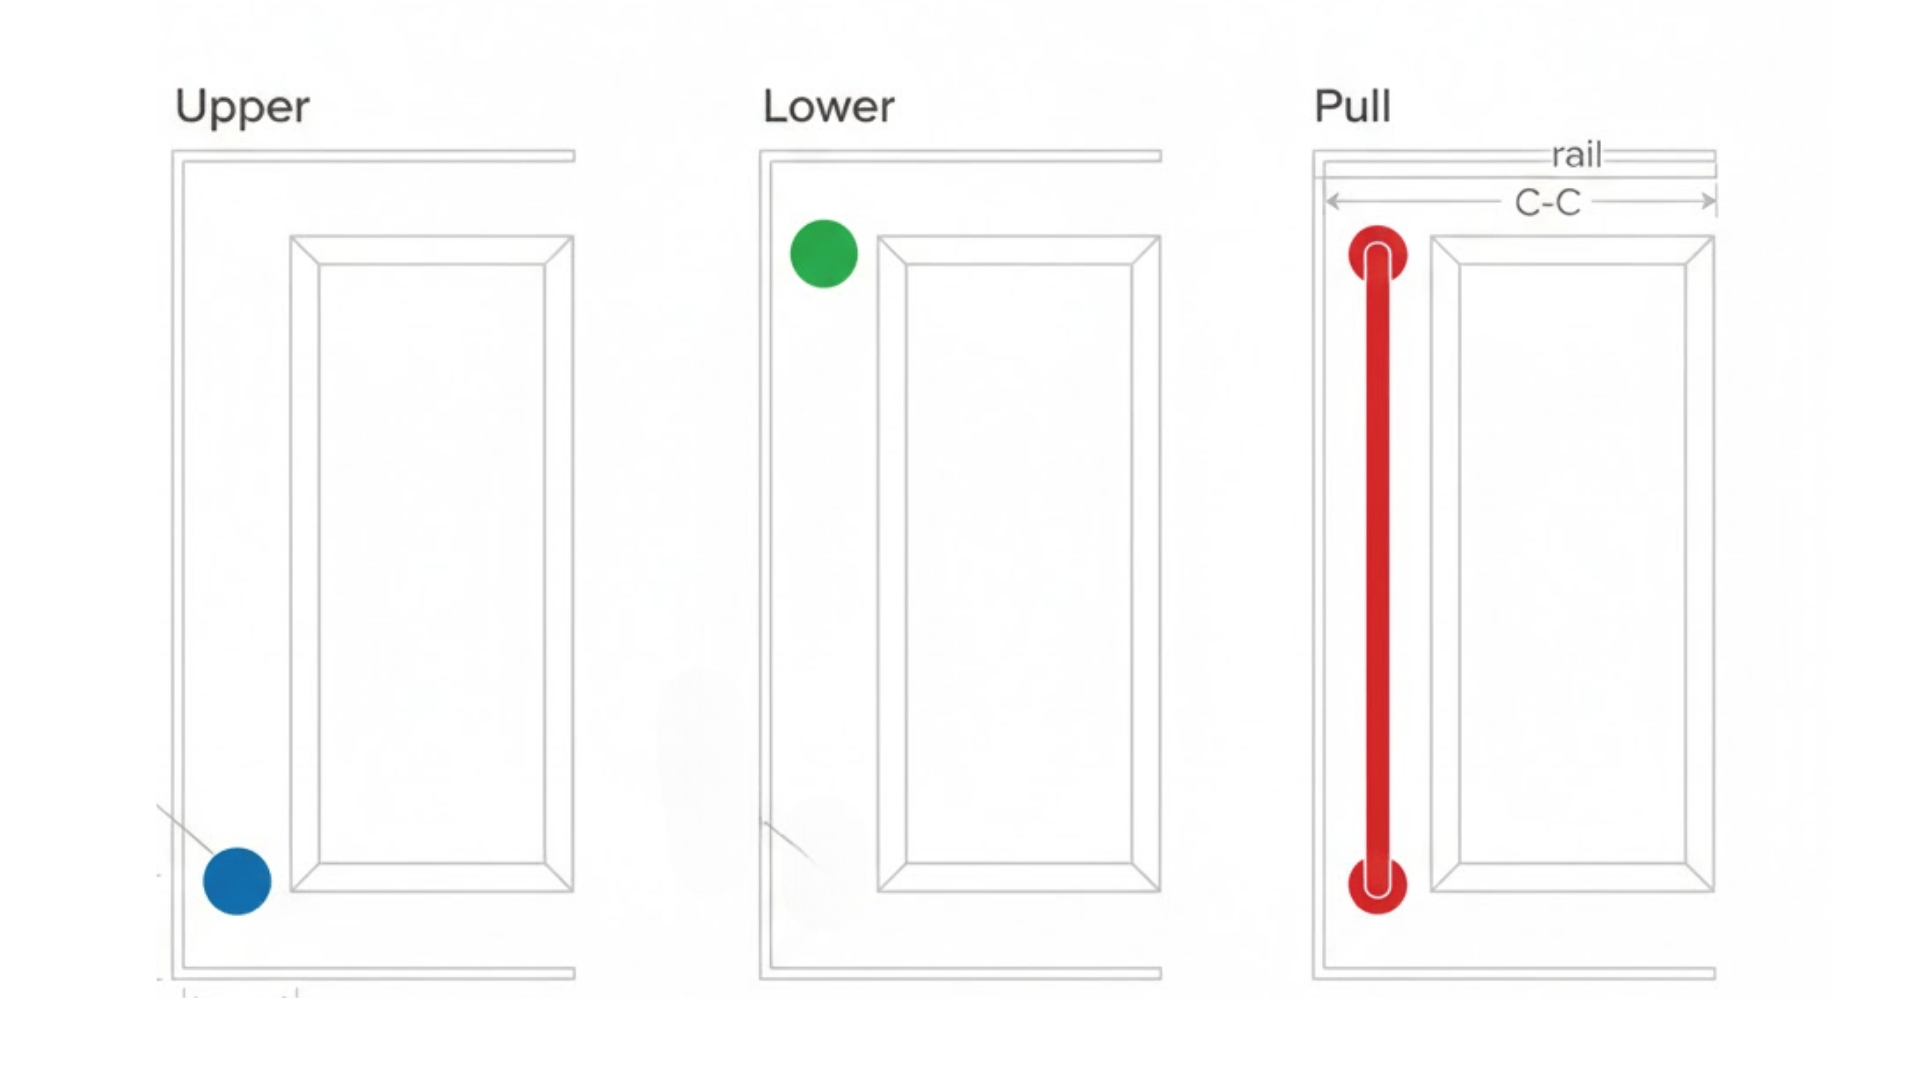
- Upper Cabinet Doors: Place hardware on the lower corner, opposite the hinge side, for the most natural and comfortable reach
- Lower Cabinet Doors: Mount hardware on the upper corner, opposite the hinge side, so opening feels effortless and ergonomic
- Drawer Fronts: Center hardware horizontally across the drawer front to create a balanced, symmetrical look every time
- Wide Drawers Over 24 Inches: Use two pulls or one longer bar pull to keep the proportions visually balanced and functional
- Consistency is Key: Choose one placement pattern and repeat it on every cabinet and drawer throughout the whole kitchen
Most popular layouts include knobs on uppers and pulls on lowers, knobs on doors and pulls on drawers, or all pulls throughout.
Once you lock in a placement pattern that works, sticking to it across every cabinet keeps the whole kitchen looking polished and cohesive.
Exact Hardware Placement for Cabinet Doors
Door hardware should land where your hand naturally reaches while keeping measurements consistent so every cabinet line stays aligned.
1. Upper Cabinet Doors
Center knob holes on the door stile and place them 2-1/2 inches up from the bottom edge. This keeps hardware in the lower corner, easy to reach while standing, and visually balanced on the door.
2. Lower Cabinet Doors
Center knob holes on the door stile and place them 2-1/2 inches down from the top edge. This upper-corner location improves leverage when bending down, and you can adjust between 2 and 4 inches.
3. When Using Pulls on Doors
Use the same corner logic as knobs, but align two screw holes using the pull’s center-to-center spacing. Keep the bottom of the pull aligned with the cabinet rail, and use a hardware jig for consistent placement.
Cabinet Door Types Change Hardware Placement
Cabinet door style affects where the hardware looks best. Match placement to the door’s geometry for a balanced finish.
- Traditional Raised-Panel Doors: Corner placement suits the framed look. Rounded knobs and classic finishes like bronze, antique brass, or ceramic work well.
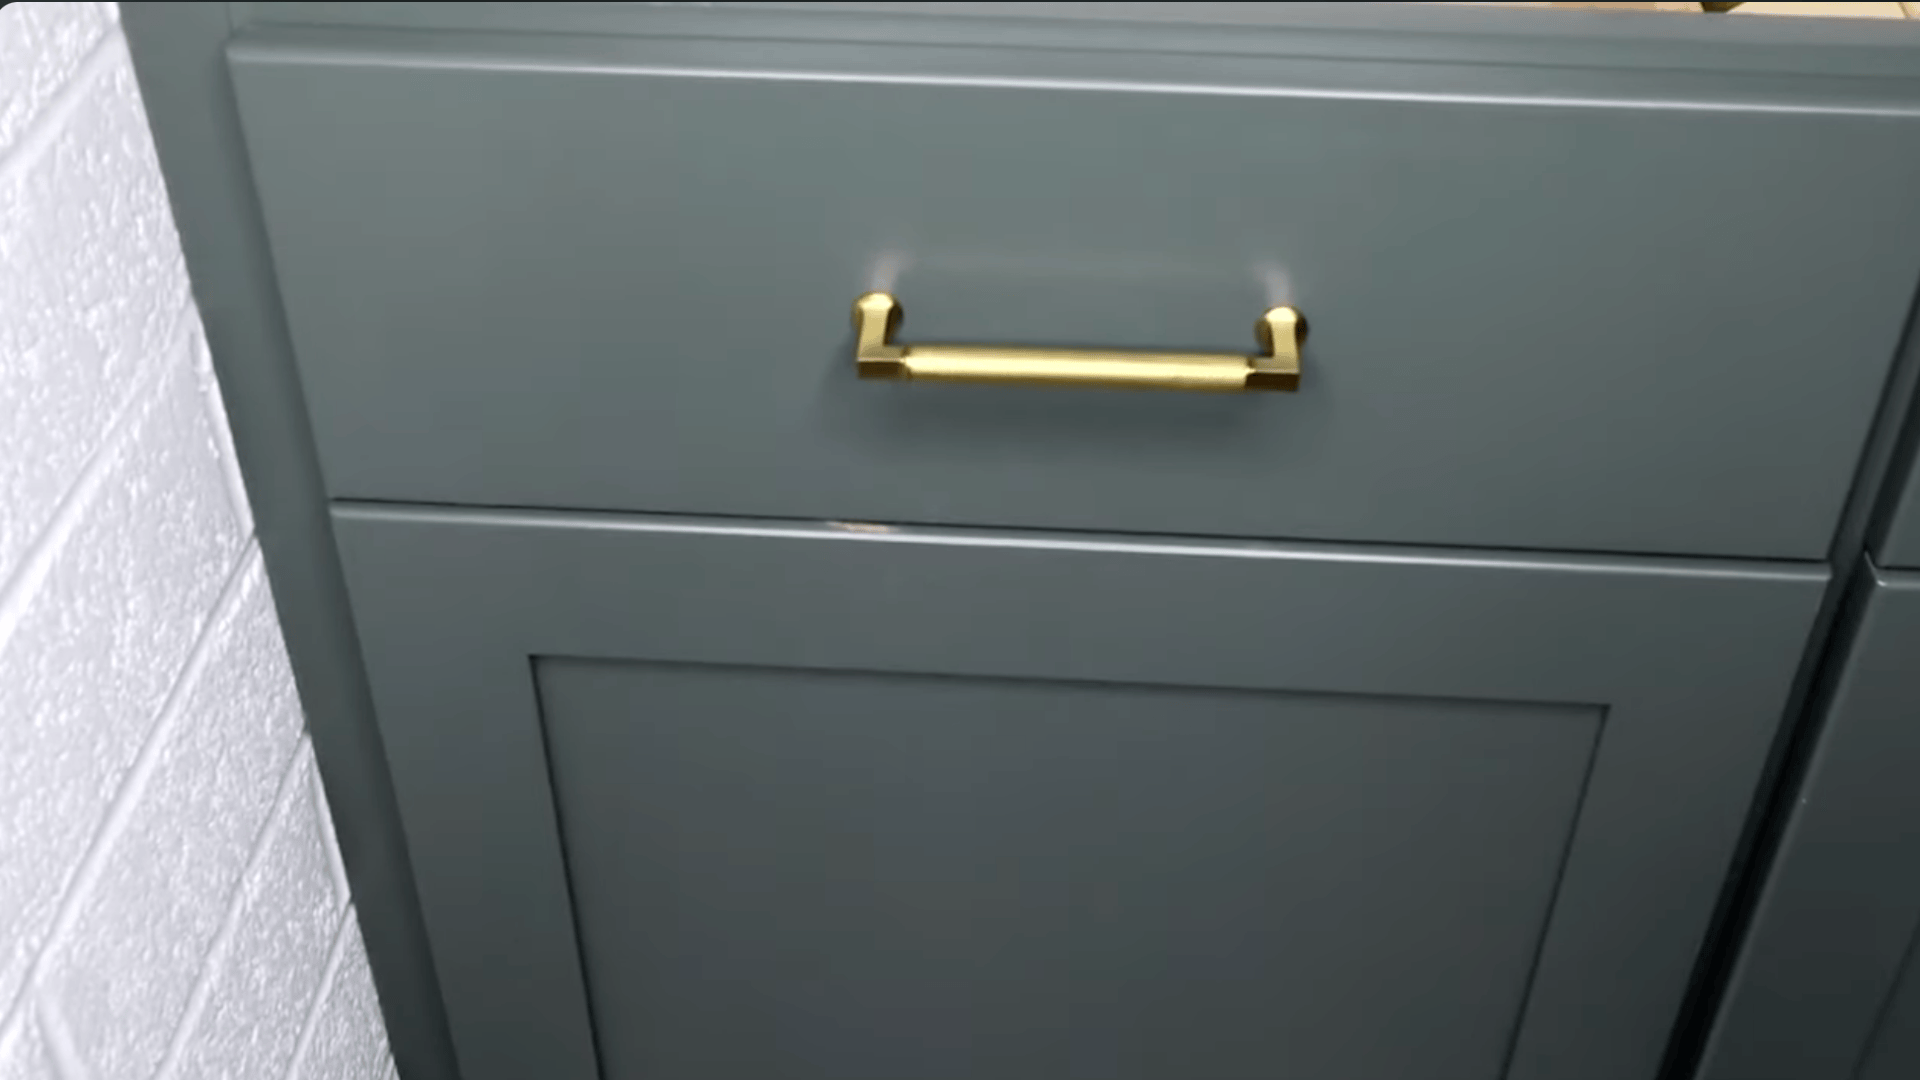
- Transitional Shaker Doors: Align hardware with the rail/stile edge for a clean look. Shaker works with knobs, pulls, or a mix.
- Modern Slab Doors: Keep equal spacing from the bottom and side edges. Longer bar pulls often look best and add visual structure.
- Handleless Options: Push-to-open gives a minimalist look but requires specialized hardware and may feel less natural for daily use.
Choose hardware and placement together, not separately. Think about the paint finish for kitchen cabinets, too, because texture and sheen can influence how hardware looks and feels against the surface.
Exact Hardware Placement for Drawers

Drawer hardware placement is easiest when you start with centering, then adjust for wider drawers and modern style preferences.
1. Centered Drawer Pulls
Centered placement is a safe, stylish choice that works especially well in modern and transitional kitchens.
Measure the drawer width and mark the midpoint. For pulls with two screw holes, the midpoint should fall exactly between the holes.
Measure the drawer height and place the pull at the true center for a balanced look. If you prefer a more contemporary feel, raise the pull slightly above center to make it easier to grab.
2. Wide drawers: one pull vs two
For drawers wider than 24 inches, two pulls can prevent stress on the drawer face and give balanced grip points.
Divide the drawer into thirds and place pulls in the outer thirds, or use one long pull that stays proportional.
Double-Stacked Upper CabinetsIn high-ceiling kitchens, double-stacked uppers feature a shorter top tier (12–24″ tall) atop standard uppers (30–42″ tall) for extra storage. Use knobs or small latches on the top tier for balanced proportion and subtle character; pulls on the lower tier for easier grip. Follow standard upper placement per tier: 2–2.5″ up from the bottom edge on doors, consistent within each row. Downsize hardware on top (1–1.5″ knobs or 3–5″ pulls). Mock up with tape, test reach, match finishes, and repeat the pattern kitchen-wide for a cohesive, intentional look. |
Pro Tips for Cabinet Hardware Placement
These tips make cabinet hardware placement faster, cleaner, and more consistent, so everything looks aligned and intentional.
- Pick one placement pattern early, then repeat it on every matching door and drawer for consistency.
- Use a cabinet hardware jig to keep hole locations identical, especially when installing multiple pulls.
- Mock up placement with painter’s tape first, then step back to confirm spacing looks right.
- Measure from the same reference edges every time, so heights and offsets stay uniform across runs.
- Double-check pull center-to-center spacing before drilling, since two-hole hardware is unforgiving if misaligned.
Follow these habits and your hardware will look clean and balanced, with fewer mistakes and faster installation overall.
Sizing Guide: Getting Proportions Right
Choosing the right knob and pull size is what makes cabinet hardware look intentional, balanced, and comfortable to use every day.
1. Knob Size Basics
Most cabinet knobs are 1 to 2 inches in diameter, and that range works on nearly any standard cabinet door.
Smaller knobs (about 1 inch) are a good fit for tight spaces or when you want the hardware to feel subtle.
Larger knobs (about 1-3/8 to 2 inches) read bolder visually and are often easier to grip.
2. Pull Sizing: The 1/3 Rule
A simple sizing guideline is choosing a pull that’s roughly one-third the width of the drawer front. It keeps the pull from looking too small or overly dominant.
Examples (center-to-center):
- 18-inch drawer: 6-inch pull
- 24-inch drawer: 8-inch pull
- 36-inch drawer: 12-inch pull or two 6-inch pulls
Most standard pulls run from 3 to 12 inches, with longer sizes available for oversized drawers.
3. Appliance Pulls
For large panel-ready doors (like refrigerators), standard cabinet pulls can look undersized.
Appliance pulls are typically 12 to 18 inches long, built for heavier-duty use, and scaled for large doors. Match the finish to your cabinet hardware so everything feels cohesive.
Tools and Materials Used for Installation
Having the right tools and materials makes cabinet hardware installation faster, cleaner, and more consistent across every door and drawer.
| Tools | Materials |
|---|---|
| Tape measure | Drawer pulls / handles |
| Pencil | Cabinet pulls / handles (tall door) |
| Cabinet hardware jig/template | Cabinet knobs |
| Center punch/punch tool | Mounting screws/bolts (included) |
| Drill/Correct-size drill bit | Longer screws (about 1-3/4″) |
With these basics, measuring and drilling stay accurate. A jig and punch help deliver straight, repeatable, professional results.
Different Cabinet Hardware Placements
These hardware placements use a tape measure and jig for accuracy, helping every door and drawer align cleanly.
1. Centered Drawer Pull Placement
Drawer pulls are usually centered for a balanced, easy-to-grab install. Once the jig is set, you can repeat the same placement on every drawer front.
Instructions:
- Measure drawer width carefully, then mark the exact center.
- Measure drawer height carefully, then mark the vertical midpoint.
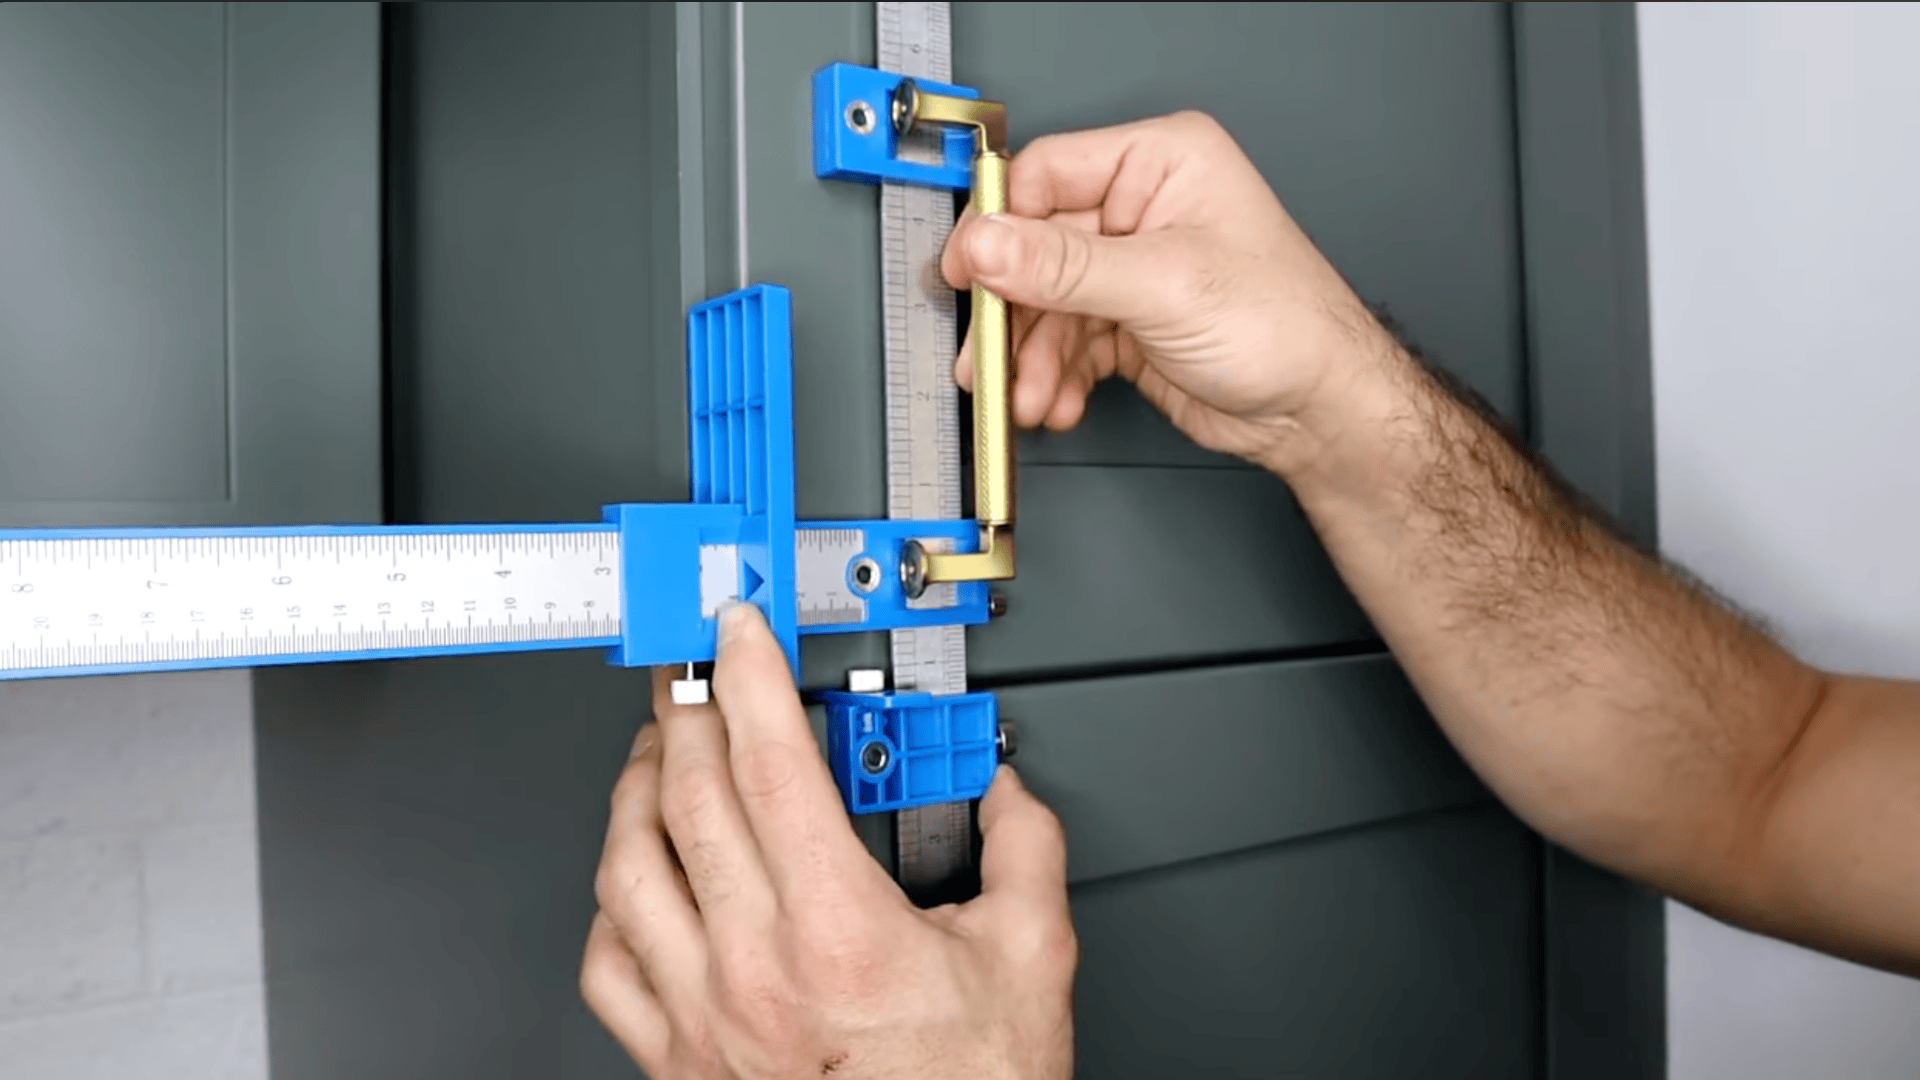
- Align the jig center window directly over your crosshair mark.
- Set the jig hole spacing to match the pull center-to-center spacing.
- Punch starter dimples through both jig guide holes.
- Drill straight through the dimples using the correct drill bit.
- Install pulls from inside, tightening screws evenly and straight.
- Use longer screws when drawer fronts are extra thick.
Centered pulls look clean and feel natural. Repeating the same jig settings keeps every drawer line perfectly consistent.
2. Vertical Pull Placement on Tall Doors
Vertical pulls on tall doors need intentional placement for comfort and balance. A jig makes it easy to match hole spacing so the pull mounts straight.
Instructions:
- Choose a balanced pull location, then mark one reference point.
- Place the jig on the door and align the drill guide to your mark.
- Set the second drill guide to match the pull center-to-center spacing.
- Confirm the jig sits straight, flush, and firmly against the door.
- Punch starter dimples through both drill guide holes.
- Drill straight through both marks using the correct drill bit.
- Install the pull from inside the door, tightening screws until snug.
- Flip the jig for the opposite doors, keeping the placement mirrored precisely.
Straight drilling and matched spacing prevent crooked pulls. Balanced placement makes tall doors easier to open and more aesthetically pleasing.
3. Single-Hole Knob Placement on Doors
Knobs install with one hole, so placement consistency matters most. Using a jig helps repeat the same corner offset on every door, even across opposite swings.
Instructions:
- Set jig for a single-hole knob drilling layout.
- Choose one corner offset, then use it everywhere.
- Position the jig firmly on the door, aligned to the chosen offset.
- Punch a starter dimple through the jig drill guide.
- Drill straight through the dimple using the correct bit size.
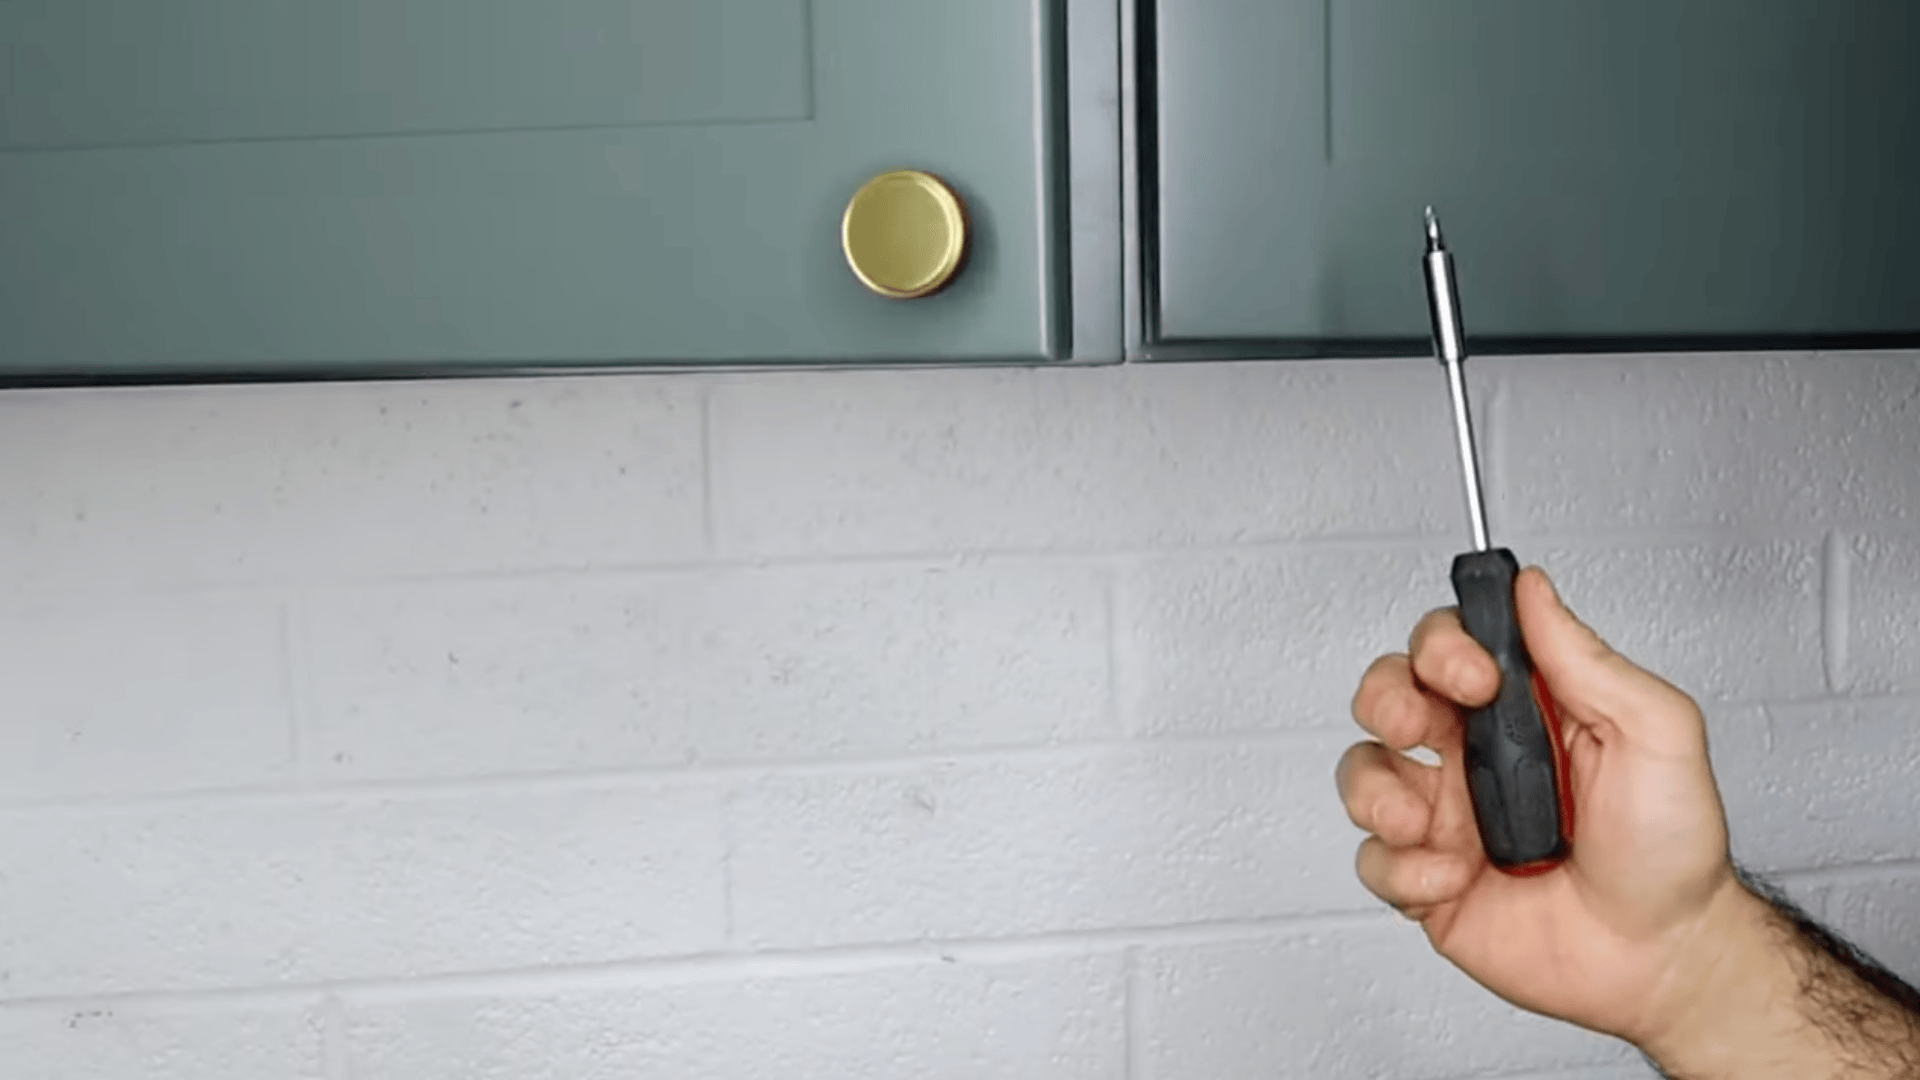
- Insert the screw from the inside, then thread the knob onto the front.
- Hold the screwdriver inside, then tighten the knob until snug.
- Flip the jig left or right to mirror placement on doors.
Keeping a consistent offset makes knobs look intentional. Mirroring the jig keeps both sides symmetrical across the kitchen.
Video Tutorial
For a more detailed, step-by-step demonstration with tools, measurements, and drilling tips, check out this video from Remodel with Robert
Cabinet Hardware Placement Mistakes
Small placement errors show up quickly across a full kitchen. Test placements first and use repeatable measurements for a clean finish.
- Drilling without Testing Placement: Mock up positions with painter’s tape or temporary mounting putty before drilling permanent holes.
- Inconsistent Heights: When hardware sits at different heights across doors, the whole run looks messy; consistency matters most.
- Wrong Pull Length: A short pull can look lost on a wide drawer, while an oversized pull can feel cramped. Use the one-third guideline as a starting point.
- Forgetting Pulls Need Two Holes: Hole spacing (center-to-center) is just as important as placement. Measure carefully before drilling.
- Ignoring Double-Stacked Proportions: Using the same size hardware on both tiers often looks unbalanced; shorter top doors usually need smaller pieces.
- Skipping the Jig: Hand-measuring invites small variations that add up fast. A jig keeps every hole repeatable.
Avoiding these mistakes comes down to measuring twice, testing first, and staying consistent so every cabinet in the kitchen looks deliberate and well-finished.
Conclusion
A kitchen can have beautiful cabinets and still feel unfinished if the hardware looks out of place.
Most people don’t know why it bothers them; they just sense something isn’t right. That subtle feeling almost always traces back to cabinet hardware placement and how it aligns across the room.
It’s one of the easiest things to get right when you know what to look for.
You don’t need expensive tools or years of experience. You just need a clear starting point and the confidence to follow through.
Now that you have both, the hardest part is already behind you.
Ready to get started? Bookmark this page for when you’re standing in that kitchen with a drill in hand and share it with anyone planning a refresh.